As much as I like to create complex corridors, sometimes you don’t need or want to go through all the steps that are required to create a corridor. In my example I am doing a short S-shaped walk path. The path itself is created by featurelines, which gives me a lot of freedom with the shape. It is easy to make the path wider in some areas or even add some steps if needed.
But I still need to do a volume calculation for the substructure of my path, and that is where Naviates Sub-Surface command comes in.
Create your surface
You can create your surface any way you like, for my example I am using two featurelines that are the edges of my walk path, that I then create a surface from. To get the best surface, I use the Supplementing Factors when adding the lines to the surface, the lower the value the more triangles. I find that 5 meters between triangles along straight lines and 0.1 as Mid-ordinate distance (max distance from arced line to straight triangle) gives me enough definition.
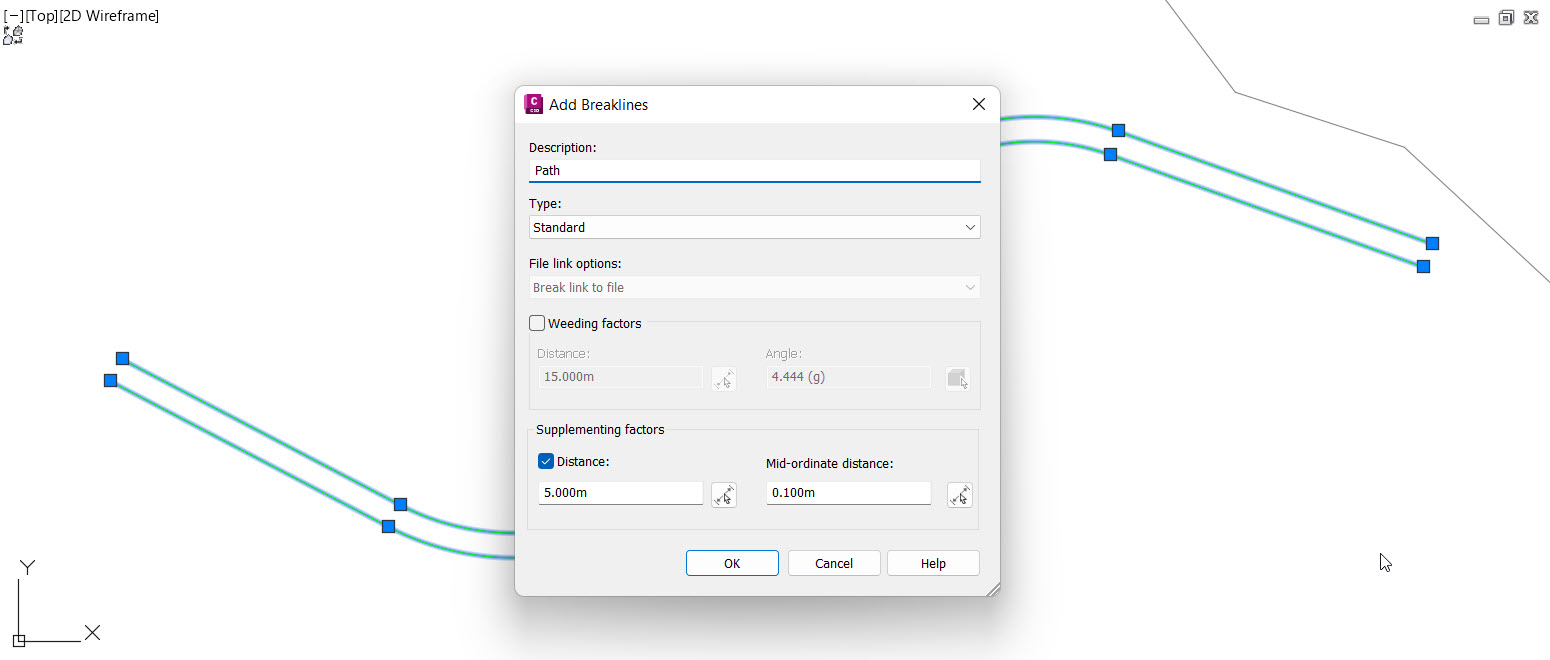
It is important to remember not to go crazy with the number of triangles. The more triangles in the top surface, the longer time all other commands will take.
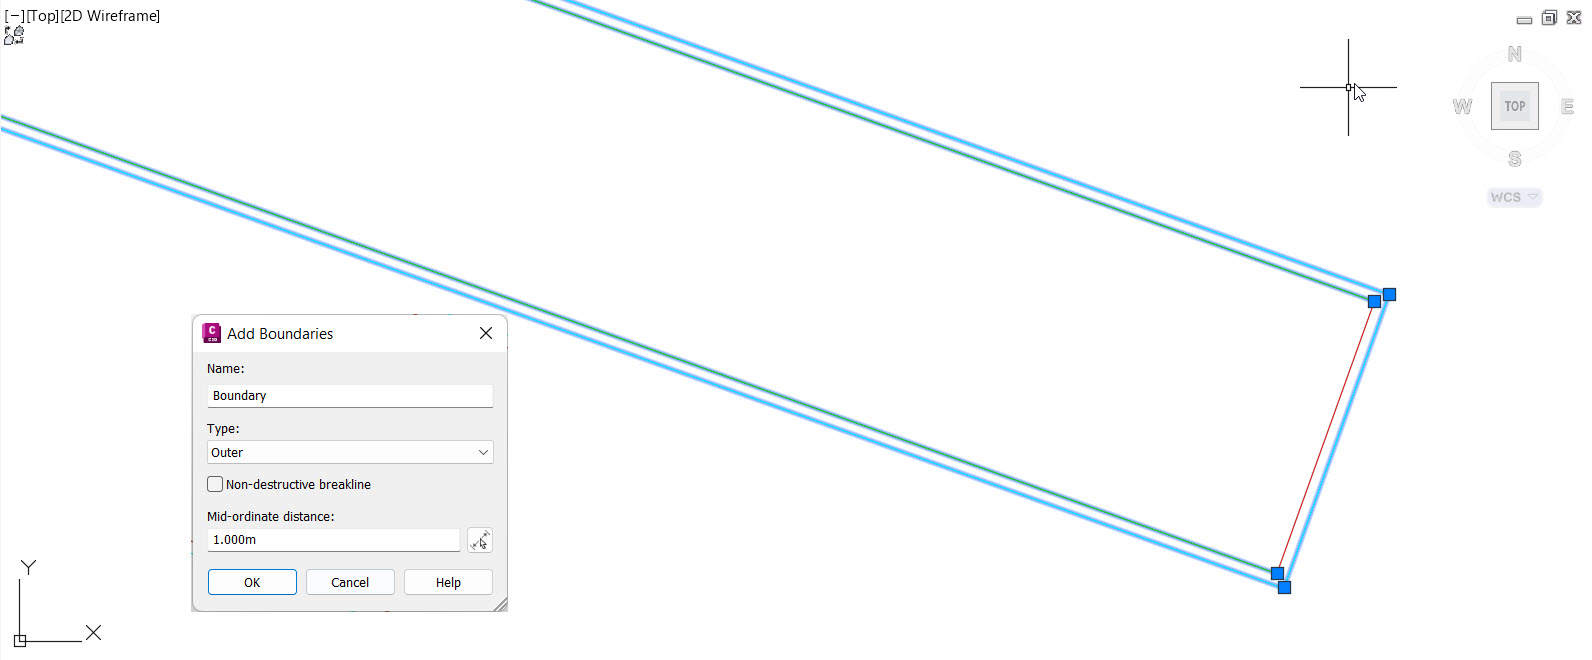
It also important to remove all the “extra” triangles that Civil 3D creates. This can be done in multiple ways; in this case I want to use an outer boundary. To create a closed boundary, I use Naviates Merge Featurelines to create a merged copy of my two featurelines.
Once I have that copy, I use Stepped Offset to move it a little bit outside my path and then add it to the surface as a destructive boundary so that only triangles completely inside the boundary remain.
Sub Surface
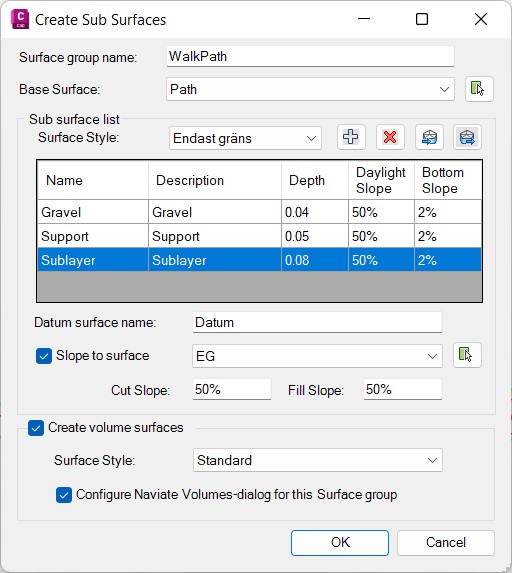
Once the top surface is done, then I use Naviates Sub Surface to create the substructure of my path.
The command starts with a template of layers that I can add to, remove or change to create my own substructure. At the bottom I make sure to tick Slope to surface to get a Datum surface for the whole structure, this means I get a complete excavation volume as well as the individual layers.
Note that Daylight slope is applied along the side of the surfaces and Bottom Slope is applied for the offseted bottom edge of the layers.
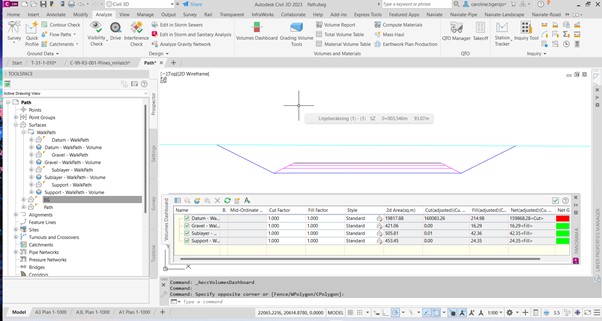
After the command is done, all the surfaces have been created and I can open Volumes Dashboard to import the volume surfaces and see the values.
And since all layers are connected dynamically, if I change my walk path, all these values are automatically updated!

Want to know more?