As a landscape architect, you know that the world isn't made up of straight lines: it’s full of curves and dips and degrees.
Today we’re going to show you how Naviate Site & Landscaping helps you expand the capabilities of Revit. With these features, you can adapt your model to your site’s topography, then adjust and automatically recalculate the land. From there, you can create detailed instructions and projections — including elevations, volumes, and slope marks — to pass on to the rest of your team when it’s time to build. And the system makes the calculations for you automatically.
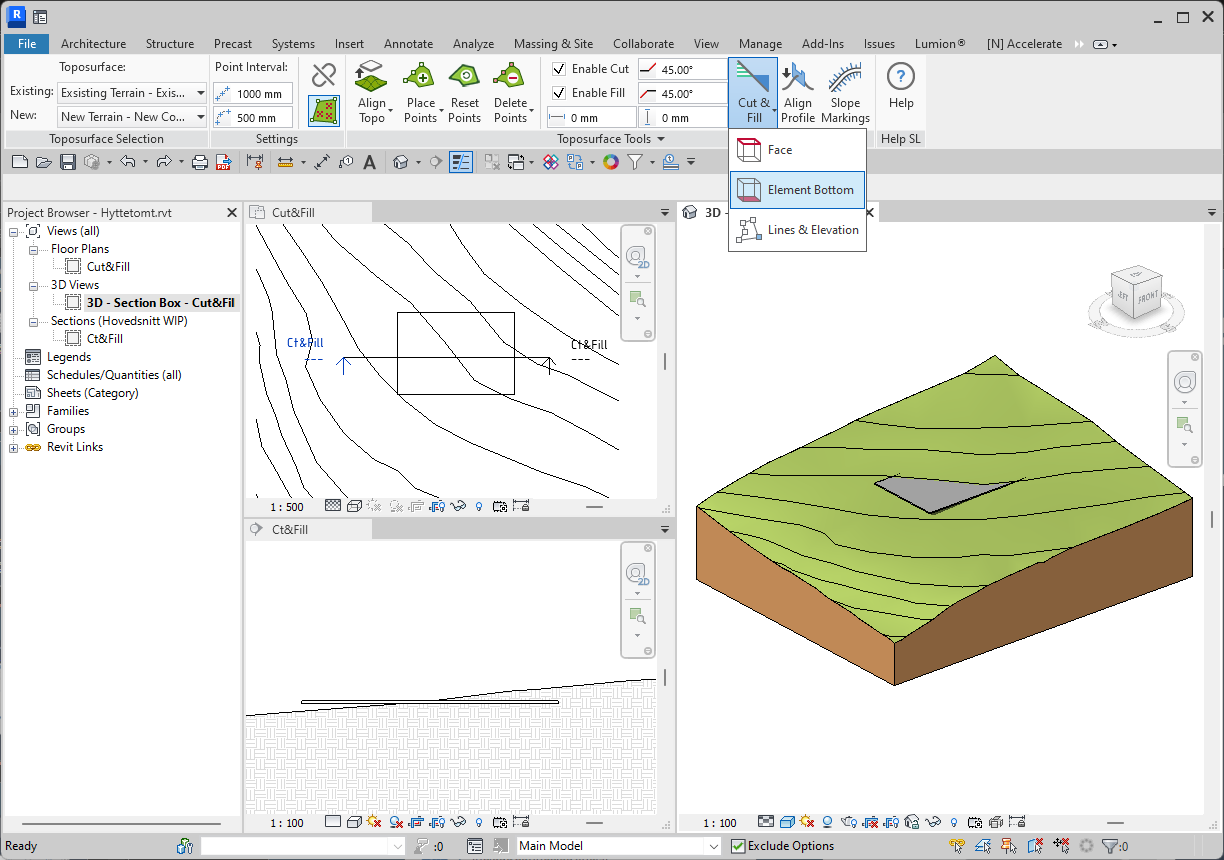
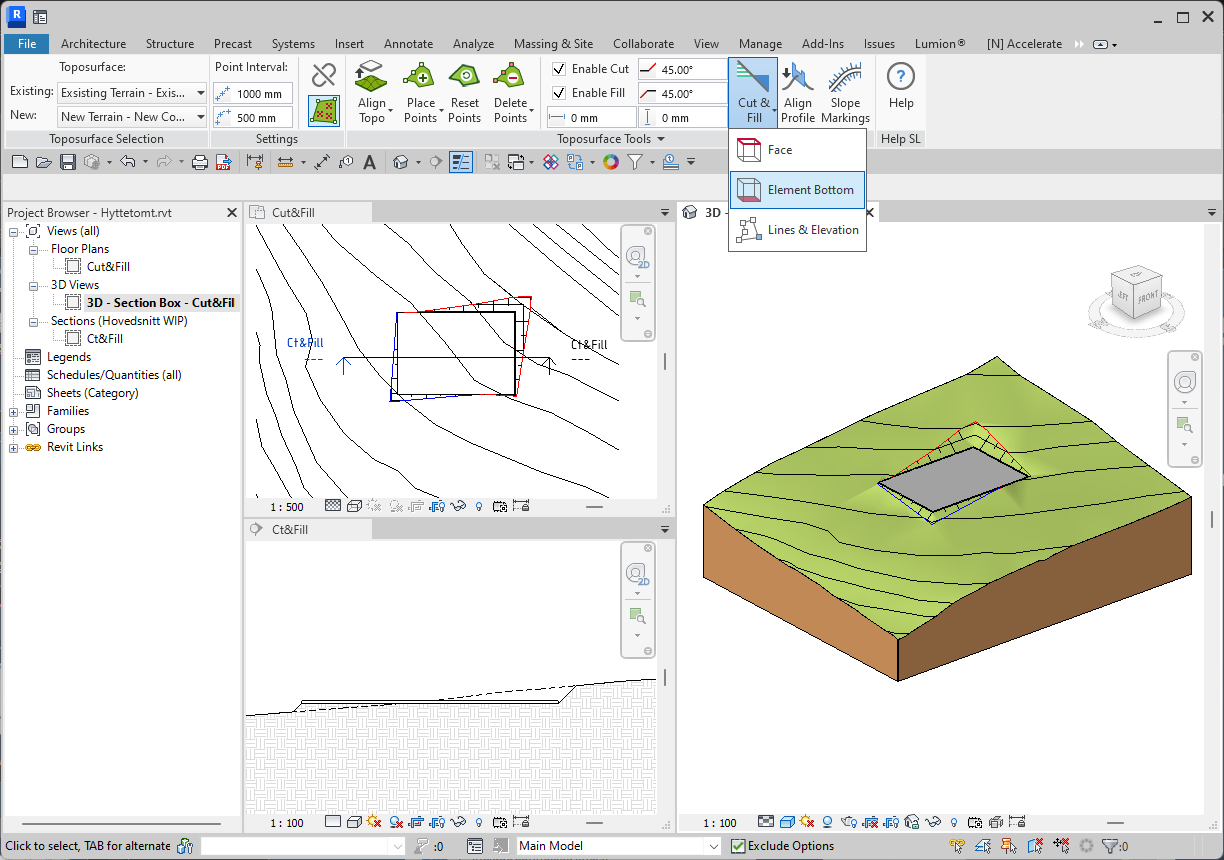
Here's an example of a before and after Cut & Fill has been used.
Try it for yourself: download a free trial of Naviate Site & Landscaping today.
Once you have Naviate Site & Landscaping installed, here’s what you do:
Open your project in Revit
- You can start from an existing project and/or import a variety of file types into Revit, including DWG, PXY, text files, etc. The system will create the surface including topographical details.
- Set the boundary lines around the surface where you want to build or edit the land.
- From here, you can choose which feature you want to use for editing: Cut & Fill, Floors, or whatever you need.
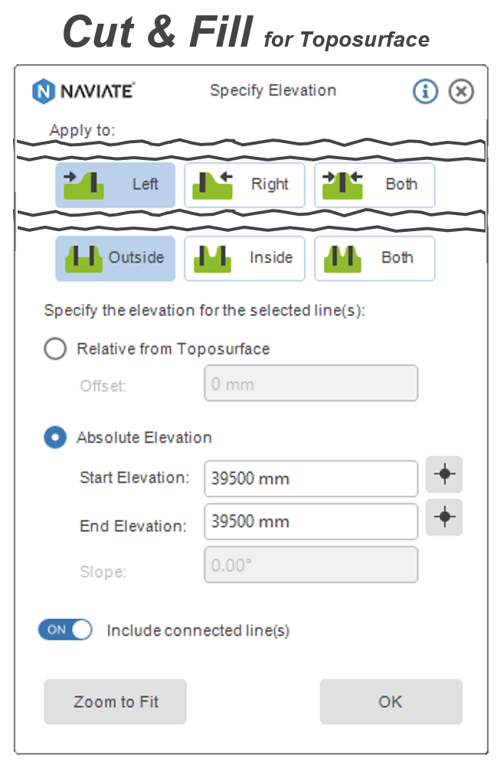
Cut & Fill
With Cut & Fill you can automatically cut out of fill areas of topography based on features like terrain or retaining walls. You can create slopes with specified angle or per mille and horizontal offset from a line.
Floors
You can use floors to show surfaces on top of land: roads, foundations, and more. Floors can contain various layers to indicate different materials and thicknesses.
Edit the selection
If you’re using Cut & Fill, set the elevation where you want to even out the land. If you’re using floors, create a floor and place it where you want the “floor” to be.
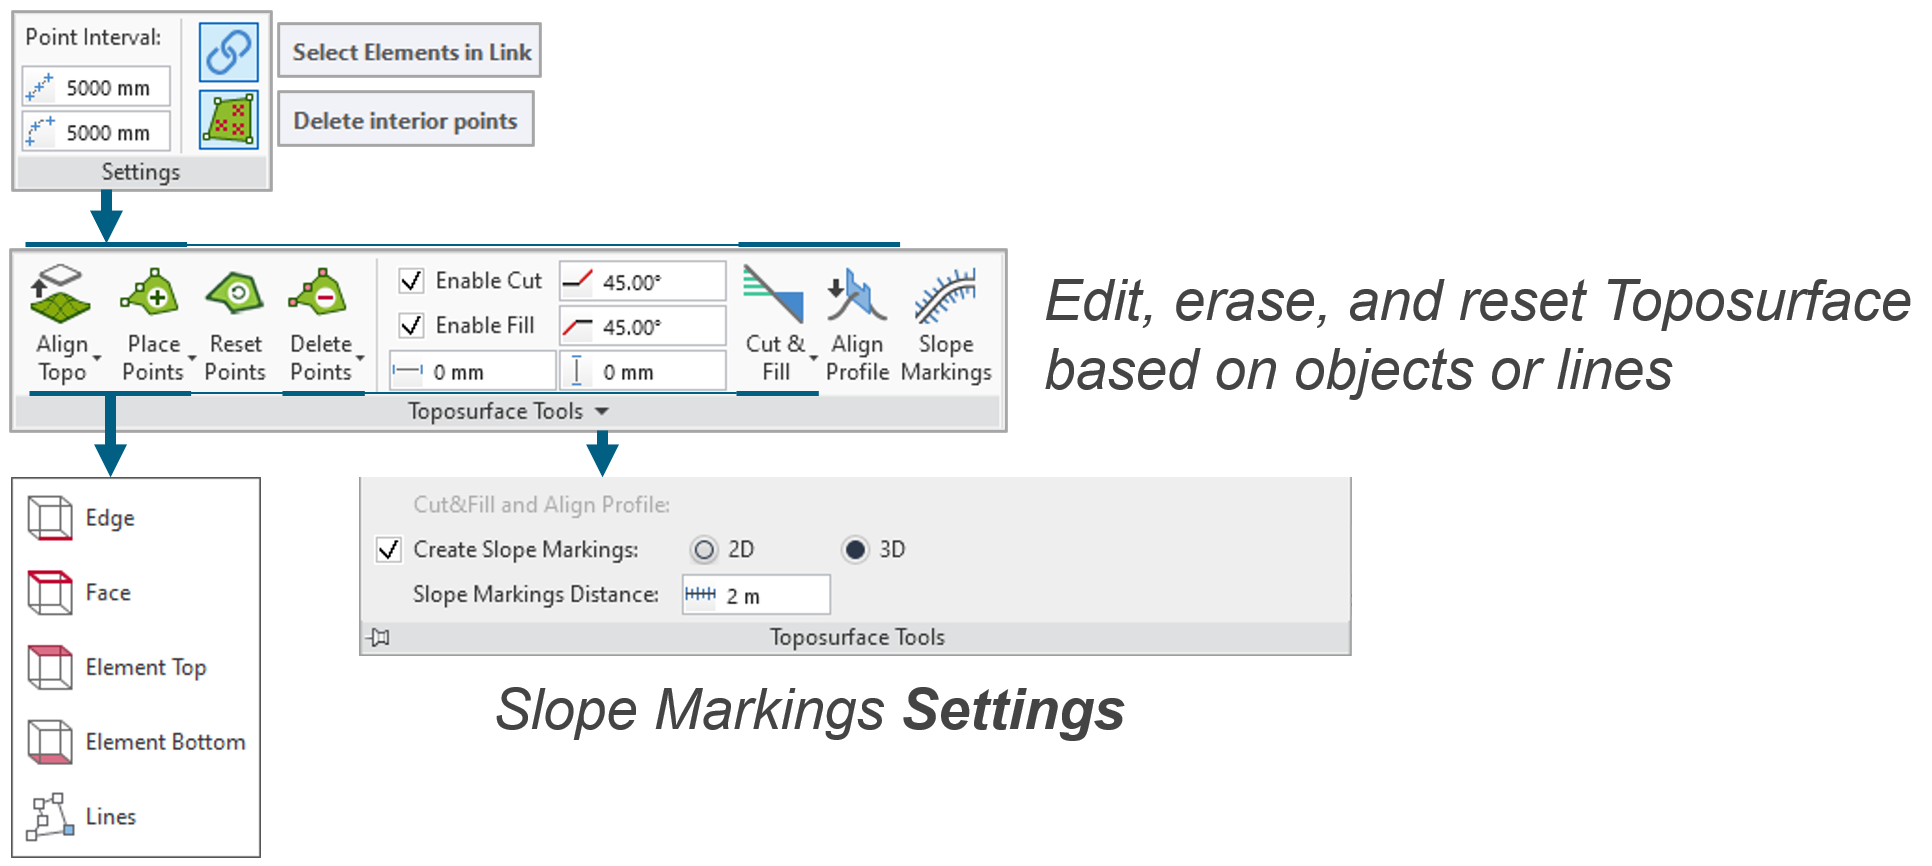
Choose whether you want to see slope markings
Slope markings align your topography to other hardscape features — edges, faces, top and bottom of element and model lines — and show where the crest and the foot of the slope is.
Set your specifications and let Naviate do the calculations for you
It takes just a couple of seconds for the system to make these complex mathematical calculations and update your model.
How much time can Naviate Site & Landscaping save you? It’s immeasurable — because there’s no other feature on the market to automate tasks like this.
Try Naviate Site & Landscaping for yourself. Click here to start your free trial.