The native commands in Revit for Electrical and HVAC has always been with some challenges. The aim is to find a more efficient way to work with ducting and cable trays. From our experience, very few projects need a linear design, we need a way to get around obstacles and other objects in the project.
To solve this, we’ve created a solution called Step, that gives you the possibility to work with your ducting and cable trays in both a horizontal and vertical aspect.
A preview
Here's a preview of the features available in the solution. For a more detailed walk-through we present the menu options in detail below.

Adaptive for ducts, pipes and cable trays
Step is adaptive for ducts, pipes and cable trays. You can use it for plan views, 3D views and sections.

Vertical and horizontal along elements
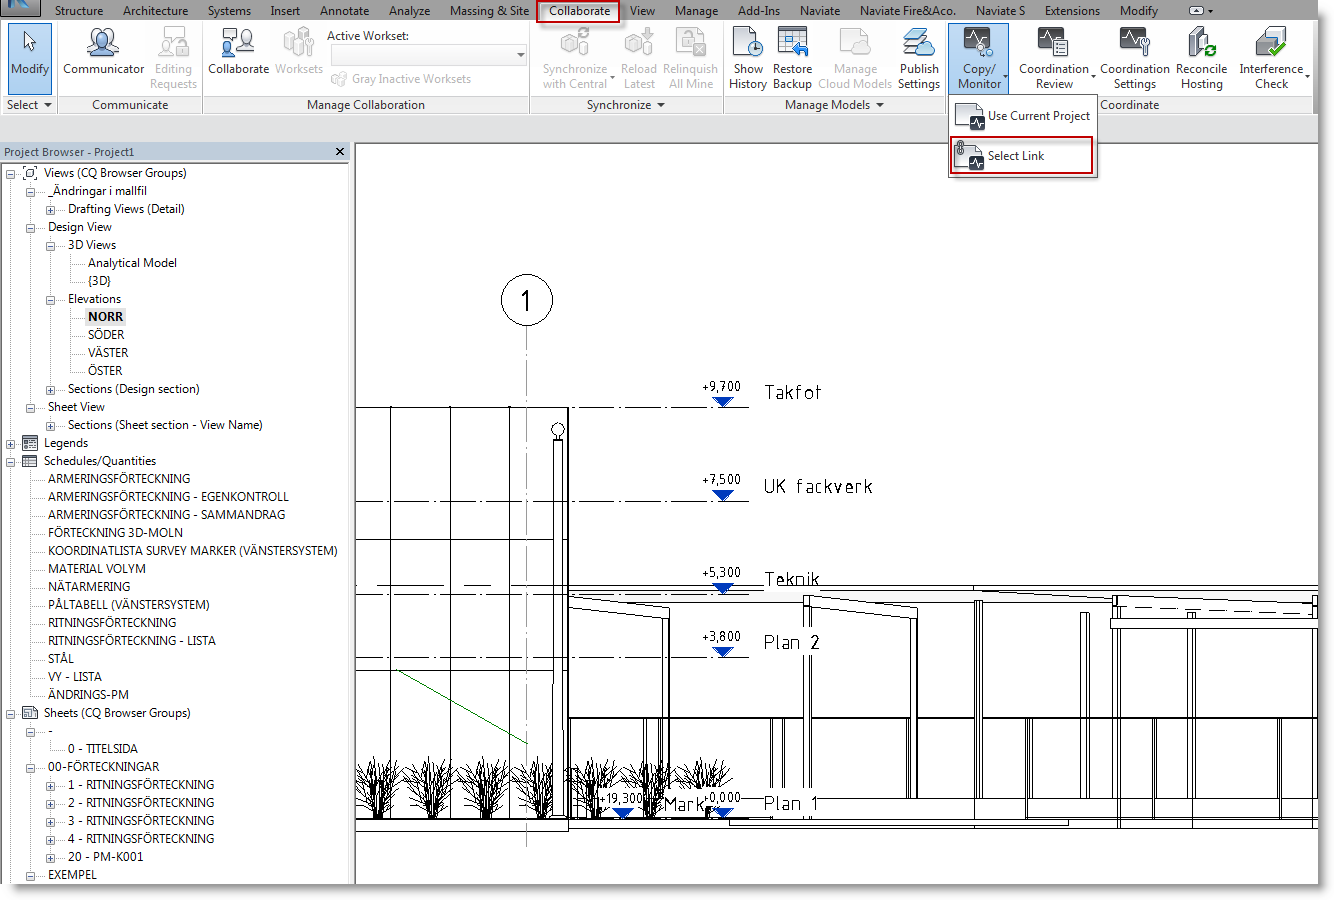
With Step, you can go vertical or horizontal along elements. To make the dialogue box visible, you need to pick two points on the element that is going to change.
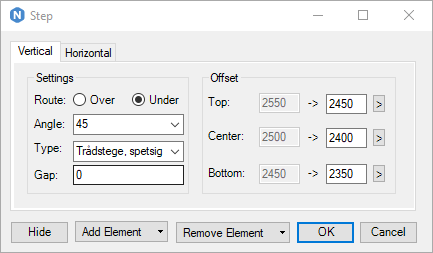
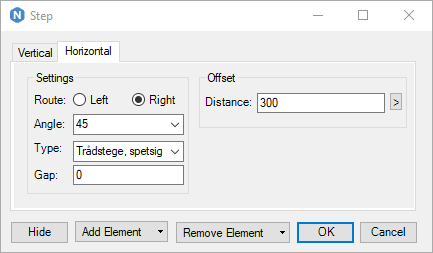
An overview of the functions available
- Route – Make the element go over or under the selected elements drawn path
- Angle – Decide the angle of the fittings
- Type – The function detects the used type. You can change the type from a drop-down menu
- Gap – The default offset of the step is the diameter/height of the element. The Gap parameter sets an additional offset to the step
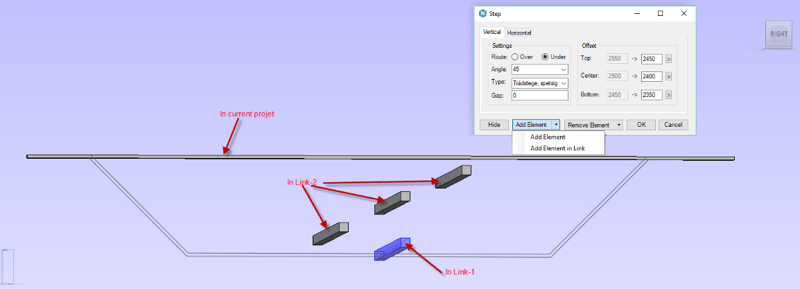
- Offset – The offset panel lets you decide the exact offset from the elements reference level
- Top – The top offset from the reference level
- Center – The centre offset from the reference level
- Bottom – The bottom offset from the reference level
- Distance - The distance offset from the reference line
Hide
Hides the dialogue box to make it able for you to pan, zoom and orbit in the view. It is also possible to switch between already opened views.
Add element
If one or more objects don’t clash with the original element, by choosing Add Element you are able to include these objects as well. Don’t forget to click on finish in the options bar when the selection is set.
Add and remove element
- Add/remove element - to add/remove elements in current project
- Add/remove element in link - to add/remove elements from linked project file
The Remove element menu also includes remove clashing objects from the step to exclude them from the selection set.
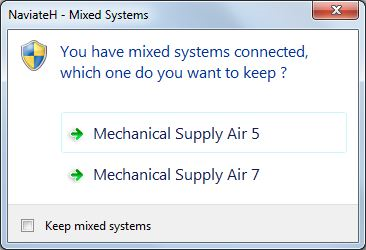
Ducts and pipes systems
To complete the step function on the ducts and pipes user must select the system name to be associated.
Want to know more?
You can try out the Naviate step in these products for free today:
We're planning more step-by-step posts in the months to come that can help you achieve your goals. Any other topics you would like us to cover? We would love your feedback in the comments below!