Part 2/3 on how to work with reinforcement in Revit and Naviate
Earlier we’ve talked about how rebar and reinforcement work in Revit. I hope that you saw some value in that blog post. Now I want to tell you about a feature we made for 3-4 years ago called Rebar numbering. Of course based on input from our customers as all our Naviate features are.
When our customers really went in to using Revit Structure, they quickly found out they were lacking some functionality. For instance, how to keep track on all the equal rebars in your Revit project, number them and export to Excel or XML file. Another issue how to keep track of changes?
Stay with me here and I will tell you about the capabilities in our Rebar Numbering feature.
A series in three parts
In the first post on the topic of reinforcement using Revit and Naviate Structure and Naviate Rebar Extension we looked at conditions, reinforcement tools in Revit, rebar cover settings, reinforcement settings, reinforcement rounding and reinforcement numbers. You can read the post here.
In this part we will dive into renumbering and how to create drawings.
And in part 3 we will look at different methods working with reinforcement; reinforcement with rebar, area and path, adjusting reinforcement with edit constraint and reinforcement with fabric area and sheet. You can read the post here.
Later we also have a planned post to properly introduce the Naviate Rebar Extension.
Rebar numbering
To keep track of the reinforcement in Revit we have in Naviate Structure created a feature that analyses and numbers reinforcement in the project called Rebar numbering.
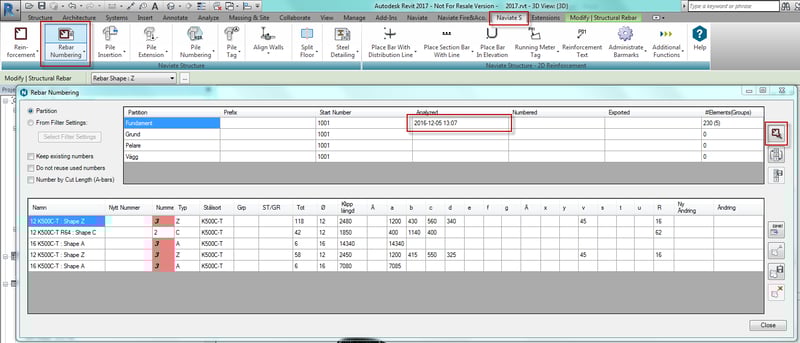
We choose to manage the numbering on the partition or from filter settings. In the example above, we use the partition and choose to analyse the reinforcement of the foundations first. All equal reinforcement ends up in a row, and if you select the row you will also select the rebars in Revit. By double clicking on the row you will zoom in view and see your rebar. If you hold down ctrl and double click you will zoom in the parts of the row.
We go ahead and number rebar by giving a start number and run renumber.
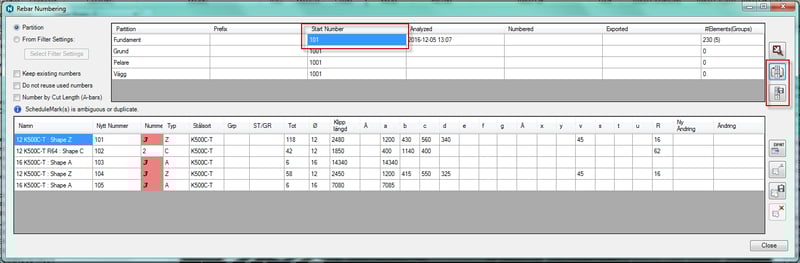
You can also go in and make manual adjustment by typing values in the new number. Once you’re satisfied with the result, save the new number to the reinforcement by running the apply numbering.

Export of reinforcement schedules and specifications
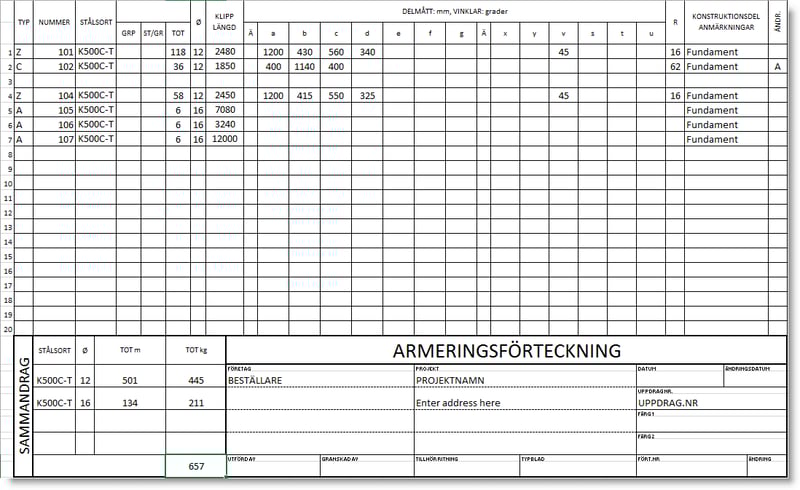
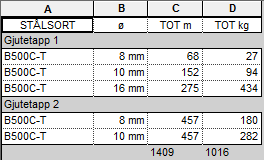
Reinforcement schedules/specifications can be exported with export. In this example we are doing export to Excel. This export is taking properties from the rebars to create rebar specifications in Excel, automatically saving the data of the bar code, size, quantity, dimensions, weights etc. to the specification. The sample for exports will be from the partition or from filter settings that is active.
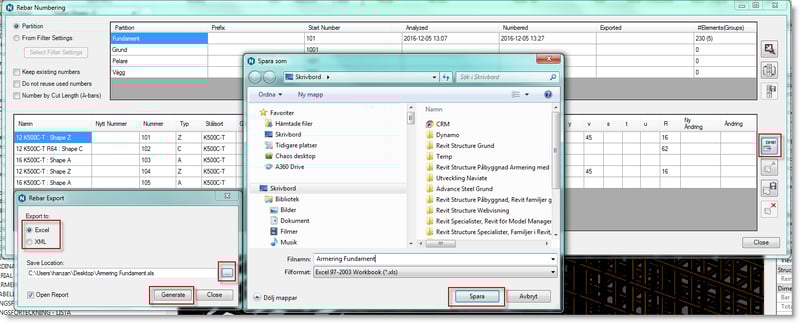
Partition parameter is sorted under column design part/notes (konstruktionsdel/anmärkningar), which is why we use this parameter to divide rebar. Specify the file name and path in save location. Select generate to create the export file.
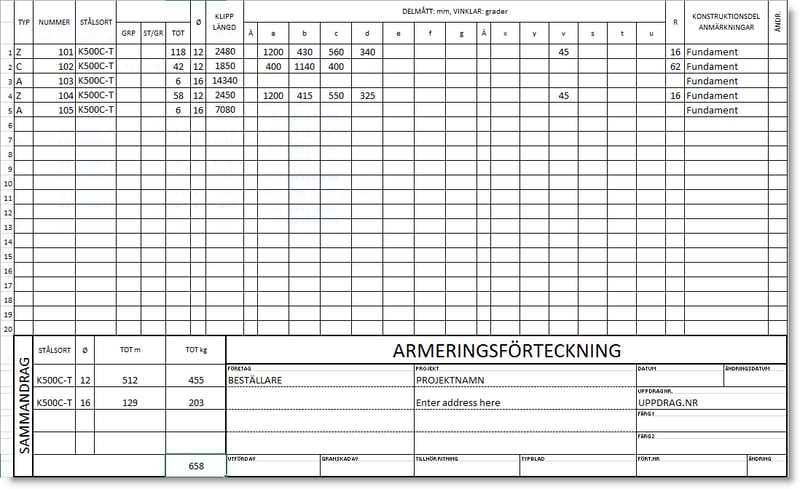
The Swedish template has room for 20 rows per sheet. Page break occurs automatically.
Configure reinforcement specifications
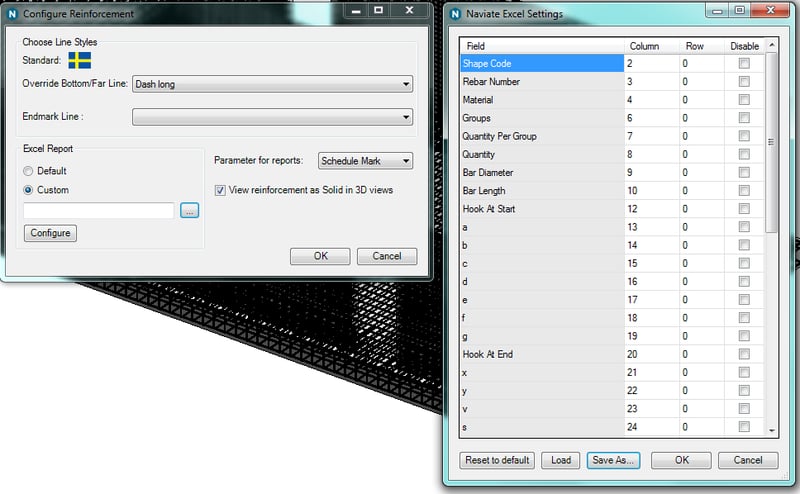
In Excel, reinforcement specification can be edited and supplemented manually as needed. In the configure reinforcement is possible to adjust the export to Excel. The settings are determined for the rows and columns that the properties of the reinforcement should be written. It is also possible to exclude properties from exports. The template for Excel that come with Naviate can be copied and edited for various purposes. The templates are located in the Program Files\Symetri\Naviate\Revit 20XX\Templates.
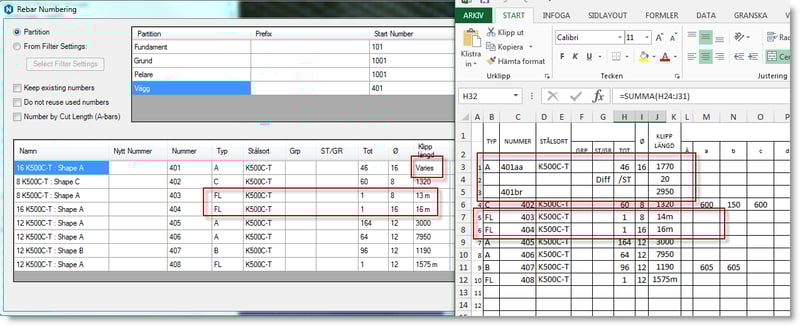
In rebar numbering there is functionality to manage change in the reinforcement. After the export is made, we can choose to activate keep existing numbers and do not reuse used numbers. In the example below, we have adjusted the number of c-shape rebar and removed the a-shape rebar on 14340 and created two new ones with joint. When we go in and analyse the rebar again, we will find out what happened since last time. C-shape rebar needs to be revised and the new a-shape rebar need new number.
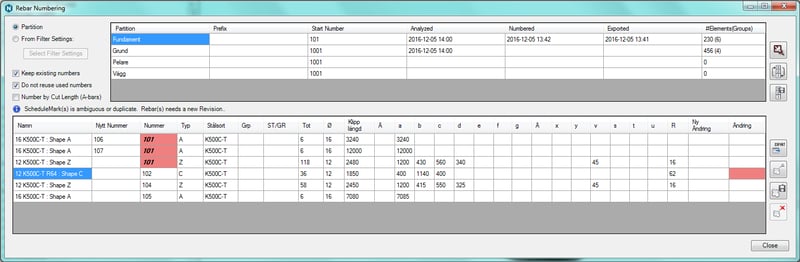
We run renumber and apply numbering to give number to new rebar. If the function renumbers the z-shape rebar you need to adjust it manually in the list. To revise the c-shape rebar there is features called new revision and apply revision. We apply revision A on c-shape rebar.
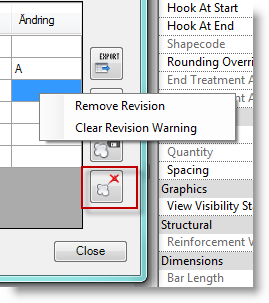
Tip. Remember that even here we can go in and enter revisions manually if needed. It is possible to delete revisions by using the remove revision ore right click and delete. You can also clear warnings by right click else they will be cleared when you export.
 The new list containing the changes.
Rebar numbering and its export functionality handle continuous length and varying rebar set by continuous length will be grouped into overall length (FL) and varying rebar set exported out to an interval.
Note. Rebar numbering feature does not support multiple users. If other users want to gain an overview of the reinforcement, they can go in under schedules/quantities.
Lists for 3D reinforcement and net
There are three lists in Naviate linked to 3D reinforcement and one that shows the net.
- Reinforcement list
- Reinforcement list - self-inspection
- Reinforcement list - summary
- Net reinforcement /area sheet reinforcement
Reinforcement list
Reinforcement list provides a picture of how the exported rebar specification will look like.
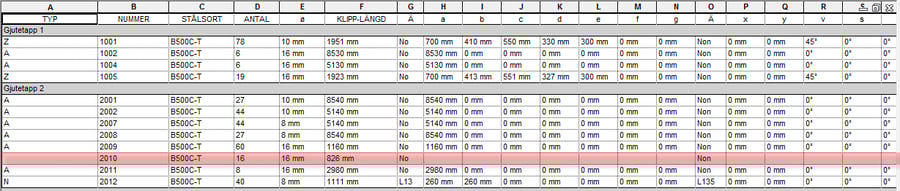
Reinforcement list - self-inspection
You can see each rebar in the project.

The lists are sorted in partition, schedule mark, bend diameter and material.
Reinforcement list - summary
The summary shows the weight of the reinforcement in Revit.
Net reinforcement/area sheet reinforcement
Fabric reinforcement.

Create drawings
The procedure for creating drawings have changed. Below we will go through step by step how the new functionality looks and works with Naviate.

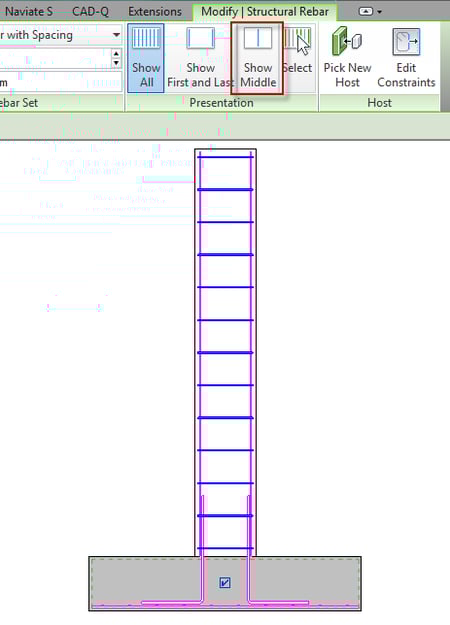
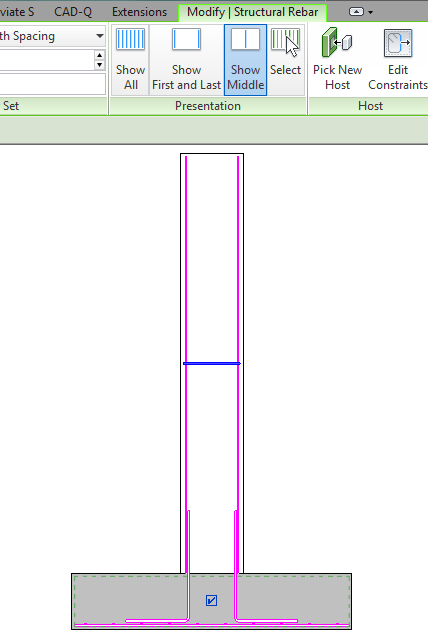
It is possible in a view to set how rebar will be displayed using presentation. This is used to show one rebar of the reinforcement bars modelled as multi rebar set. In the example below, we make a section through a foundation and mark the n-shape rebar and adjusted it by selecting presentation and show middle.
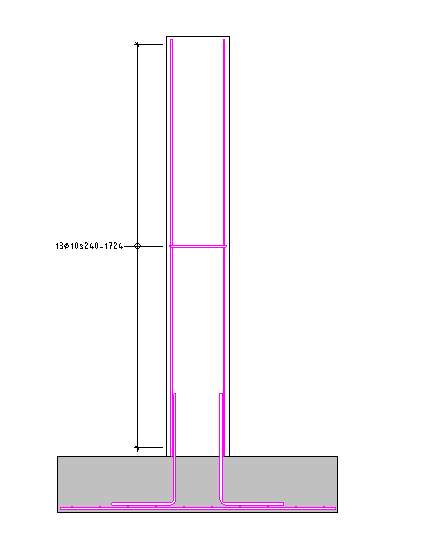
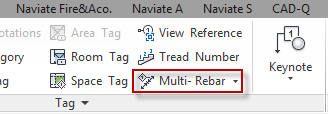
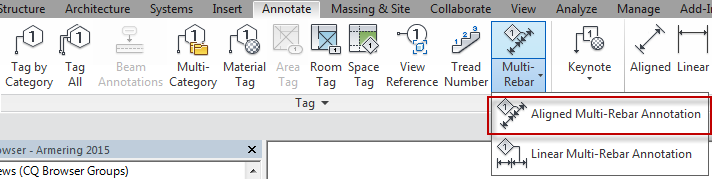
After adjustment of the presentation to show middle, we can use the multi-rebar under annotate and aligned multi-rebar annotation to create a distribution line with tag. An alternative to the multi-rebar annotation is to make a distribution line with ordinary dimensions. A standard dimension and type reinforcement dimensions of 2.5 mm and then make a separate tag with tag by category.
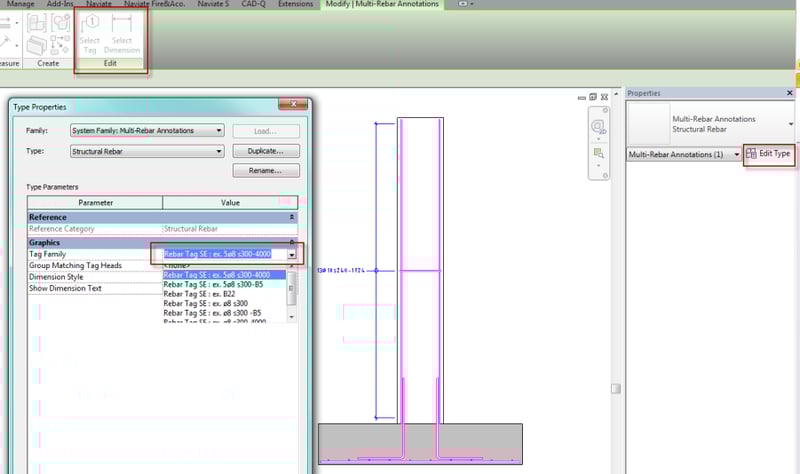
You can adjust tag and dimension by selecting multi-rebar annotation.
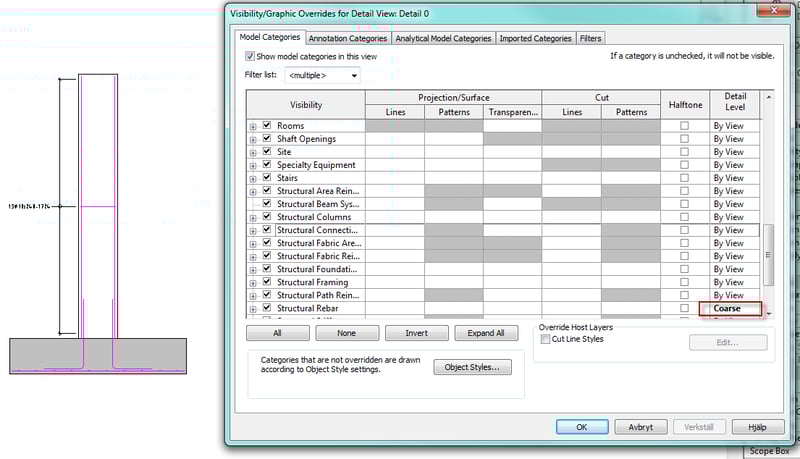
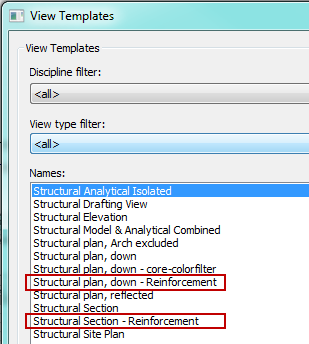
Adjust structural rebar to detail level=coarse. This is adjusted at V/G overrides or by applying a view template.
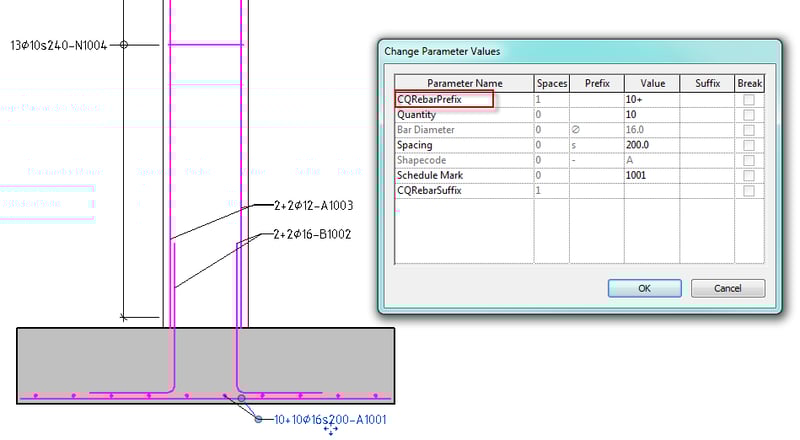
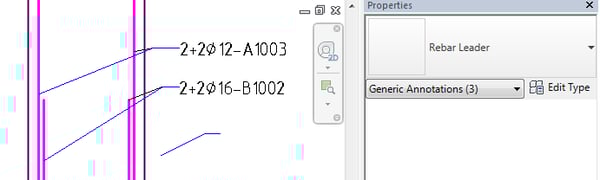
The other rebar in the section is annotated with regular tag by category. If you want to use the same tag to several rebar, you can add a rebar leader (symbol) and use CQRebarPrefix.
To show hook type/end marks and their symbols that are representing hook, angel and direction in view we have functions in Naviate helping us.
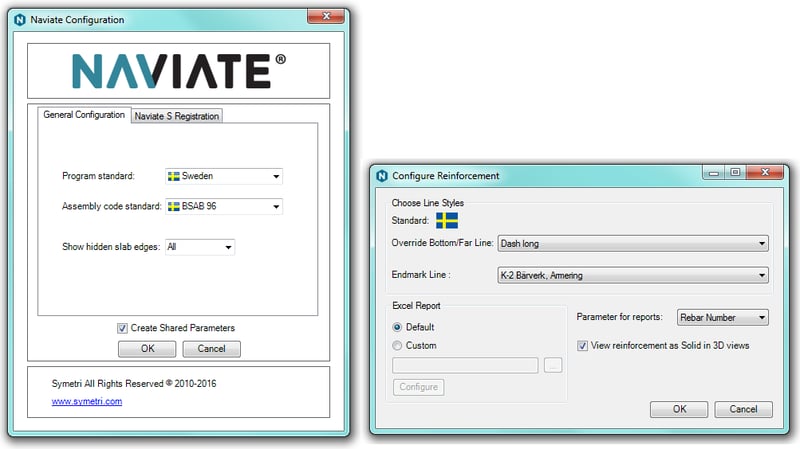
Tip. If not the latest version of Naviate Structure template is used then run the configure Naviate + configure reinforcement before you use Naviate Structure commands in your project. This is because the necessary parameters need to be created.
Reinforcement symbols
Reinforcement symbols created by Naviate supplies rebar with symbols of the scale that is active in the view.
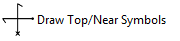
- Draw top/near symbols
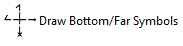
- Draw bottom/far symbols
Draw top/near symbols
The symbols get plotted in a line style which is selected at choose line styles under configure reinforcement.
Draw bottom/far symbols
Redraws line pattern on the rebar to predefined settings at choose line styles under configure reinforcement.
Flip endmarks
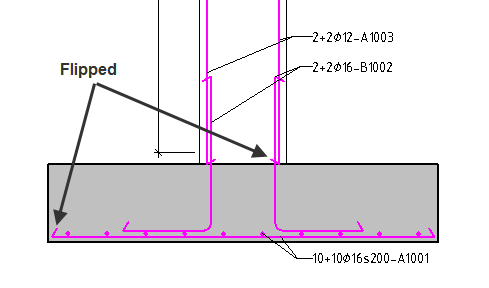
In the example below, we create a section through the pillar and foundation. If you want all rebar to be solid then you can run function draw top/near symbols without selecting any rebar.
If one or more rebar is marked, then just those get affected by the functions. If no bars are marked, then every rebar will be affected in the active view.
A couple of end marks may seem to end up in the wrong direction in this case. It is normal, the bar at the bottom has been treated as if it was sitting on the top side. We want the endmarks pointing upwards. Select the symbols which have the wrong direction and run function flip endmarks.


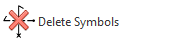
Delete symbols
Delete symbols remove symbols from the current view.
Update symbols
Update symbols update the symbols in the project.
Hide rebars/show rebars
The function can update the active view, any view or selected elements. In large projects with several thousand symbols, we recommend that you always use the active view or selected elements because of performance. Hide/show rebars is hiding and showing rebars in active view.
Group rebar/explode rebar
Explode rebar is exploding a rebar set into individual rebar. Group rebar merges rebars to rebar container. This feature is not useful if you are going to create 2D drawings, since it doesn't work with presentation or symbols generated by Naviate. This feature is for facilitate the 3D presentation of reinforcement.
Split rebar
Split rebar at a detail line.
Want to know more?
You can try out the Naviate reinforcement module in these products for free today:
- Naviate Rebar Extension
- Naviate Structure
- You can read more articles about similar topics in our knowledge base
- See our recorded webinar on rebar/reinforcement here
Any other topics you would like us to cover? We would love your feedback in the comments below!