Collaboration between disciplines is almost always causing some problems, no matter if it's architecture, structure or the MEP disciplines. When it comes to openings in drawings it's even more challenging, as you probably already have discovered. We have tried to make this barrier as low as possible for you a a user.
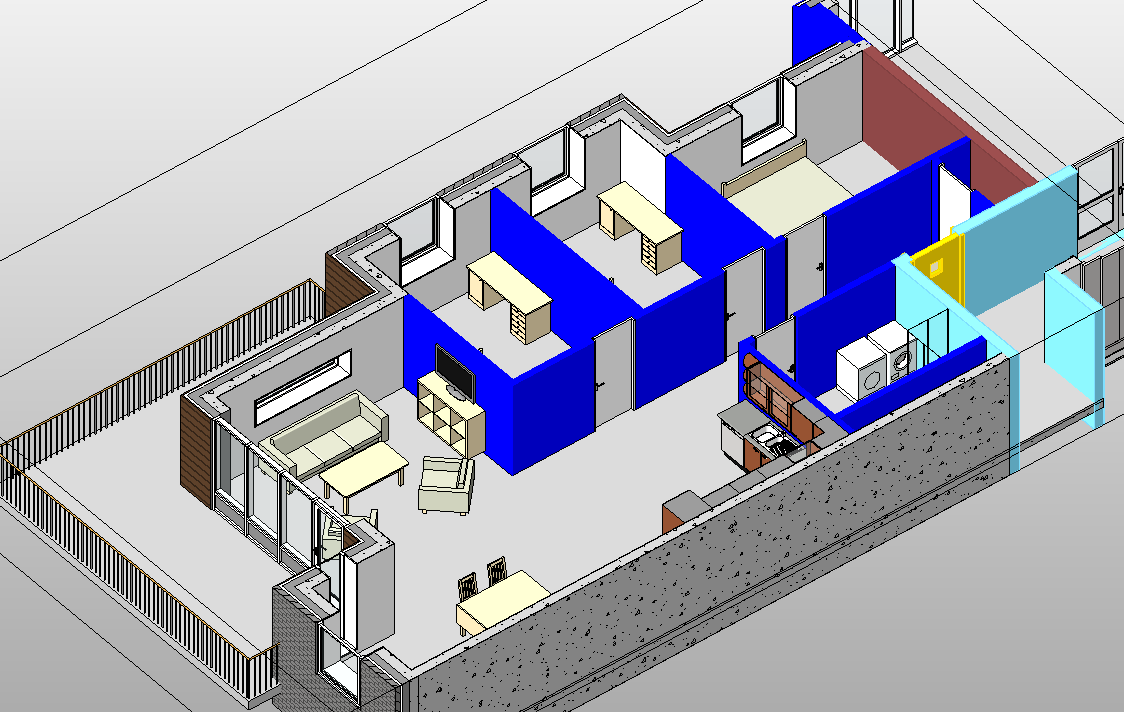
Provision for void lets you coordinate the openings for MEP service across disciplines and linked files. The solution can be used by all disciplines to create provisions for voids and actual voids.
The actual void is created when the provision gets an accepted status, provided the provision element is in the same file as the building element that needs the opening.
A provision for void is typically made by MEP engineers and is a solid object representing a void request in a building element. This provision is created as a family which can be communicated back to the structural engineer through an IFC file or Revit model. When exported to IFC these families become IfcProvisionForVoids. They can be imported into other software such as Tekla Hole Reservation Manager.
How to create provisions
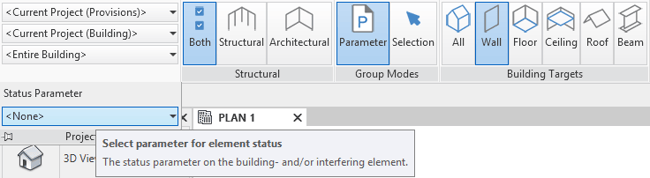
There are different ways to create the provisions depending of structural type and group modes.
Structure type analyses
For the structure type analyses there are three selection options:
- Both - includes all structure types within a model
- Structural - includes only the structural category types
- Architectural - includes only the architectural category types
Group modes analyses
For the group modes analyses there are two selection options:
- Parameter
- Selection
Parameter
The parameter group mode create provisions for all elements within categories. You can pre-select one or more MEP elements to create provisions for only the selected MEP elements. To group provisions just assign the same PFV Group ID to the MEP elements. You can use scope boxes to limit the area for which to create provisions for. An active section box in the current view will override the scope box selection.
Selection
The selection group mode create common provisions for all pre-selected MEP elements.
User interface
- Select a Revit or IFC link containing building element categories for which you need to check for void requirements
- Select a Revit or IFC link containing service element categories for which you need to create voids or provisions for void
Use the create command for creating provisions for void at Revit MEP model.

Want to test it out? Download a free trial here.
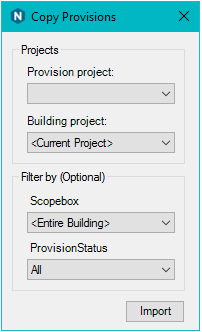
Import Provisions
Use the import command for importing provisions from other linked RVT and/or IFC files.
The copy provisions can be filtered by:
- Scope box selection
- Provision status selection options (cannot be used if you import provisions from an IFC file)
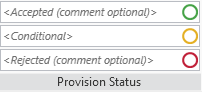
Provision status
Approving provisions is typically done by the structural engineer which owns the building elements.
- Provision status "accepted" will create the actual opening
- Provision status "conditional" will not create the opening and requires a comment
- Provision status "rejected" will reject the provision
Status is transferred along with the provisions to MEP engineers when using the provision synchronise and import provision functions.
Want to test it out? Download a free trial here.
Provision family
The tool will create un-hosted families for rectangular provisions and face based for circular provisions.
- For rectangular profiles you will get a rectangular provision
- For circular profiles you will get a circular provision
When a circular profile hits a face at an angle the resulting cross section will be elliptical. Where the largest elliptical diameter increases, the more slope you have. To avoid a very large circular provision we have set a 1,5-ratio limit. So, if the provision diameter gets to more than 1,5 of the MEP diameters you will get a rectangular provision.
Note that you at any time can override a circular profile to generate a rectangular provision. This is done with the parameter PFV rectangular override found on pipes, ducts and conduits.
This mode requires a usable 3D view in the selected building document where the building elements are visible. If you don’t find a suitable 3D view you will need to create one.
- If you have a linked RVT file (either from open RVT or open IFC) just open the file a create a 3D view
- If you have a linked IFC file (link IFC) use an IFC import template that contains a 3D view
- The IFC import/link template is set in open -> IFC options -> default template for IFC import
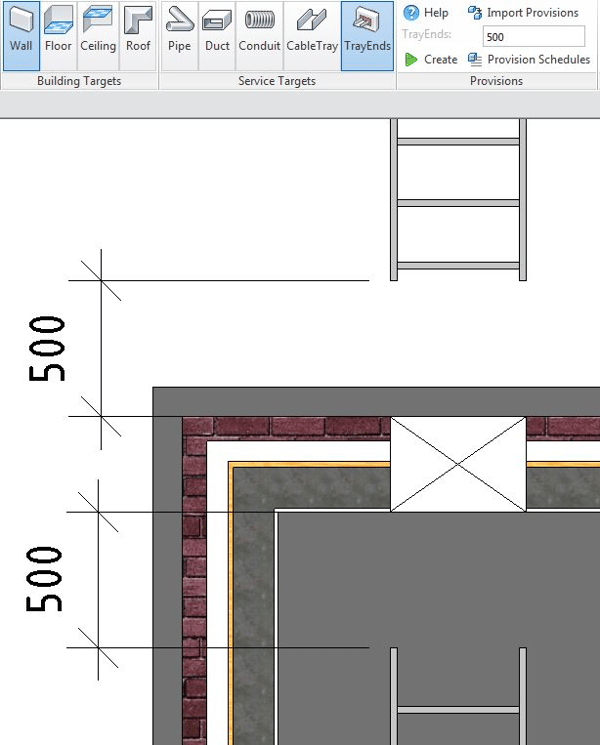
Non-intersecting cable trays and conduits
You can create void provisions for cable trays and conduits even if they don't physically intersect the building elements. If the distance from the cable tray or conduits endpoint to the wall is inside the specified range, you will get a void provision.
Parameters of provisions
You can set the provision over size in the properties of the family and/or in the service targets drop down menu. In type properties you will find an over size size parameter, this will set size for all instances of that type.
When the family is placed it has parameters for over size both on type and instance properties.
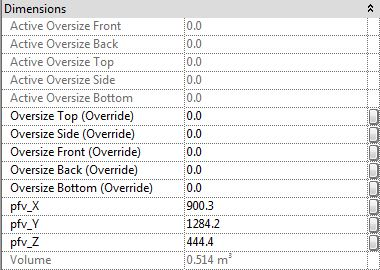
You can further override this per instance. In instance properties you have over size override. In addition, there is an actual over size parameter. This will display the actual over size in current use, type or instance in that order. If overridden per instance it will display the overridden value, giving you a clear scheduled over size from one single parameter overridden or not.
Want to test it out? Download a free trial here.
Provision parameters on MEP elements
Cable trays, conduits, ducts and pipes has these parameters to allow you more control.
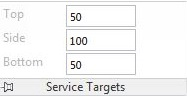
PFV group ID
If you have several smaller runs close you might want to create just one void covering them all. You can do this by assigning them to the same PFV group ID.
In the example below, we have assigned four ducts to PFV group ID: RDV1. Doing so will create provision for all four ducts as shown here.
PFV exclude
Use the PDV exclude to exclude the service or building element from provisional void calculation.
PFV rectangular override
Use the PFV rectangular override to force a rectangular shaped void provision for circular service runs. If you want to examine in detail what the function does there’s a log file created in %TEMP%. The log file is named ProvisionForVoid_FileName.log.
Provision schedules
Schedules creates two provision schedules:
- ProvisionStatusByDiscipline scheduled by system and count
- Pset_ProvisionStatusItemized scheduled by items with revision status (the pset prefix allows you to export the schedule as a property set to IFC)
Provisions synchronise
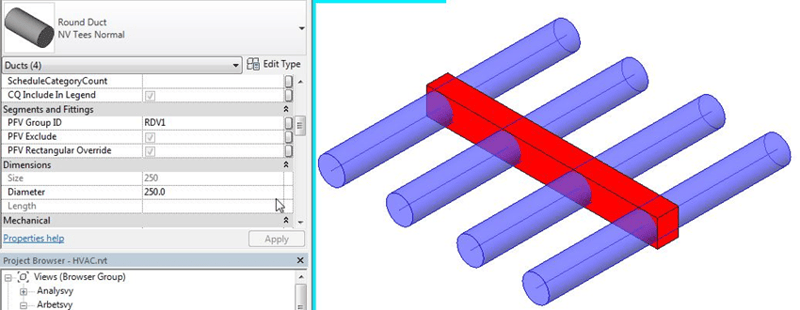
Use the synchronise function to synchronise the imported provisions between projects. This function gives us preview of imported provisions into working project and provisions in linked projects, so we can see difference between them.
Synchronise user interface
The synchronise user interface is divided in two repositories:
- Opened document/project is repository where we are working
- Linked document/project is external repository and it contain provisions created in linked project
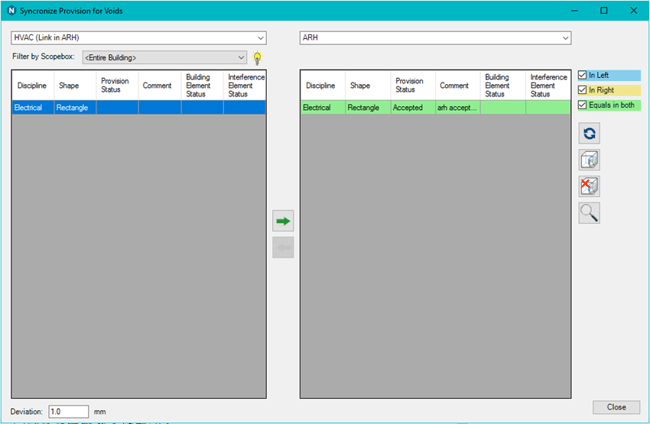
Either repository can be used by all projects depending of the provision creating/importing stage, and the repository position can be switched vice versa.

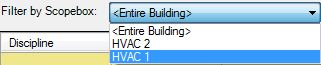
The provisions preview in the synchronise menu can be filtered by the scope box function or synchronised for entire building.
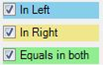
The preview in repository can be filtered by discipline, shape and status, or by clicking on/off buttons for preview provisions existing in one or both repositories.
The selected provision in repository will be highlighted in project also we can do multiple selection using the Shift or Ctrl button.
If you want to create or remove the scope box for selected provision in project using the scope box icon.
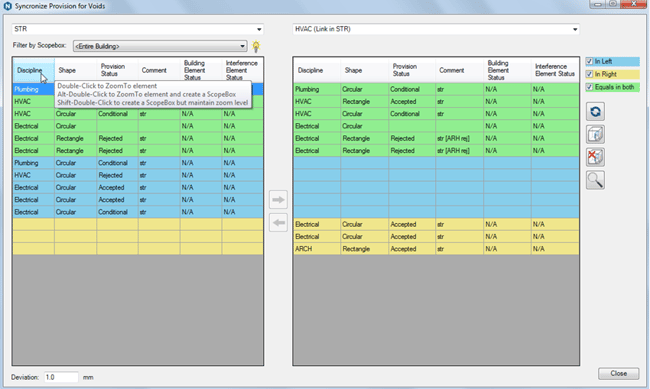
Tip! There are options for create scope box and zoom:
-
Double click - zoom to element
-
Shift and double click - create scope box
-
Alt and double click - create scope box and zoom
Round provisions are created parallel to the intersecting element instead of parallel to the wall, floor, ceiling or roof. For elements with a small slope like sewerage pipes the openings is still created parallel to the building element but with a slightly bigger diameter.

Want to test it out? Download a free trial here.
Provision Status
The function provides the ability to see status on the elements causing a collision on the provision element to be able to filter provisions when synchronising between projects.
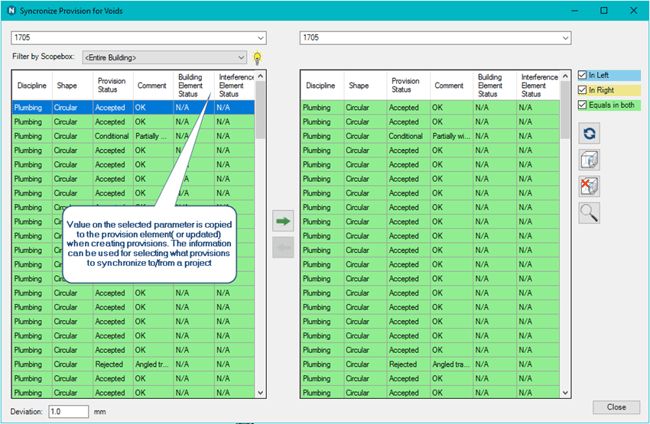
This is implemented by specifying the Parameter that contain the status of the building elements in the projects.
The value from the colliding elements are copied to two parameters on the provision when creating provisions.
Import provisions from external repository can be done using the arrow button. We can set deviation range for import new provisions using the deviation parameter.
Want to know more?
You can try out the Naviate provision for voids solution for free today:
Want to test it out? Download a free trial here.Any other topics you would like us to cover? We would love your feedback in the comments below!