
In version 2023.2 of Naviate for Civil 3D we included a new set of features aimed at plan production. These features can take any layout of View frames, whether they are created along an alignment or if they are in a grid pattern, and use them as a base for creating multiple Layouts with the aid of a script.
This blog post will go through the steps required, to see these commands in action please see this recorded webinar.
View Frames
The first step is to place your view frames in the view frame file. This can be a separate file, or it can be your model file. The view frames can be blocks, closed polylines or Civil 3D View Frames. These need to be the same size (with regards to the scale) as the viewport. If you intend to have multiple viewports on your layouts (Plan and Profile view on the same layout for instance) then you need to have both viewports in the same view frame file.
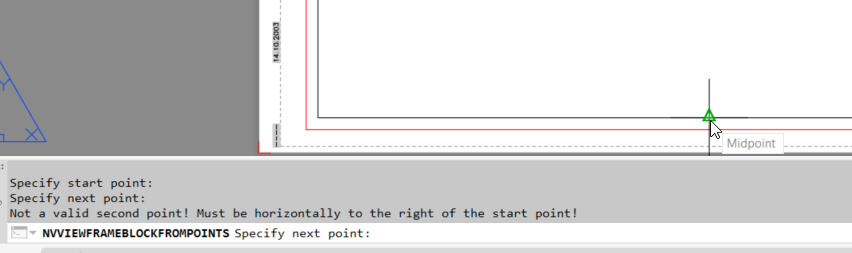
If you don’t have a view frame, you can use Create View Frame Block to create a view frame block. This command is run on a Layout where you have a viewport already drawn up in the correct size. Click on the corners of the viewport, starting from the bottom or top left and place the first point of the view frame block horizontally to the right of the first point. This is because we use this first line as the rotation of the viewport later.
Once you have the view frame block created, place it in your view frame file.
Set up the View Frame file
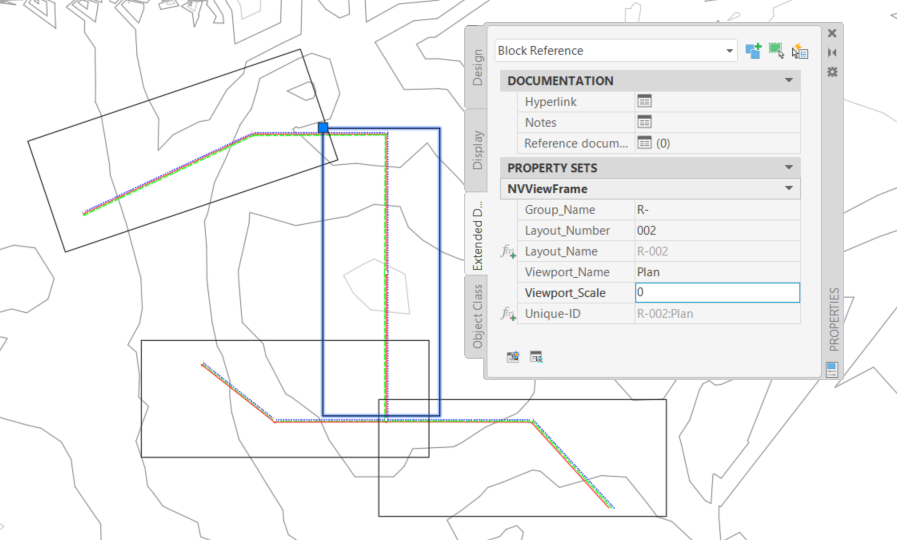
Once the view frames are placed, use View Frame Property Set to add the required property set to your view frames. The property set will contain information about which view frame each viewport should zoom to, and what each layout file should be named.
Group_Name and Layout_Number will together be Layout_Name. Layout_Name should be the same for all view frames that are displayed on the same layout.
Viewport_Name indicates which viewport on a Layout that zooms to this view frame.
Example:
In the View Frame File you can have five view frames called ‘Plan’ in Viewport_Name and five view frames called ‘Profile’. But only one view frame called ‘Plan’ and one called ‘Profile’ can be called R-001 in Layout_Name.
Optional: Overview Hatch and Match Lines in the View Frame file
There are commands to create the overview hatches and match lines for each view frame. These can then be turned on/off on the correct layouts in the end.
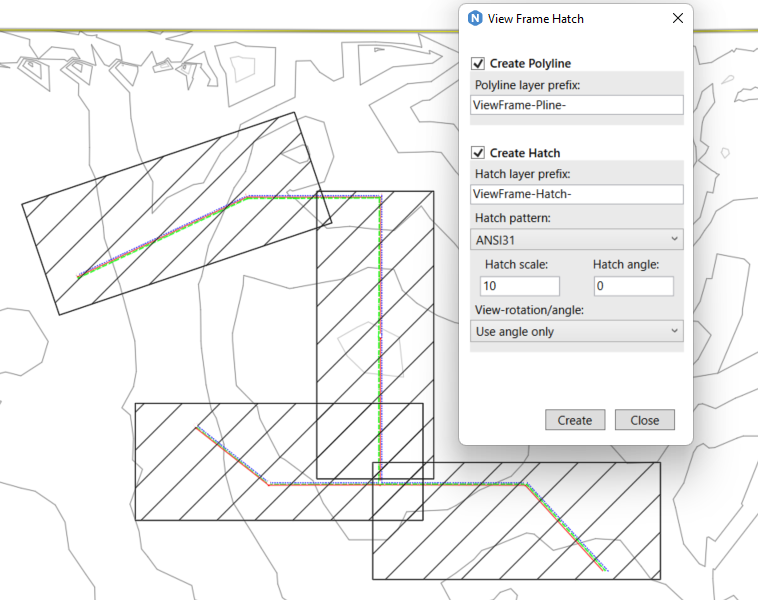
Use Hatch View Frame to create hatches for each view frame. The command can create both a polyline and hatch on individual layers that is named related to the view frame.
Match Lines can be used to create match lines where view frames overlap and set a label along the match line. These are also placed on specific layers that can be turned off per layout. 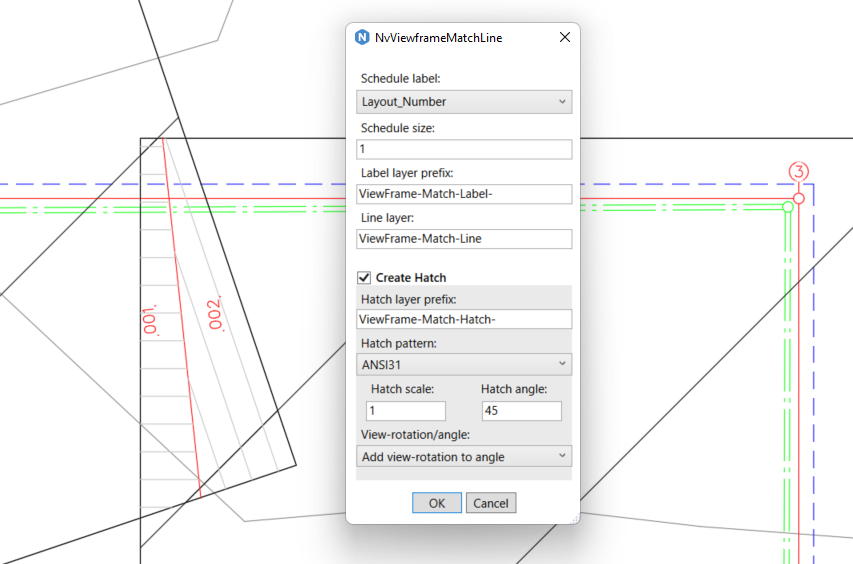
Set up the Viewport file
In your viewport file, use Viewport Property Set to add the required property set to each viewport. There are a lot of optional settings in this viewport property set, but only one property is required.
You must add Viewport_Name to each viewport, and this needs to match the Viewport_Name used in the view frame file. If you intend to have multiple viewports on your layout, make sure you add the correct Viewport_Name to each.
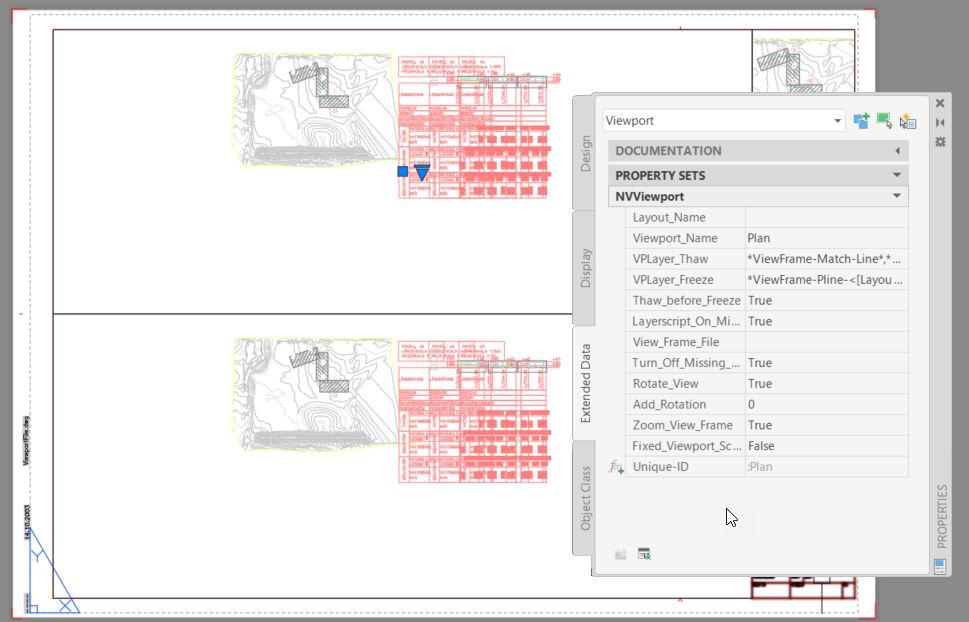
You can also set up an Overview viewport, even if that zoom shouldn’t change, we can use the View Frame Zoom to turn off and on layers for each layout. To get the overview to work, we use two settings in the property set for the Overview Turn_Off_Missing_VP is set to False so it is not turned off, even if the view frame is missing, and Layerscript_On_Missing_VP is set to True to make sure the layerscript is run even if the view frame is missing.

To set up to turn off the hatch layers, you add what layers to turn off in VPLayer_Freeze , and what layers to turn on in VPLayer_Thaw. Then you can control which is done first with Thaw_before_Freeze. It doesn’t have to have explicit layers, you can use ** instead of the entire layer name, and you can use <[Layout_Name]> to select the layer connected to the current layout.
Example:
- VPLayer_Thaw: *ViewFrame-Match-Line*,*ViewFrame-Hatch-*,*ViewFrame-Pline*
- VPLayer_Freeze: *ViewFrame-Pline-<[Layout_Name]>*,*ViewFrame-Hatch-<[Layout_Name]>*,*ViewFrame-Match-Line-Text-<[Layout_Name]>*
- Thaw_before_Freeze: True
This means that when Layout R-001 is created with the script, first all layers containing ViewFrame-Match-Line, ViewFrame-Hatch and ViewFramePline are thawed. Then the layer with ViewFrame-Pline-R-001, ViewFrameHatch-R-001 and ViewFrame-Match-Line-Text-R-001 are frozen. Then the command moves to Layout R-002 and does the same, but for the layers named R-002.
View Frame Zoom
When both files are ready and prepared, then it is time to run the main command, View Frame Zoom.
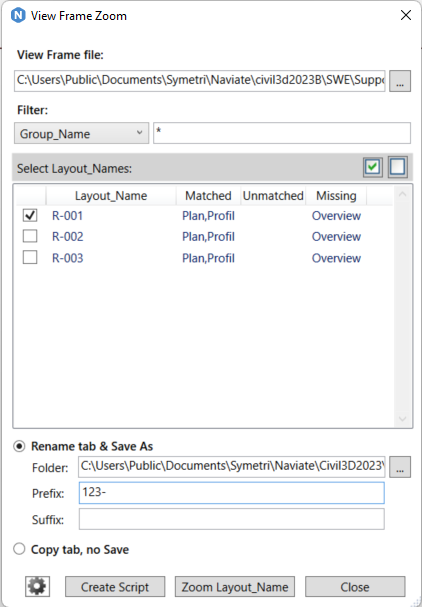
Select the view frame file at the top of the dialog and the available Layouts are listed in the middle. To test that everything is set up correct, select one Layout_Name and then click Zoom Layout_Name. Now the viewports should zoom to the correct view frames, and the layers should freeze and thaw according to the layer scripts.
If everything works, then select all the layouts (use Select all at the top right of the list), select Rename tab & Save As if you want individual DWGs for each layout, or Copy tab, no Save to create all layouts in the same DWG. If the Rename tab & Save As is used, then enter a folder to save the drawings in.
Click Create Script to create the script. To run the script, use AutoCADs SCRIPT. If there are many drawings, the script might take a few minutes to run. To reduce this time, you can run it in AutoCAD Core instead. Click here to read more about AutoCAD Core and how to set up a simple script in it.