The Naviate Pipe Subassemblies is built for creating normal pipe trenches where the pipes are placed underneath the surface – but what to do if your pipes are above the surface? How can we do volume calculations then?
4 criteria for Pipe Trench subassembly
First, we need to have some understanding on how the Naviate Pipe Trench subassembly works and how it will be affected when the pipes are above the surface. There are four things we need to be aware of:
- The subassembly needs to have a surface set as target. Without a surface target, the corridor will not be created.
- The corridor will always create the backfill around the pipes and the insulation above the backfill - but the remaining backfill depends on where the surface is found.
- You can set the side slope to a high number (e.g. 1000) to get it as vertical as possible, but you will never get it to slope ‘the other way’.
- The Naviate Pipe Trench subassembly is only one subassembly, and since every subassembly needs to have a side, this subassembly is placed on the Right side.
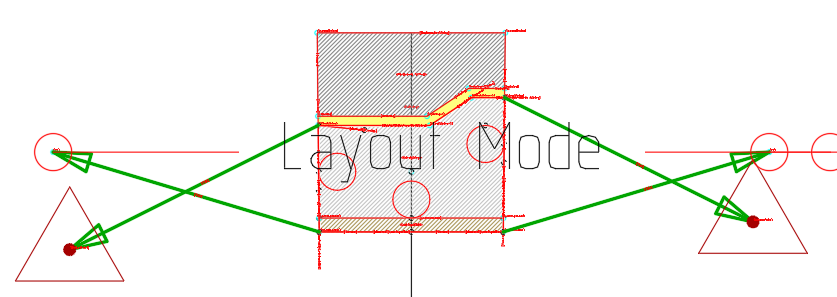
What does this mean when we use this section for a pipe that is placed above a surface? The section will initially look like this. 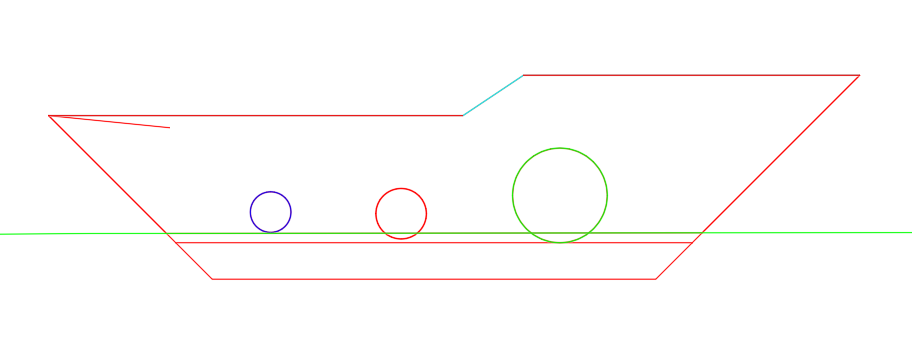
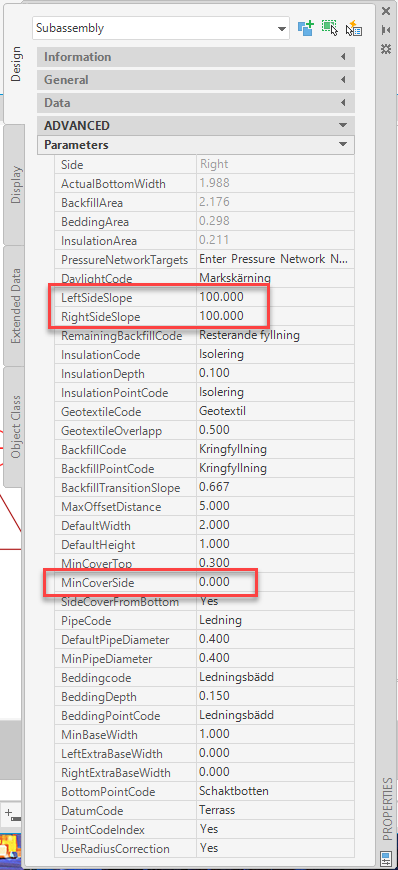
We can use this as it is, but we can change the subassembly to make it better, let’s go through the steps. A picture of the subassembly and its properties is included at the bottom of this text.
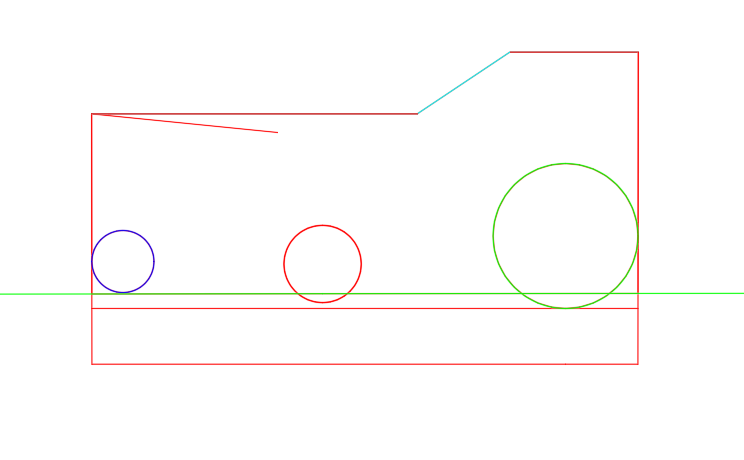
I set the side-slope to a high value and I also set Min-Cover-Side to 0. This means that the subassembly will be almost square, which doesn’t look better right now, but it gives me connection points that I will use to shape the section.
Next step is to add the surface links. These are Civil 3D Generic Slope to Surface-links. But this is where we need to remember that the Pipe Trench subassembly is only on one side. I need to add surface slope links and remember to change the side manually. You can change the side afterwards in Assembly Properties. Remember to place the top links on the Backfill top outer nodes.
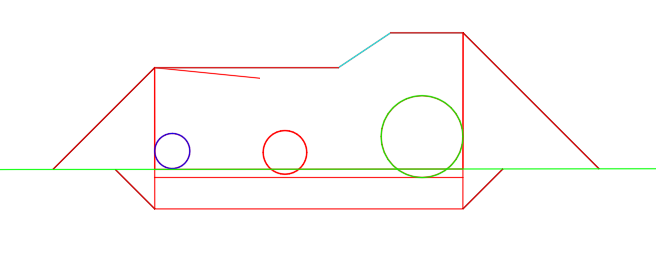
Now we have the sides of the bank section almost done. To be able to volume calculate properly, we need to add a link connecting the two surface points. To do this I add a Marked Point to one of the links and a Link to Marked Point on the other.
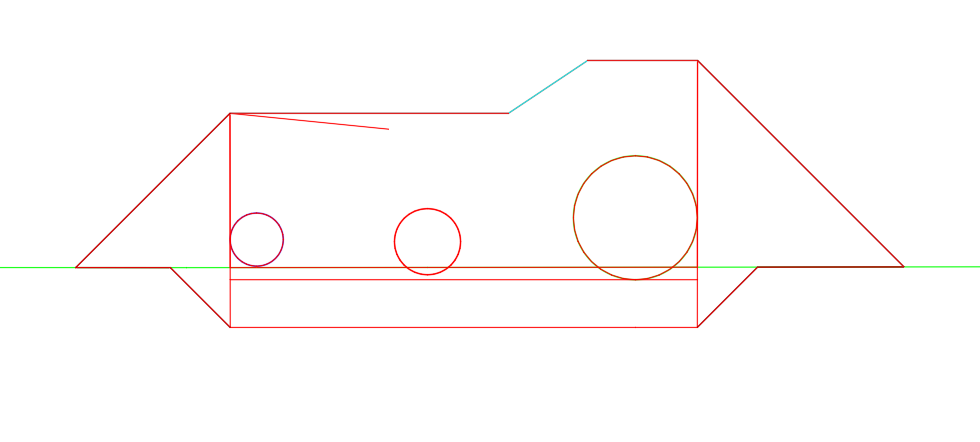
Now we have all the elements we need. I recommend to name and code the links with some care, especially if you want to use this assembly again.
To calculate volumes, we need to create two surfaces, one for the Datum and one for the Top. If you have made a logical coding, this shouldn’t be too troublesome.
Once the surfaces are created, you make a volume calculation, and you need to calculate the Backfill as a surface-volume between the top and bottom surface. This volume will also include the Pipe and Bedding volumes, so remember to subtract that manually. The Bedding and Pipe volumes are calculated as Shape-volumes.
The assembly and its properties will look something like this:
