Naviate contains several commands to create piles. This blogpost will focus on Lime Columns and Piles later this fall we'll cover Sheet Piles and Anchors.
Lime Columns
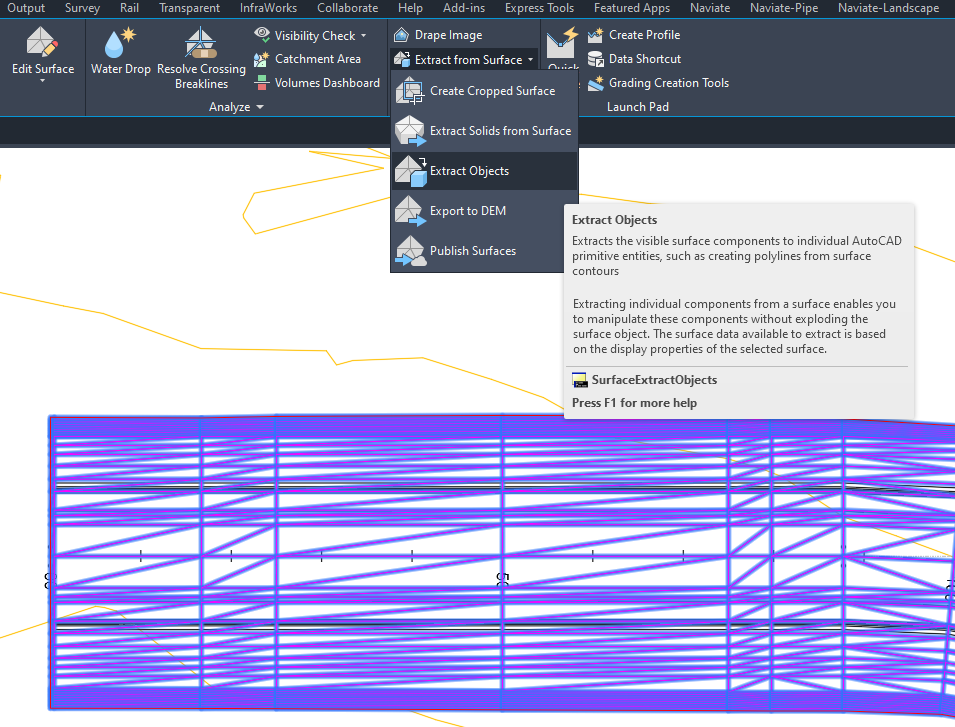
In this example there is a road that needs to be reinforced with lime columns. Lime columns can fill a closed polyline so the first step is to extract the outer edge of the datum surface from the road corridor. This comes out as a 3Dpolyline, so use Convert3DPolys to convert this to a Polyline.
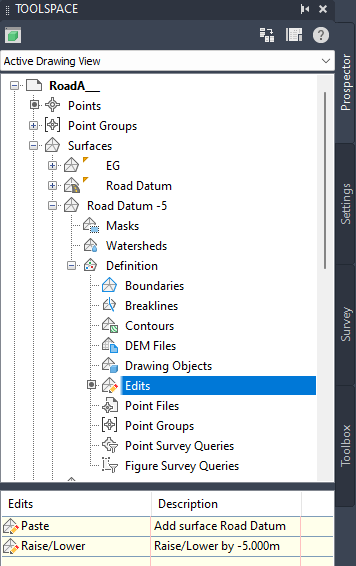
Lime Columns are created between two surfaces, but in this example, there is only the surface for the Roads Datum. The layer where the lime columns should stop is assumed to be 5 meters below the Roads Datum. To create the bottom surface for the lime columns a new surface is created, then the road datum is Pasted on and then Lowered 5 meters.
| Note! The Lime Columns command might take some time to complete, before you start the command it is a good idea to save your drawing! |
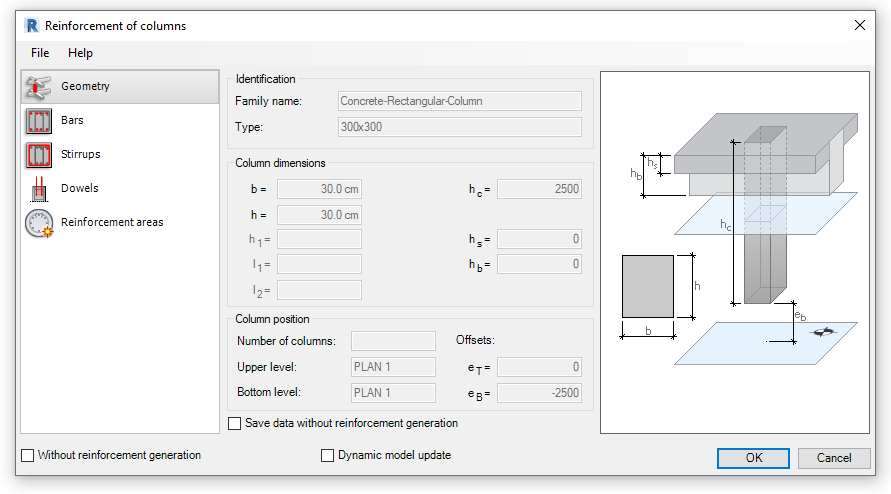
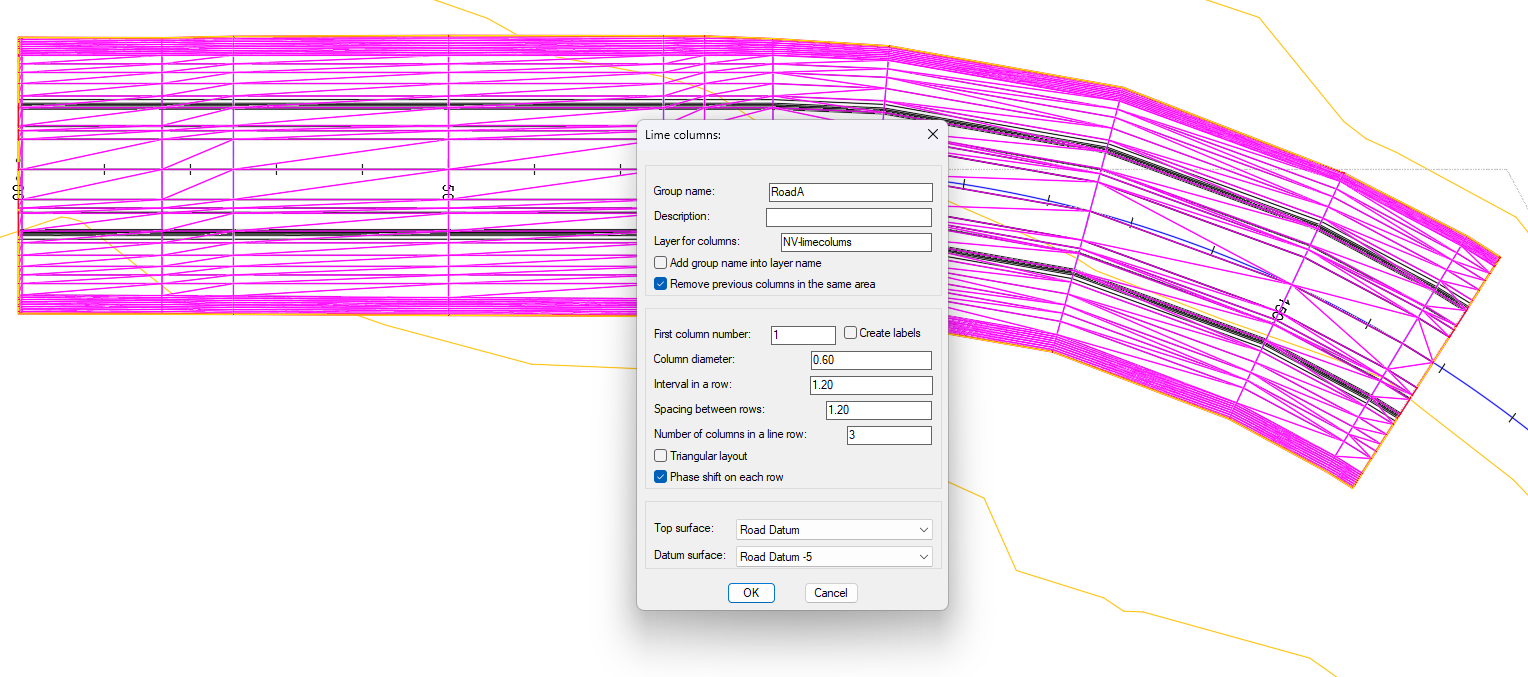
In the Lime Columns dialog a group name is set, in this case a diameter of 0.6 is used and the interval and spacing will be 1.2 meters. The pattern will be phase-shifted in the area. Top surface is the Road Datum and the lowered datum-copy is selected as the columns Datum surface.
When selecting the polyline, it matters where you select the polyline! The segment that is clicked when the polyline is selected determines the pattern direction. Also, the function creates columns from the selected segment and forward. This means that if the polyline is very irregularly shaped, the function sometimes misses areas that are “behind” the selected segment.
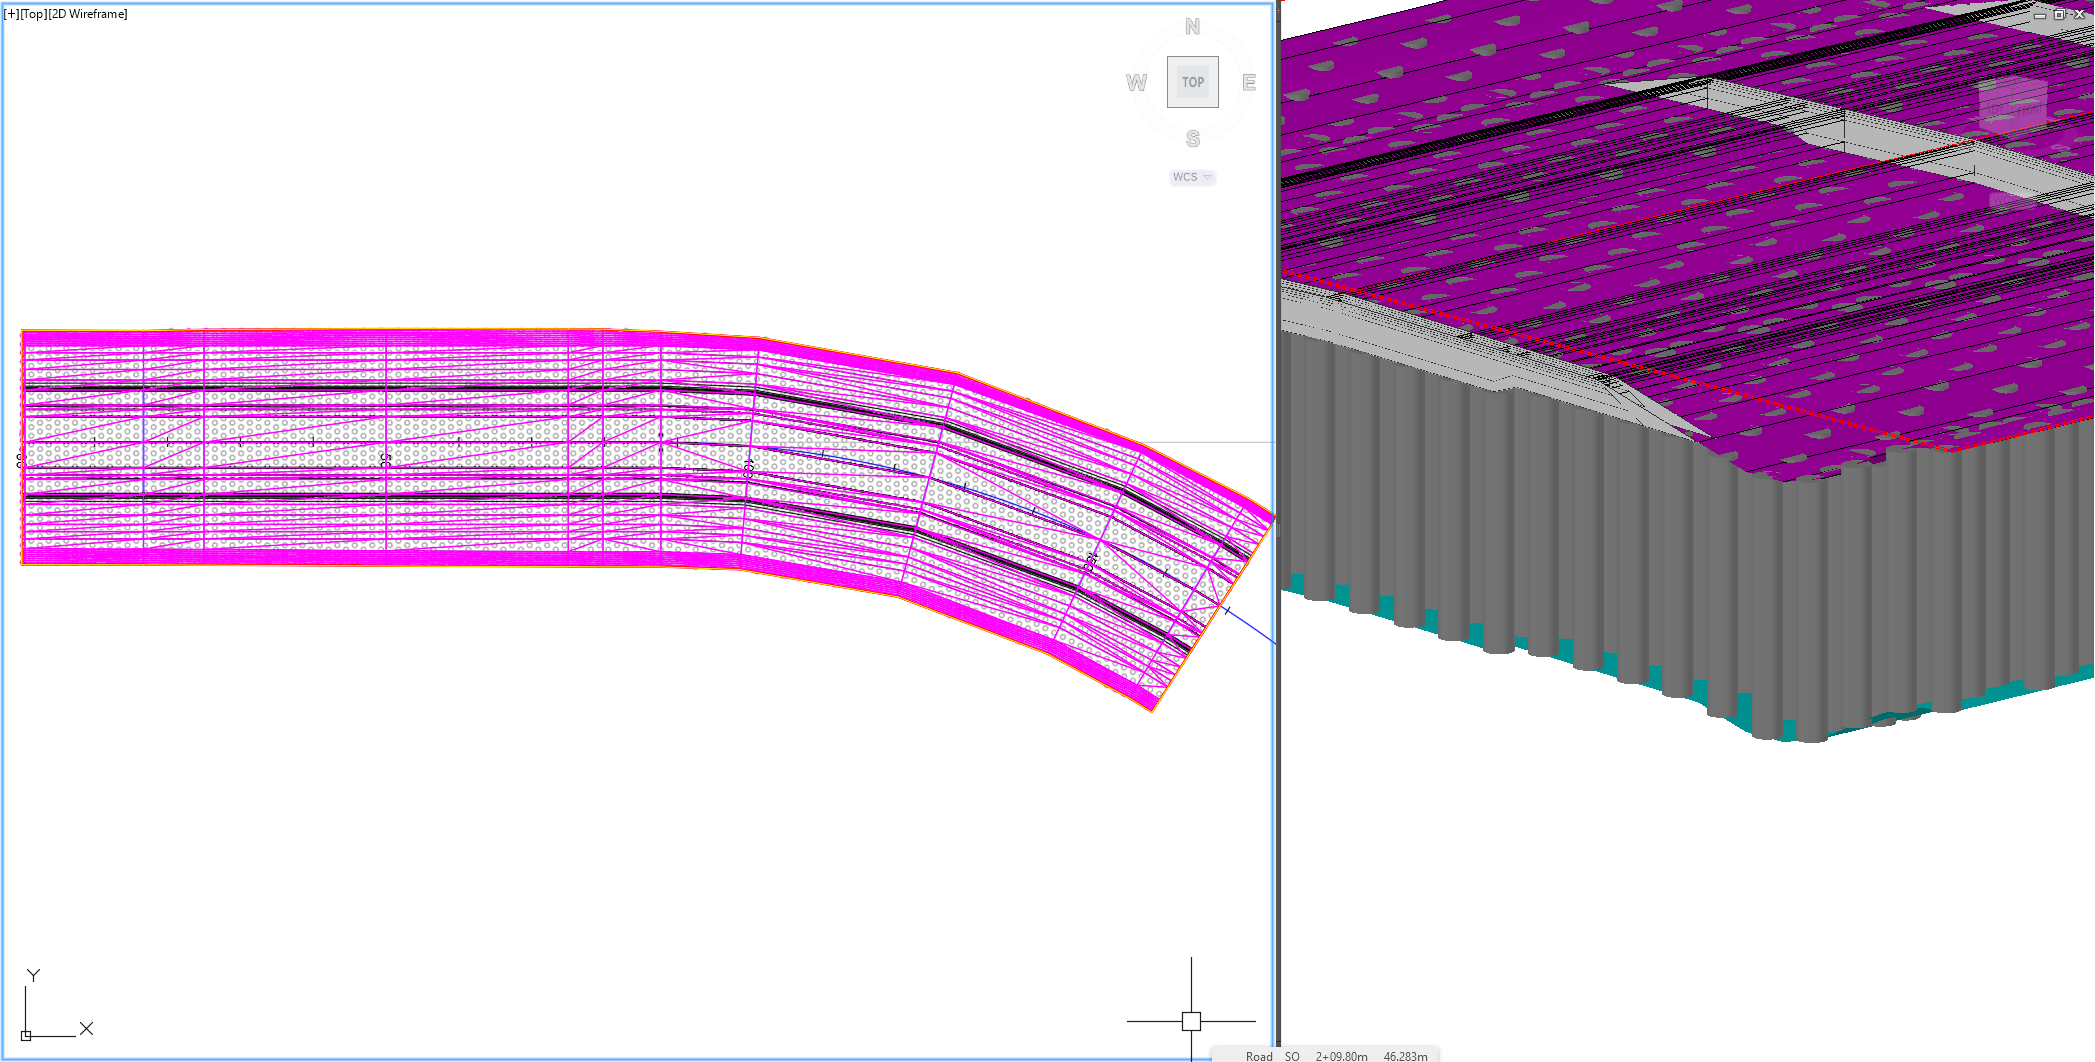
A tip is to create a first version of the columns with larger intervals to check that the direction and coverage is correct. Then run the command again and make sure to tick Remove previous columns in the same area to replace the test-columns with the correct ones. Depending on the size of the area, this might take some time so sit back and wait while the solids are created.
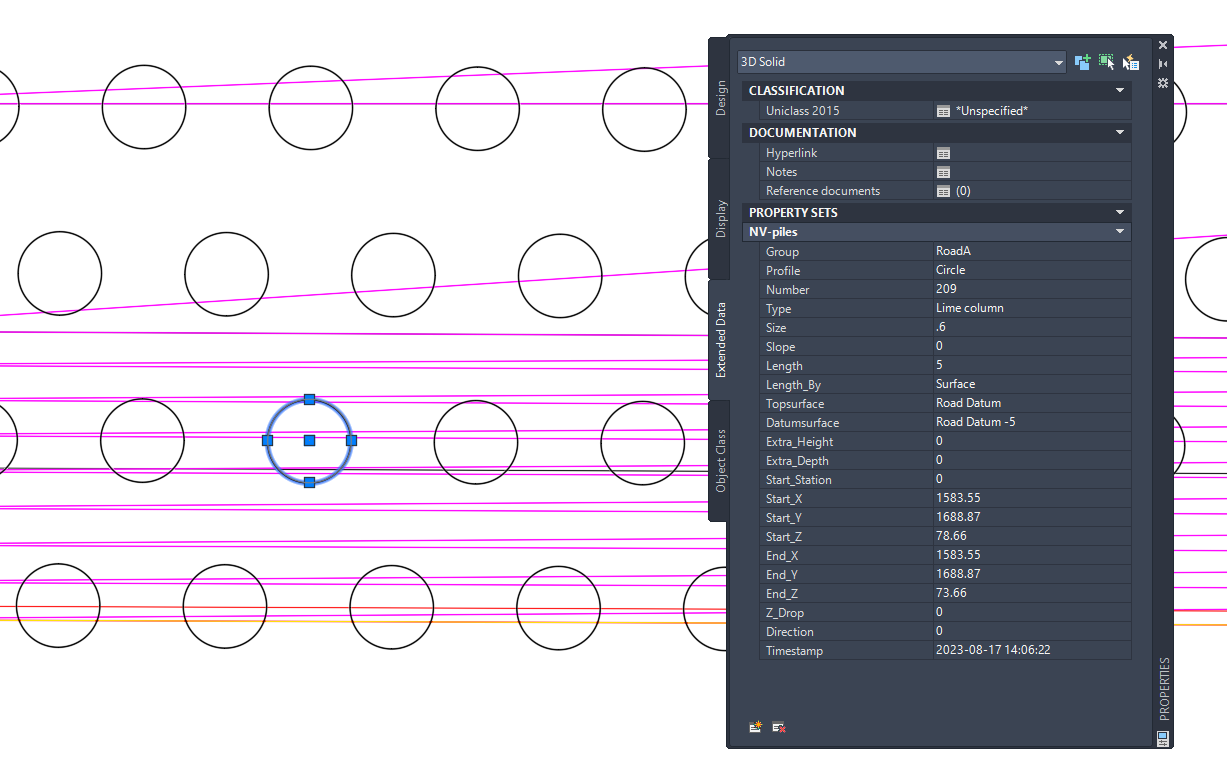
Each Lime Column have automatically a property set added, so tables can be created for all the information and the same information can be exported for further analysis. Property Set information also comes along if this file is exported to IFC.
Piles
If individual piles are needed, then the command Piles can be used to create them.
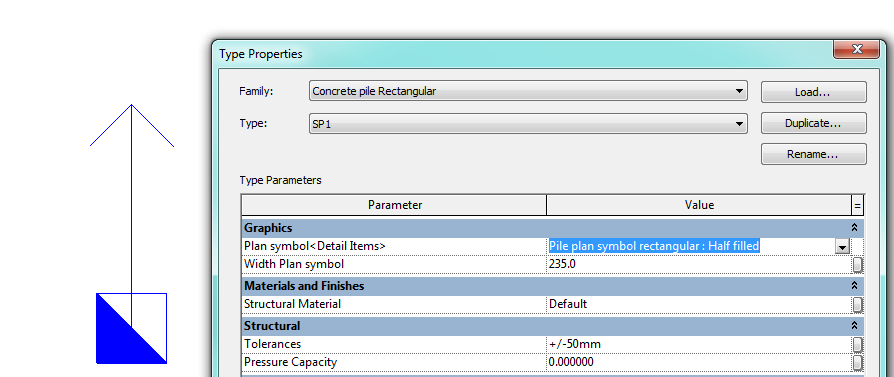
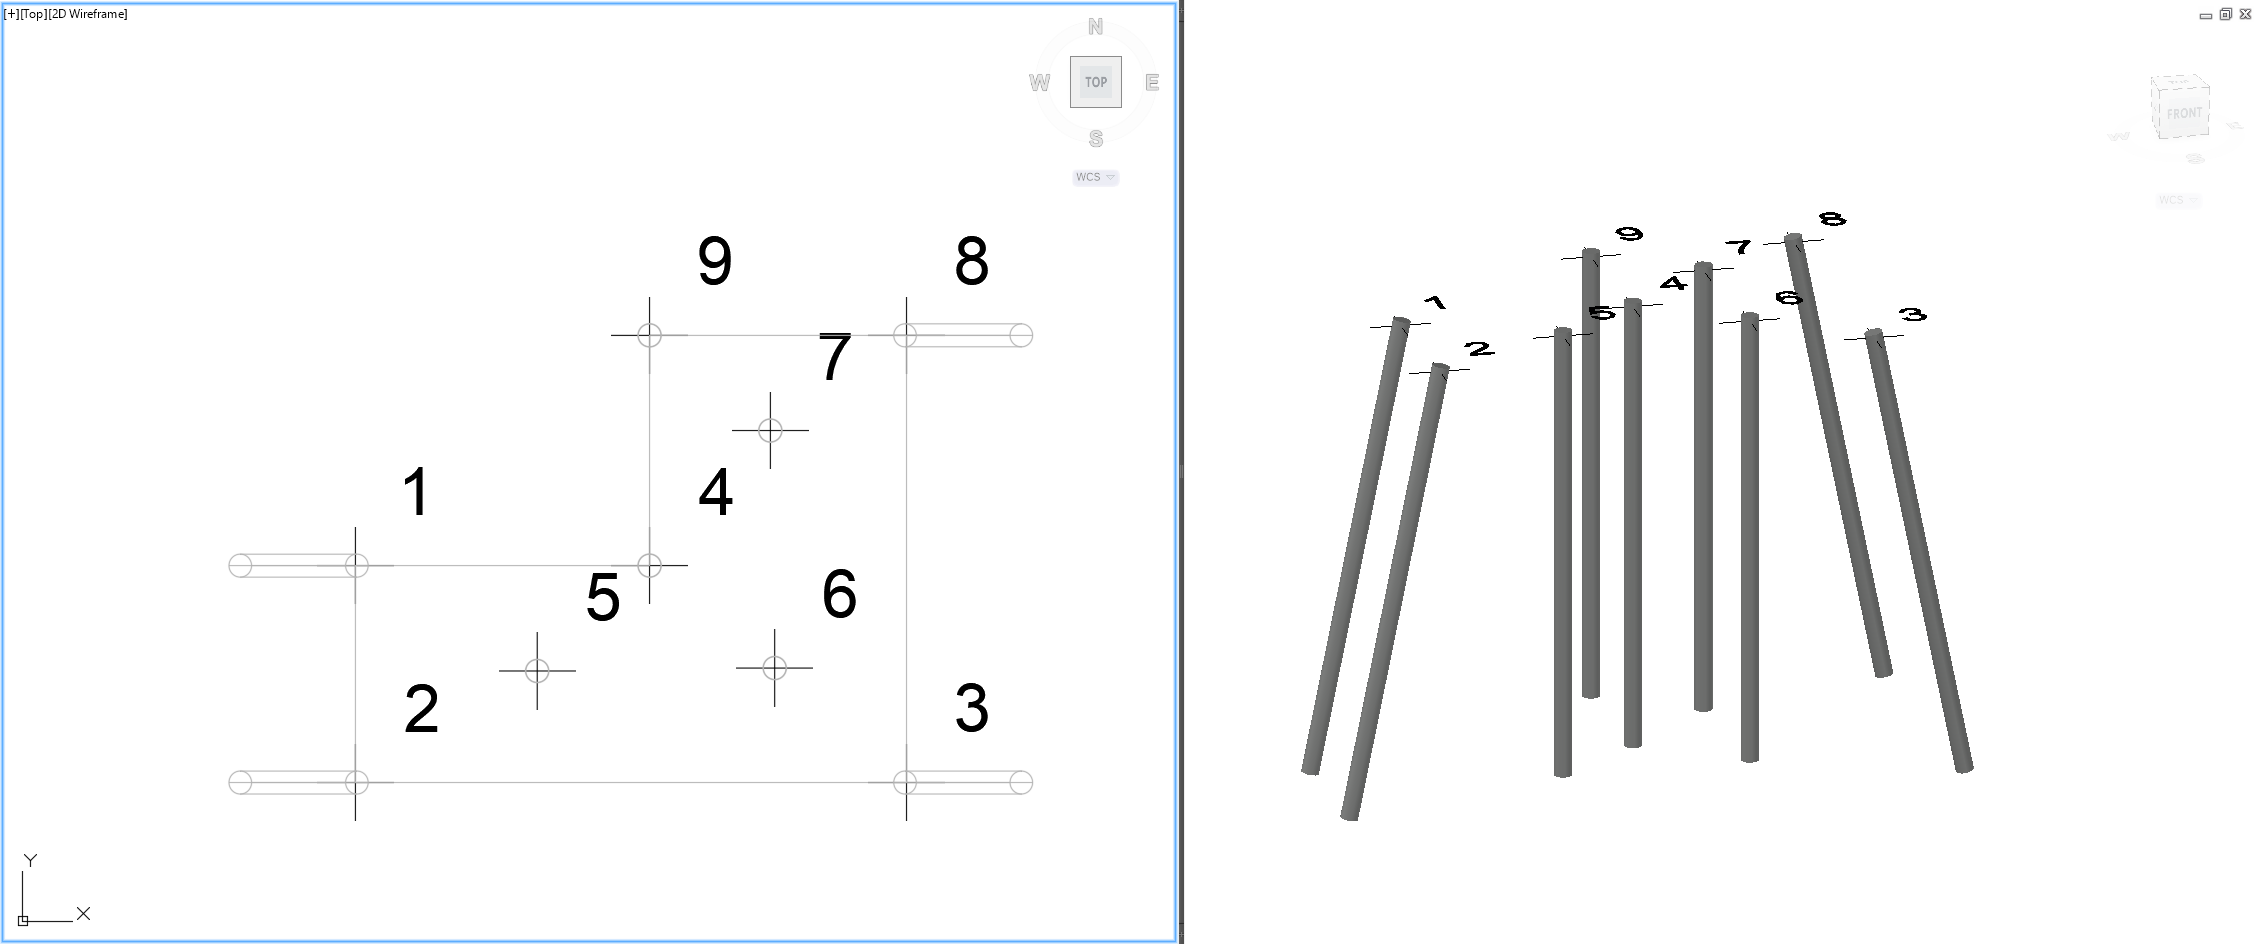
Piles are created from individual points, in this example there are Cogo points placed underneath a building pad. The piles on the outside of the pad will have a slope applied to them so they will be created in instalments depending on the direction of the slope.
The actual slope is defined in the dialog, but the direction of the slope is drawn after the points are selected. The dialog remembers the settings so it is easy to create these piles in instalments based on which way they should slope and still get them in the same group.

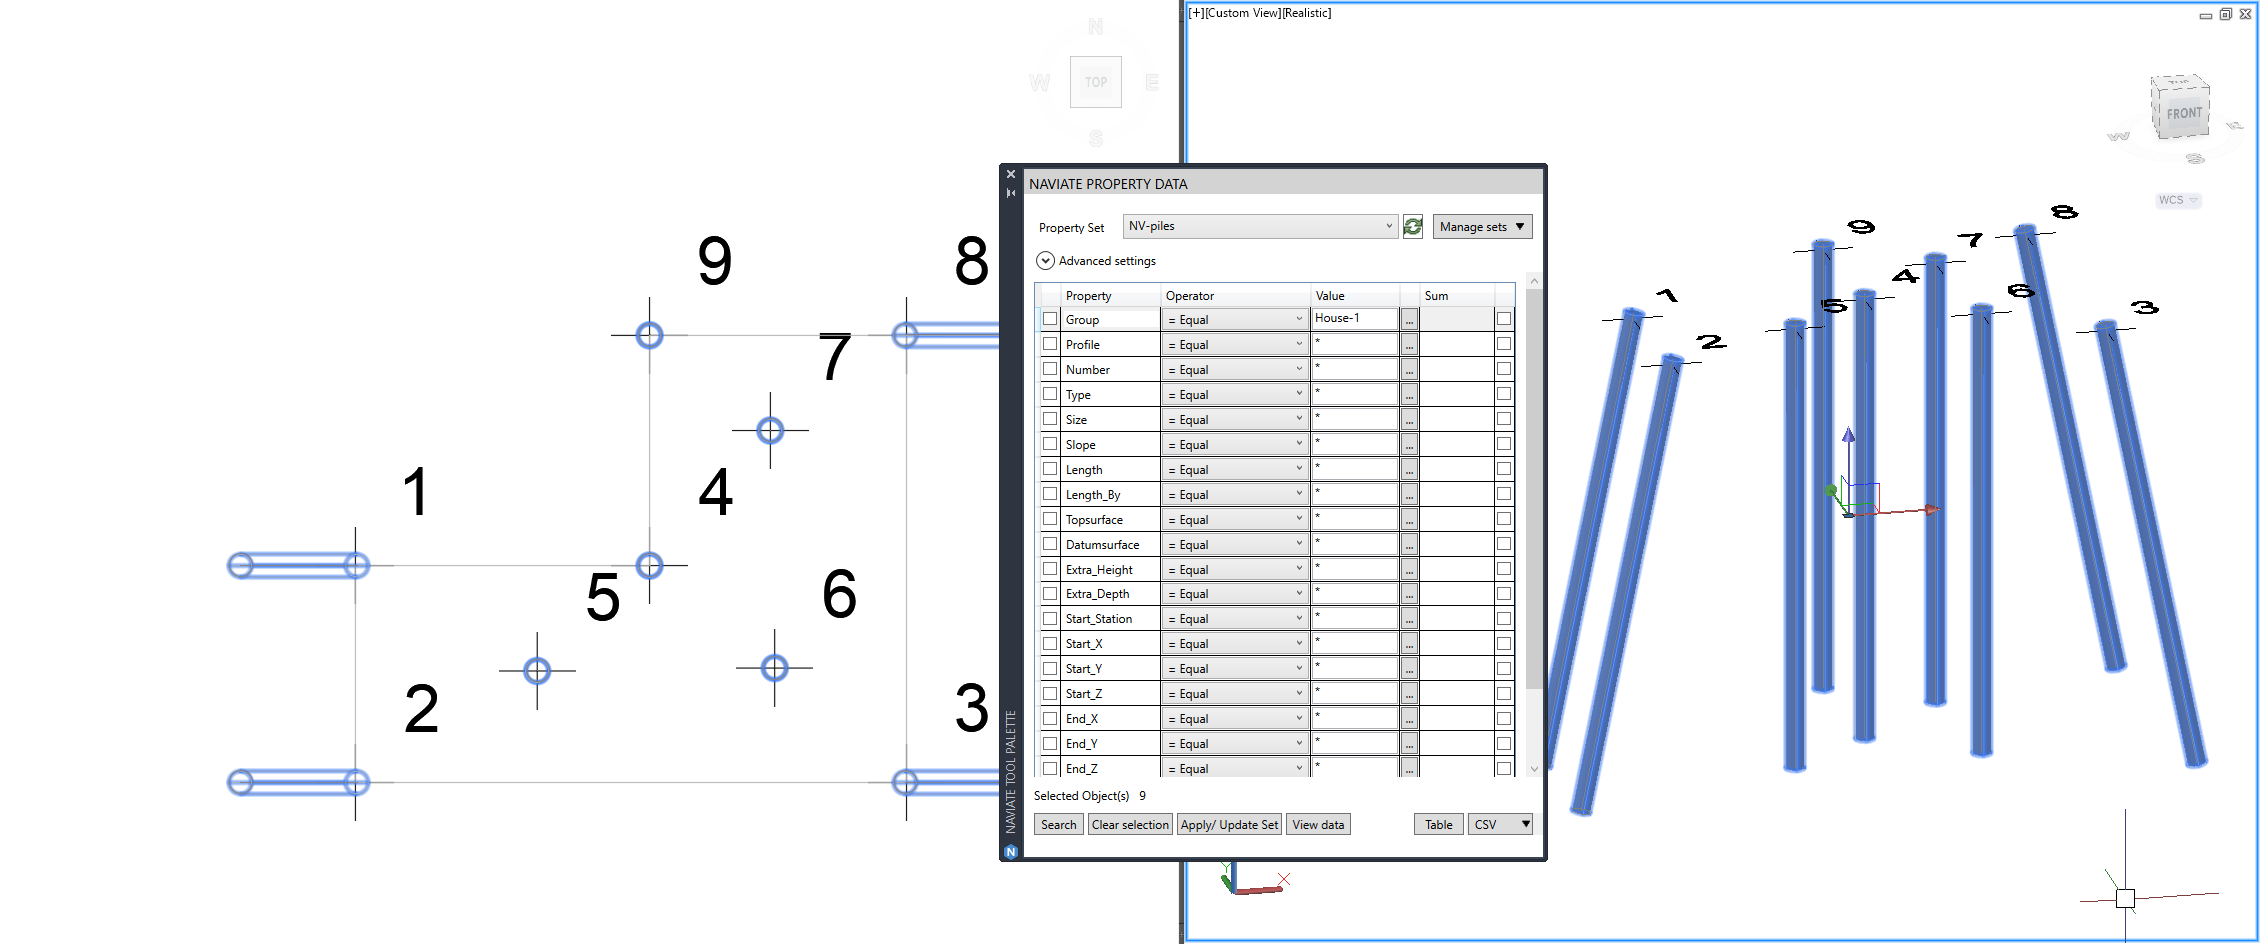
Piles also automatically have a property set applied, and by searching by group-name in Naviates Property Palette, you can easily find the piles you are looking for.
Want to try Naviate Sheet Manager for yourself? Download a 30-day free trial of Naviate for Civil 3D to give Lime Columns and Piles a try.