Naviate Plant Data is an easy way of importing information from an Excel-file and apply the information to Civil 3D or AutoCAD objects. In this blog post I will describe how to go from information in a spread sheet in Excel to information attached to your design elements.
Step 1: Excel to CSV
Let’s start with the Excel file. I have created a list of plants, have added a Littera and a C/C-value to each. Then I have added three factor columns; Piece, Area and Length. In the model when I add this to different objects, I want to use the C/C-value to calculate how many of each plant I need. The factors are to indicate if this will be calculated as individual pieces, as area or as length. This factor can be changed later, if one of the bushes for instance are placed in an area or one of the bulbs are planted along a line.
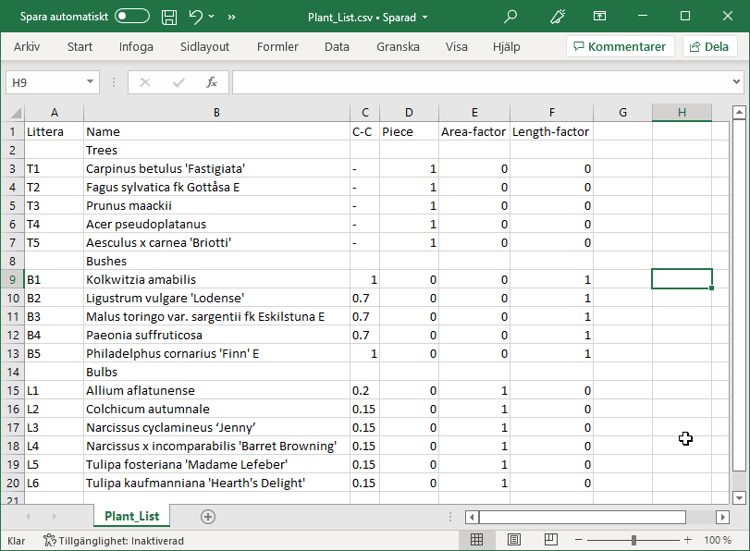
This file is then saved as a CSV, and here it is important to save it to the format UTF-8 with BOM. If you have trouble with this step, I find it easier to do if you open and save the CSV in Notepad.
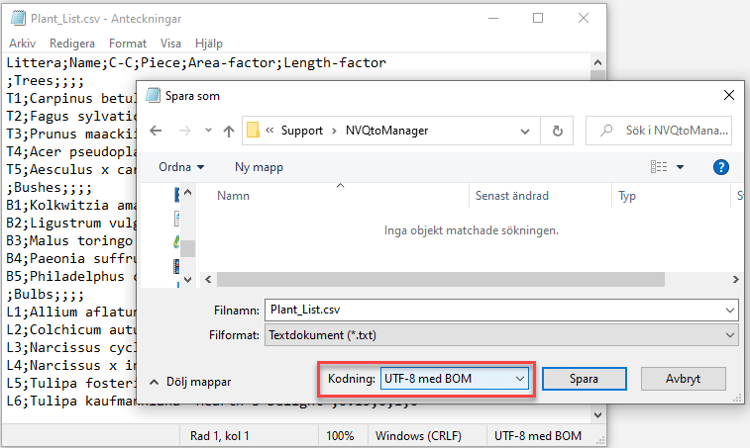
If you are using Naviate standard folders, then save this file to:
C:\users\public\documents\symetri\naviate\civil3d<vers>\<lang>\support\NVQtoManager
Step 2: CSV to Property Set
Now it is time to go into Civil 3D and open your drawing. The first thing we need is a Property Set. The Property Set can be applied to all objects in your drawing, and can then be filled with information. The Property Set is stored in your drawing and we can create a Property Set straight from the CSV-file.
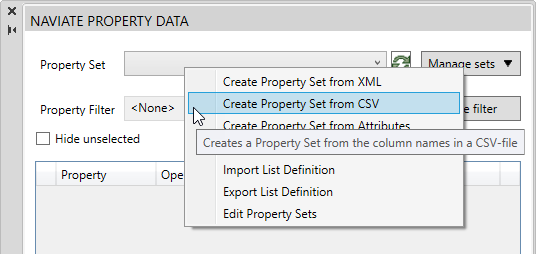
On the Naviate Property Data palette, under Manage Sets you find Create Property Set from CSV. Depending on the language settings on your Windows, you might need to change the delimiter. All column headings in your CSV-file will become Properties in the Property Set.
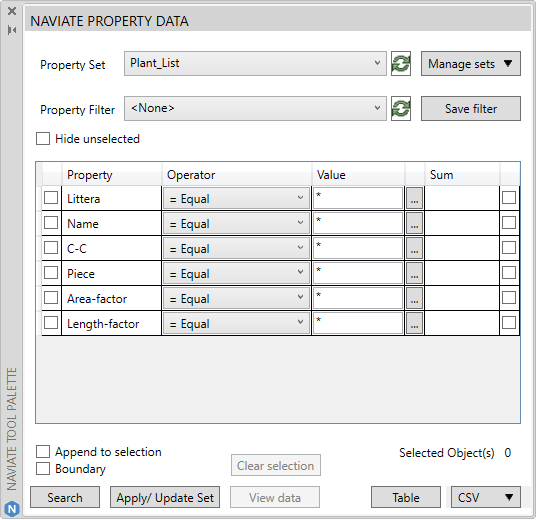
We can use this property set as it is, but for this example I will add a couple of formulas to the set to get the number of plants calculated.
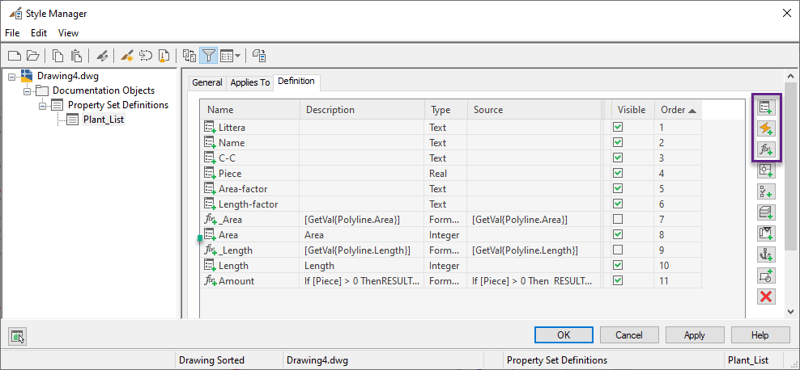
In Edit Property Set (you can find it in the same dropdown as Create Property set from CSV) use the buttons on the right to add Properties to the Property Set. For this example, I have added two formula-properties, _Area and _Length that each contain a Naviate-formula that gets Area and Length from Polylines. You can add more GetVal-parameters to be able to read Area and Length from more object types. Each formula-property has a result property where the information is displayed, called Area and Length. Note that only the result properties are ticked in the Visible-column.
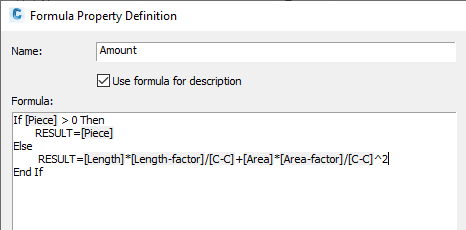
Then to get the total amount of plants I have added a third formula property with the formula you can see below. Note that the properties that the formula are using can’t be typed, they need to be added from the list below the formula window.
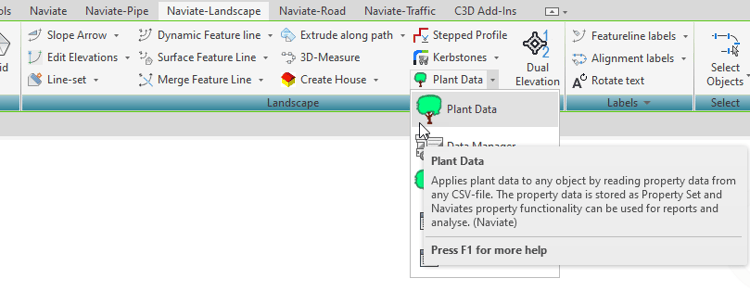
Once the Property Set is finished, you can import data from the original CSV-file and apply it to objects and the formulas will do the calculations. For this I use the command Plant Data.
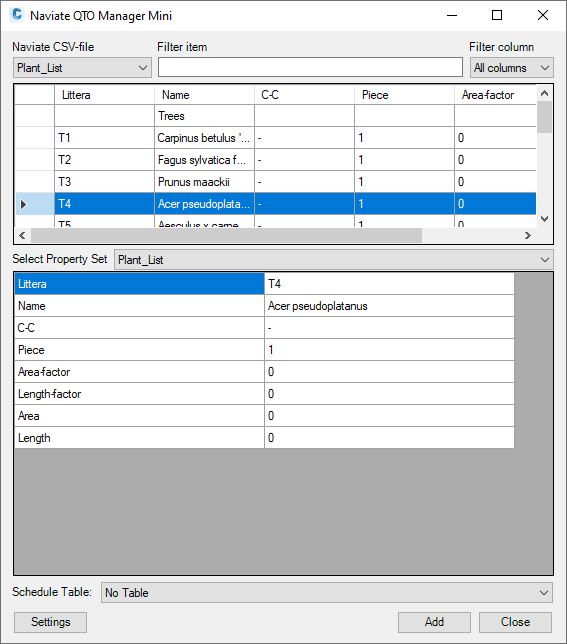
In the dialog you can select any of the CSV-files in the NVQtoManager-folder. Once you have selected a CSV-file at the top right, you can select a row of information in the top area of the window. The information selected is copied to the Property Set at the bottom area. Use Add at the bottom left to add the selected information to objects in your drawing.
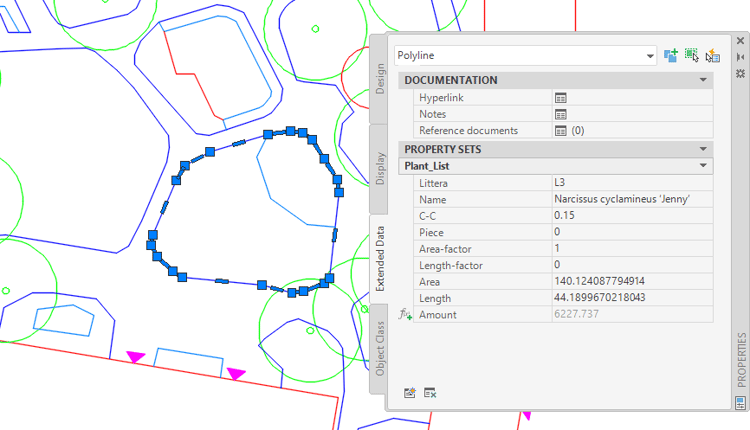
The result can be viewed on the AutoCAD Properties palette, on the Extended Data tab. If you have Dynamic Update activated, then the values will update directly if the polyline changes.
If you want to see this command in action you can take a look at the feature-film for it here
We've also done a webinar where I go into the command in more depth: Naviate for Civil 3D - Plant data (in Swedish).


