As a construction project manager or BIM coordinator, you ensure your projects run smoothly from start to finish. From managing multiple projects simultaneously to keeping track of relevant information and ensuring accurate data management, the demands on your time and resources can be overwhelming.
Fortunately, there’s a solution that can help streamline your construction projects and save valuable time: Naviate Cloud Manager, and specifically the Jobs tab. In this blog post, we’ll explore a few of the many ways you can automate project management tasks with the Jobs tab.
The Jobs tab
The Jobs tab provides you with tools to automate tasks that are time-consuming and/or repetitive by nature. You can set up these tasks to run on a pre-determined schedule so that they don’t interfere with other tasks.
Let's say you need to back up projects once a week for archival purposes, and you must do it outside of normal business hours. With Naviate Cloud Manager, you can create and define a Job to perform this task, then schedule the Job to run at 10 PM every Friday (or whatever date/time/frequency combination you choose). The Job will execute automatically at the specified time, download all files to the prescribed folder, and send an email to a designated recipient saying that the Job ran and was completed successfully.
The Jobs you can automate with Naviate Cloud Manager include:
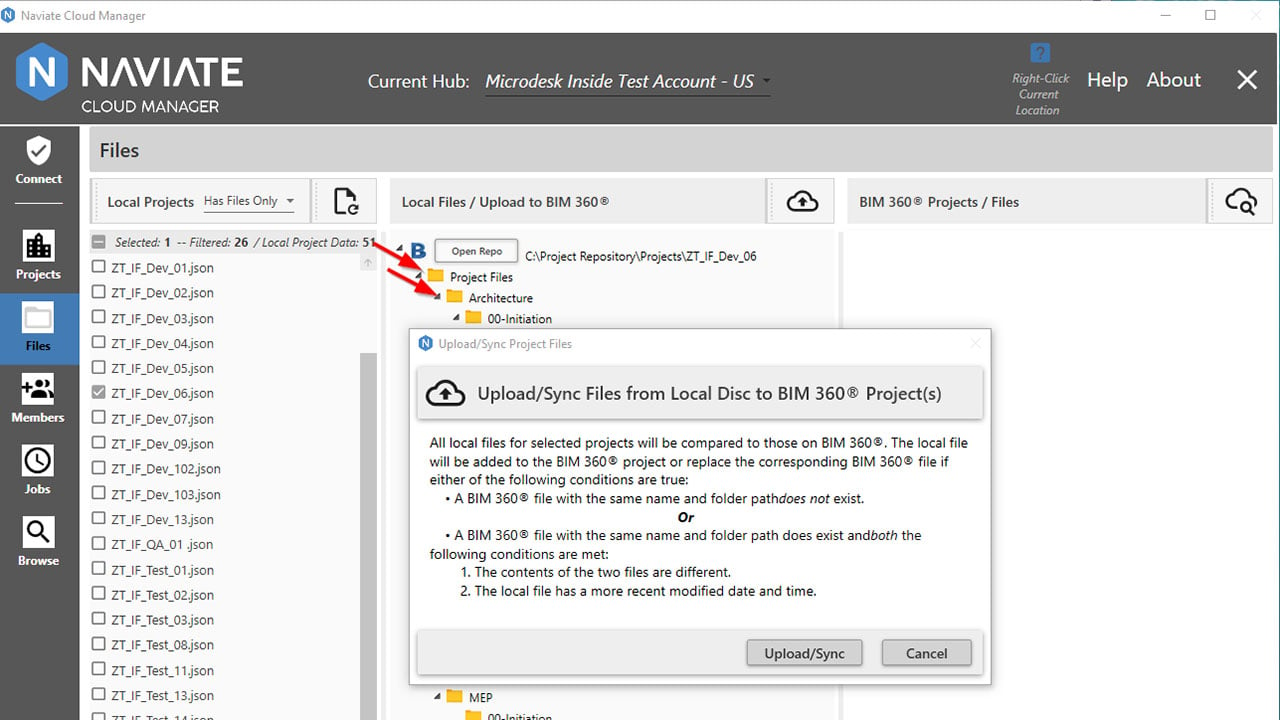
- Project file uploading
- File downloading
- Exporting Revit® models to:
- NWC
- DWG
- Publishing Revit® Cloud Workshared models
You can deploy Jobs to remote servers across the network, making it easier to manage tasks that require network connectivity. This can be especially useful in situations where a machine may not be turned on or connected to the network when the scheduled task is ready to execute.
Overall, the Jobs tab provides users with a convenient way to manage and monitor their automated tasks, giving them greater control over their project workflows and saving them valuable time.
Automating Revit model exports
Let’s dig a little deeper into the export Job type, as this Job can save you a lot of time. As mentioned above, Naviate Cloud Manager gives you the ability to export Revit models to PDF, NWC, or DWG whenever — and however often — you want. This is an excellent solution for project managers who want to ensure that their project data is up-to-date and accurate without manually exporting files themselves.
 To create an export Job in Cloud Manager, all you have to do is:
- Open Naviate Cloud Manager and go to the "Jobs" tab.
- Click "Add Job".
- Select the Job type “export”
- Choose the project and Revit model you want to export.
- Choose the file format you want to export to (e.g. PDF, NWC, DWG).
- Select the location where you want the exported file to be saved.
- Go to Windows Task Manager and set up the Job as a scheduled task.
- Set up a schedule for the export job (e.g. daily, weekly, monthly).
Cloud Manager will then automatically export the specified Revit model to the chosen file format at the scheduled time.
The exported file will be saved in the location you selected, and the job will email the designated recipient documenting the job ran and successfully completed, along with information on what was exported, how much time it took, and the total export size. If there were any errors during the process, the email will communicate complete information on what happened and at what point during the process the error occurred.
By automating project publishing, uploading, and downloading with Naviate Cloud Manager, you can save valuable time and ensure that your project data is always up-to-date and accurate.
Or, if you want to try these features out for yourself, sign up for a free trial of Naviate Cloud Manager here.