Part 3/3 on how to work with reinforcement in Revit and Naviate
Earlier we’ve talked about how rebar and reinforcement work in Revit, rebar numbering and how to create drawings.
In this blog post we will dive into the different ways to draw the reinforcement. What to think about and take in to consideration during working with reinforcement. In the end it’s all about doing it as easy and smooth as possible to create bending list and be able to deliver the project for production.
A series in three parts
The first post was on the topic of reinforcement using Revit and Naviate Structure and Naviate Rebar Extension. We looked at conditions, reinforcement tools in Revit, rebar cover settings, reinforcement settings, reinforcement rounding and reinforcement numbers. You can read the post here.
In the second part, we dived into renumbering and how to create drawings. You can read the post here.
And in this part, we will look at different methods working with reinforcement; reinforcement with rebar, area and path, adjusting reinforcement with edit constraint and reinforcement with fabric area and sheet.
Later we also have a planned post to properly introduce the Naviate Rebar Extension.
How to reinforce with slab edge
Position the reinforcement
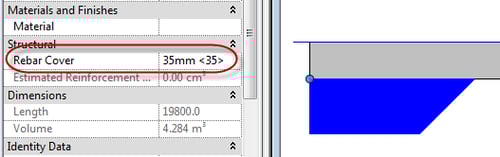
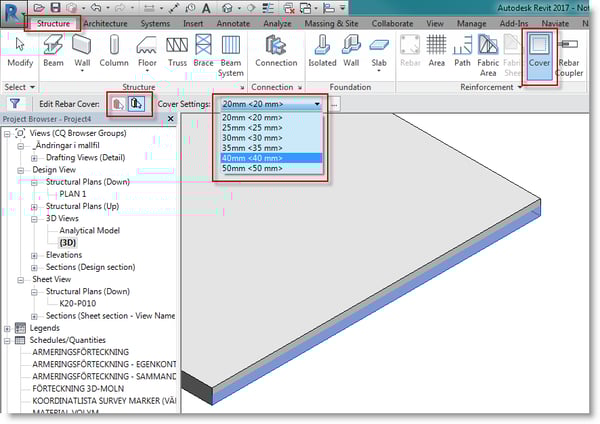
To position the reinforcement, make a section through the foundation. Before you place the rebar’s, make sure that you define rebar cover for the host/object by selecting the object and change the rebar cover in properties - structural.
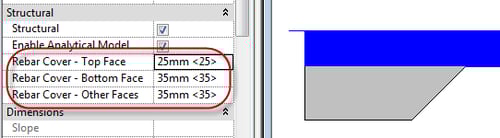
Adjust individual surfaces
To adjust individual concrete surfaces, go to structural – cover and pick faces. Select the model surface (or surfaces) where you want to change the covers, then add the new value for cover in cover settings.
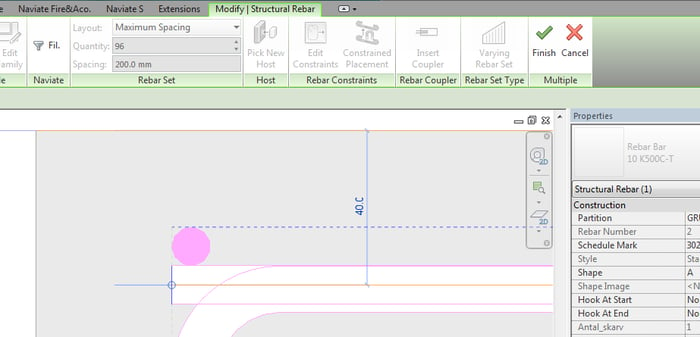
Rebar shape
For rebar shape go to structure - rebar and rebar shape browser to choose your desired shape.
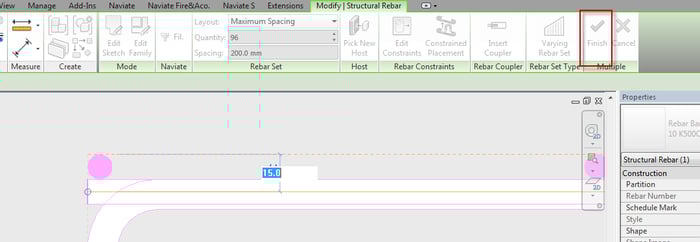
In this example we selected shape “A” and maximum spacing 200 in rebar set. Placement orientation – perpendicular to cover to place the rebar perpendicular to section. You can see with your marker how the covers are highlighted as shaded green lines around the object. The number of rebar are automatically calculated.
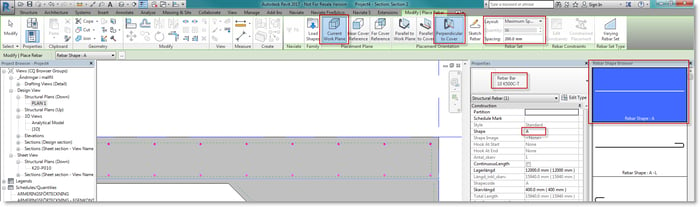
Dimensions
Choose the steel quality and dimension of the bars in properties palette. After the rebar are set in top and bottom we can switch to parallel to work plane and we can model the rebar on other direction. We are continuing with shape Z-Bar in the slab edge. Select the bar Parallel to Work Plane. Let’s pick ø10 s400. Check the settings in image below.
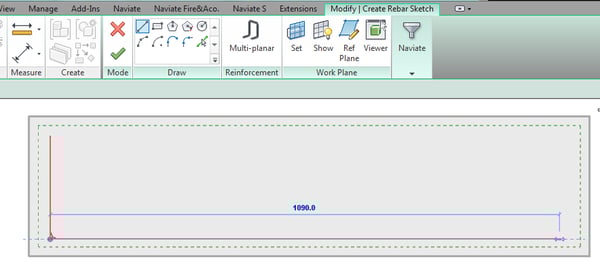
Placement
When placing the rebar on their host Revit will suggest some placement. To get the placement you want, use space on your keyboard and your rebar will rotate. When the rebar is in correct position click it into place. To get wanted dimension for the rebar you need to write them manually or use rounding, and Revit will round off to even numbers.

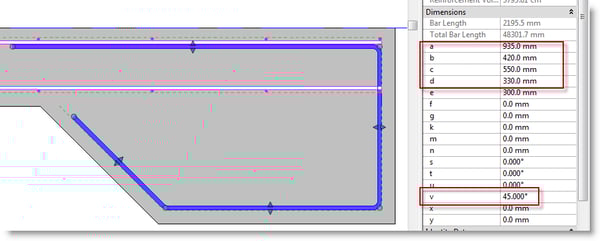
Bar dimension a, b, c, d and angle v are the characteristics of this shape and will be exported to the reinforcement schedule.
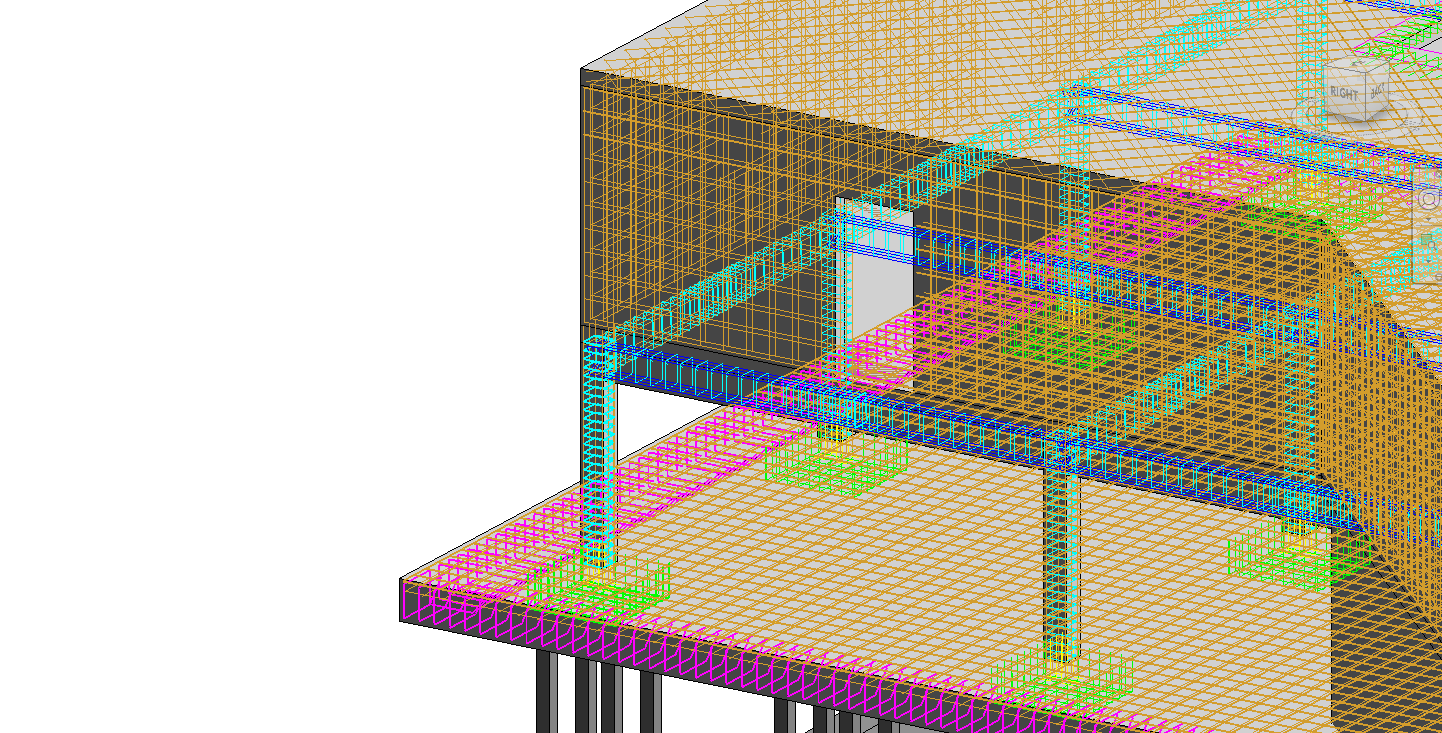
3D-view
To see reinforcement in 3D-view, you can switch display mode to wire-frame and the rebar will appear as “threads”. Another visibility state is to select all rebar (this example 3 object) and edit on view visibility states, then check the two boxes as shown below.
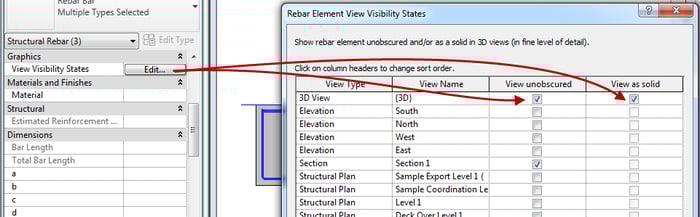
The example below has detail level fine and visual style shaded.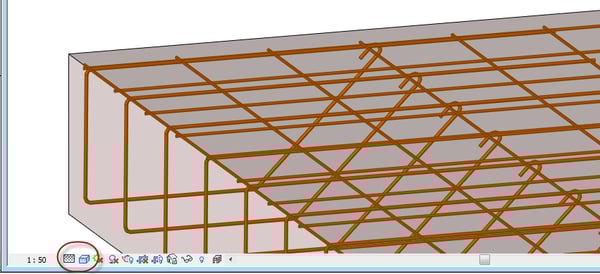
You now you see real rebar dimensions through the concrete. To view the rebar fast, use the menu hide/show obscured rebar. This give you access to hide and show reinforcement in the current view.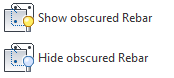
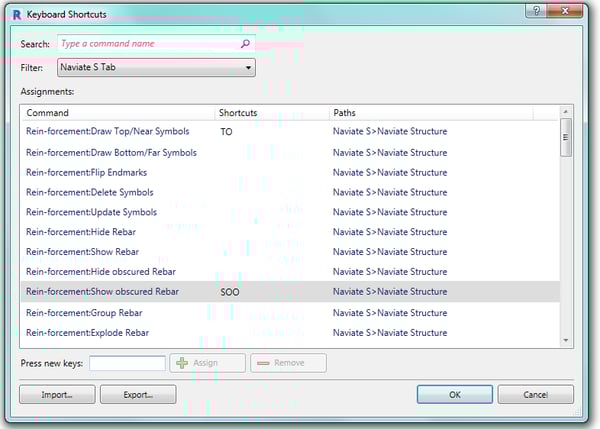
Tip! If you use certain features of Naviate often, place them as a shortcut. Keyboard K and S (KS) to enter keyboard shortcuts and make your own shortcuts.
Rebar command
With the rebar command you can create varying rebar. Select varying rebar set and model your rebar. 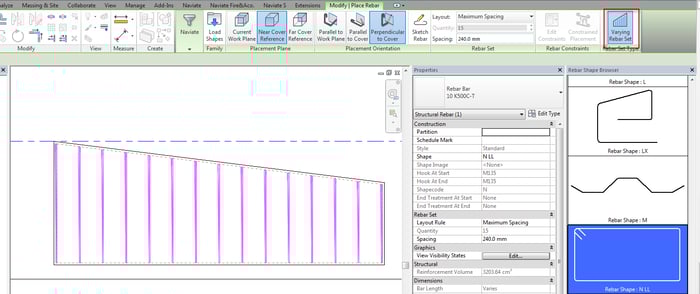
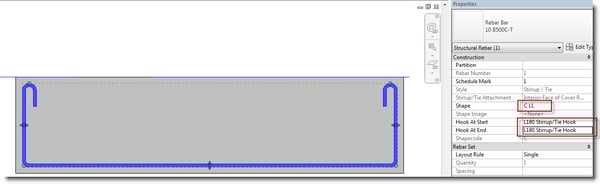
Rebar can be sketched with the command sketch rebar.
If rebar contains rebar hook (L or M), it is important to make sure that the shape match hook at start/end.
In the example, we see to that C LL has L180 hook.
Reinforce with area
To reinforce the floors and walls area (A-rebar) can be used. This feature handles more complex geometry.
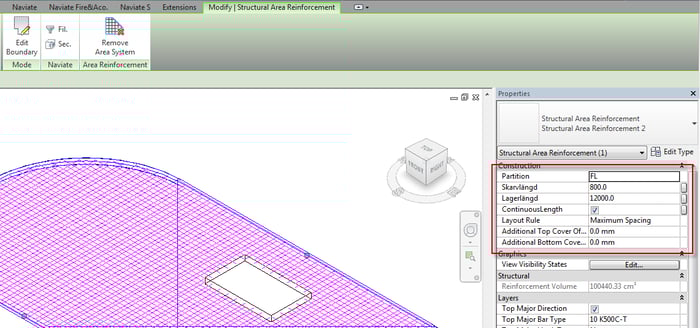
In the example below, we reinforce a floor with irregular shape by selecting slab/floor and use the area tool. Rebar line defines the extent of the reinforcement. With major direction we can define the main reinforcement direction.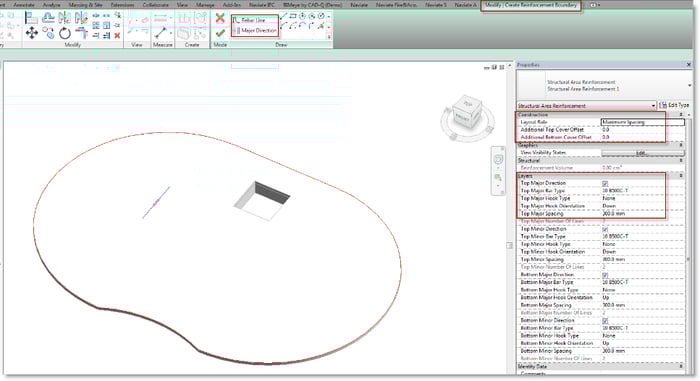
Layers in properties palette define dimensions and spacing of your reinforcement layers.
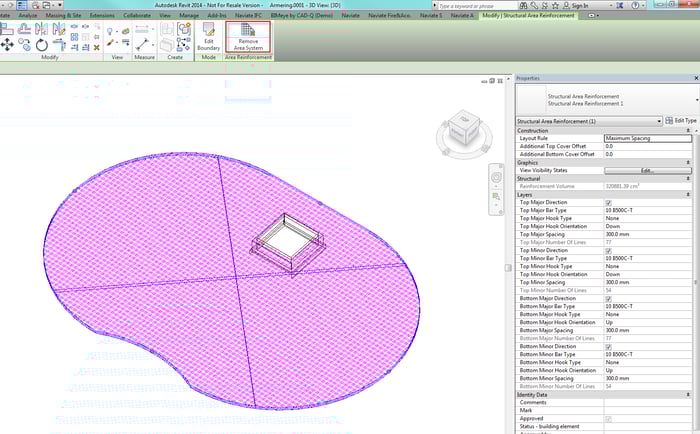
If you want to access an individual or single rebar, use the remove area system. There’s also a function for calculating the total length of reinforcement, either on the entire area system, or to one or more rebar outside of area system.
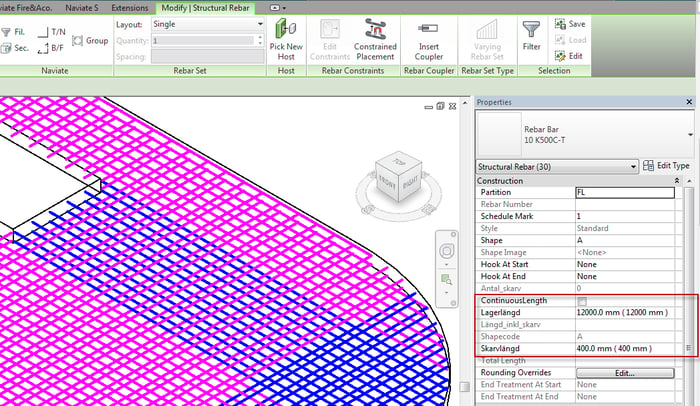
To find continuous length for your rebar, mark the area system and select continuous length in the properties palette.
If the rebar is not an area system, select one or more A-rebar and then continuous length.
Reinforce with path
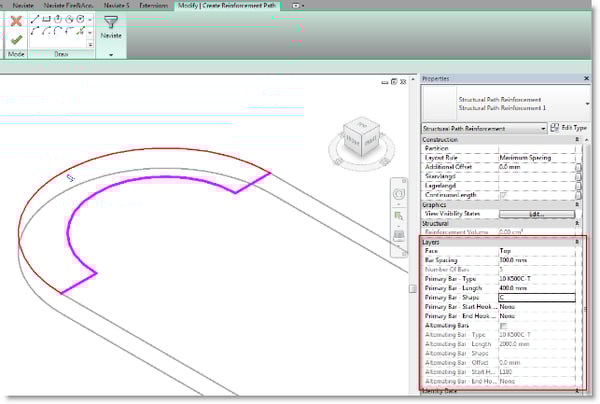
Path helps us to place the reinforcement on walls and slabs/floors at a line.
In the example below, we place the reinforcement at a slab edge by selecting the slab/floor and using path. Under construction, we choose how reinforcement is to be placed. The layers control which type of reinforcement is set in the different layers and spacing.
When the reinforcement is modelled, we use the remove path system. This is to get the opportunity to go in and adjust the rebar and to get them to reinforcement schedule. Keep in mind that space on keyboard can be used to rotate the reinforcement.
Adjust reinforcement with edit constraints
To adjust how the rebar is in relation to its host use the edit constraints. This allows us in an easy way to adjust the placement of the rebar.
Start by selecting a rebar and then edit constraints. Then select handles on the rebar and adjust the temporary measure to desire length, end with finish.
You can move the measurement by clicking on the concrete surface.
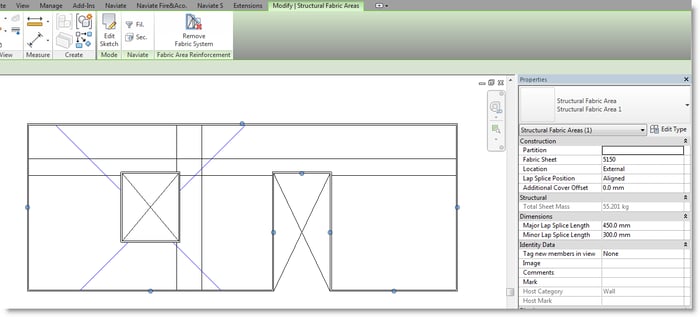
Reinforce with fabric area and fabric sheet
Fabric reinforcement can be placed in the wall, floor and slab with the functions fabric area or fabric sheet. Fabric area fills a defined area, while fabric sheet is used to place individual sheet.
In the example below we are reinforcing a wall by selecting it and run fabric area. Boundary line defines boundary of the area, while major direction defines rotation of area.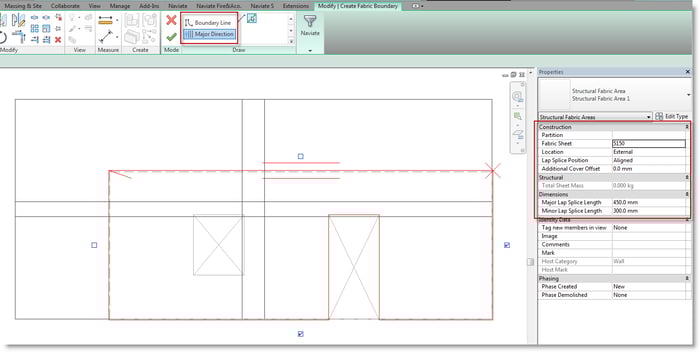
Under construction you can define type of fabric sheet and placement in host, here the dimensions controls overlap.
Want to know more?
Through this blog series we've gone through how you can succeed working with reinforcement in Revit. In the end it’s up to you as a user, to see how you can amend and adjust this to comply with yours or your company’s workflows. Sometimes it could have that impact that it could change your processes or workflows as well.
Please give us feedback on what you have learned during the series. Have we missed something, is there something else we should blog about to help you overcome you day to day work with reinforcement.
Soon there's a planned post on Rebar Extension and how we automate the generation of Rebars. Until then, feel free to download the software for free.
You can try out the Naviate reinforcement module for free today in Naviate Structure, Naviate Rebar and Naviate Rebar Extension.
Any other topics you would like us to cover? We would love your feedback in the comments below!