Part 1/3 on how to work with reinforcement in Revit and Naviate
A few weeks back I had phone call with a customer. He told me that they struggle a lot to work with the 3D Reinforcement part in Revit Structure. We had a discussion around how to overcome those challenges, where I presented him some workflows and we tried to see if those could be implemented into their workflows or change those a bit.
After our talk I realised that this could be a common challenge in the market, therefor I would like to write about this topic and hopefully help others out there that have issues working with 3D reinforcement in Revit.
A series in three parts
This is the first post in a series of three parts around the topic of reinforcement using Revit and Naviate Structure and Naviate Rebar Extension. We will present conditions, reinforcement tools in Revit, rebar cover settings, reinforcement settings, reinforcement rounding and reinforcement numbers.
In part 2 we will dive into renumbering and how to create drawings. You can read the post here.
And in part 3 we will look at different methods working with reinforcement; reinforcement with rebar, area and path, adjusting reinforcement with edit constraint and reinforcement with fabric area and sheet. You can read that post here.
Conditions
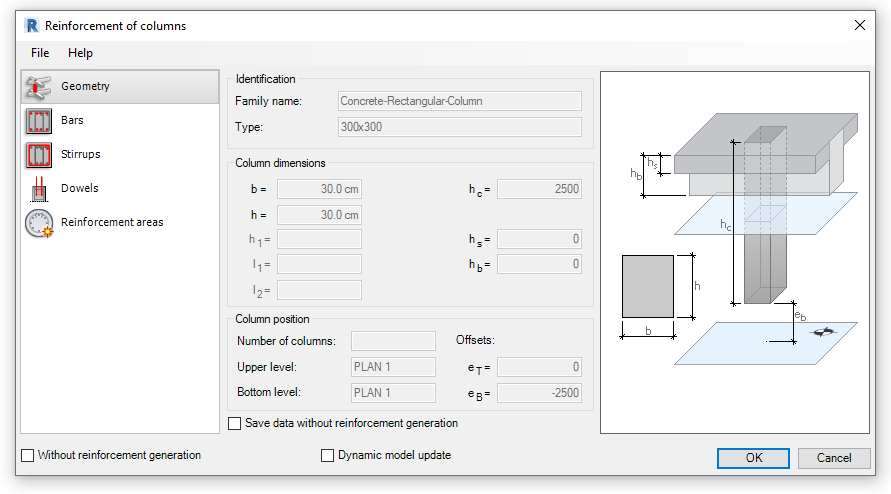
In Revit 3D-reinforcement is named rebar. To draw it you need a concrete 3D-object called host. Most object that you draw in Revit can be defined as a concrete material. However, only certain categories can be a host for the rebar.
Some examples:
- Structural framing
- Structural columns
- Structural foundations
- Structural floors
- Structural connections
- Walls
- Foundations slabs
- Wall foundations
- Slab edges
- Generic model (if you choose ‘can host rebar’ in family)
The family host need the parameter material for model behaviour to be set to ‘concrete’ or ‘precast concrete’ in the family.
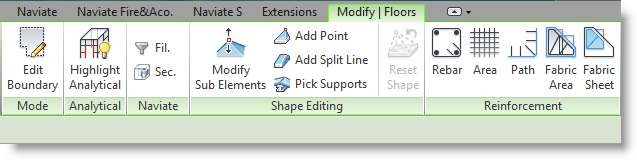
Here you can see that the item can host reinforcement obtained directly if the reinforcement panel is visible under the modify tab.

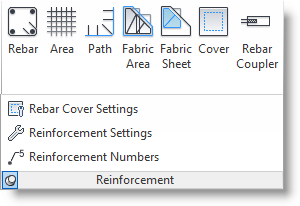
Reinforcement tools in Revit
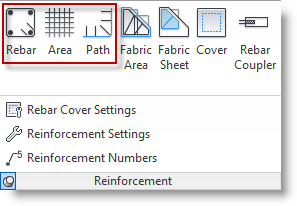
3D Reinforcement (structural rebar) is modelled in Revit using the functions:
- Structural rebar (rebar)
- Structural area reinforcement (area)
- Structural path reinforcement (path)
Structural rebar
The menu are/path helps you place structural rebar.
Structural rebar is built of two systems families and a regular family:
- Rebar bar (system)
- Rebar hook (system)
- Rebar shape (regular)
Rebar bar
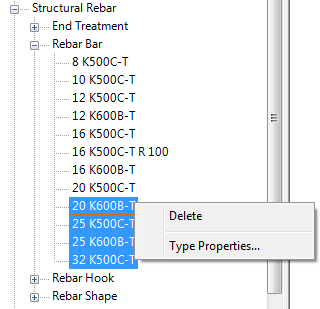
Rebar bar is a system family defining what dimension and steel quality is set for the structural rebar. Here you can also modify bend diameter and hook lengths. It is important that the name of the type is set so you can easily understand the definition of the rebar.
Below you can see an example of the predefined list stored in Naviate named after diameter and steel quality.
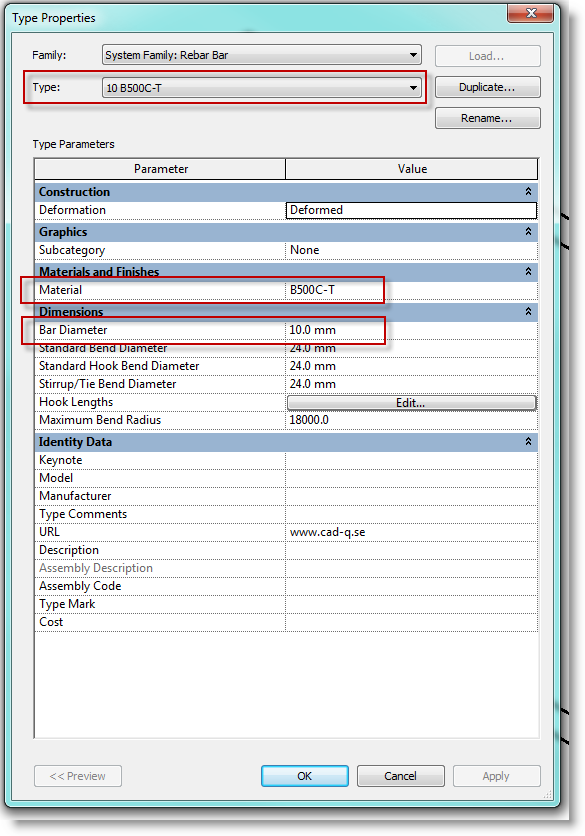
Note. If the reinforcement must have a different bend diameter you need to create new type. You can do this by choosing duplicate then adjust stirrup/tie bend to desired value. It may help to remove the types that will not be used in the project by selecting them, right-click it and delete.
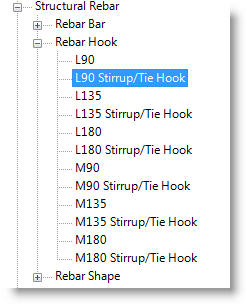
Rebar hook
This system family is defining the different hook types. Either for style: standard or style: stirrup/tie. In Naviate we have predefined three different rebar hook called 90, 135 and 180 (degrees). The L means that the hook is as the image specification sheet 2A, and M means that it’s the opposite direction to the one shown in the image.


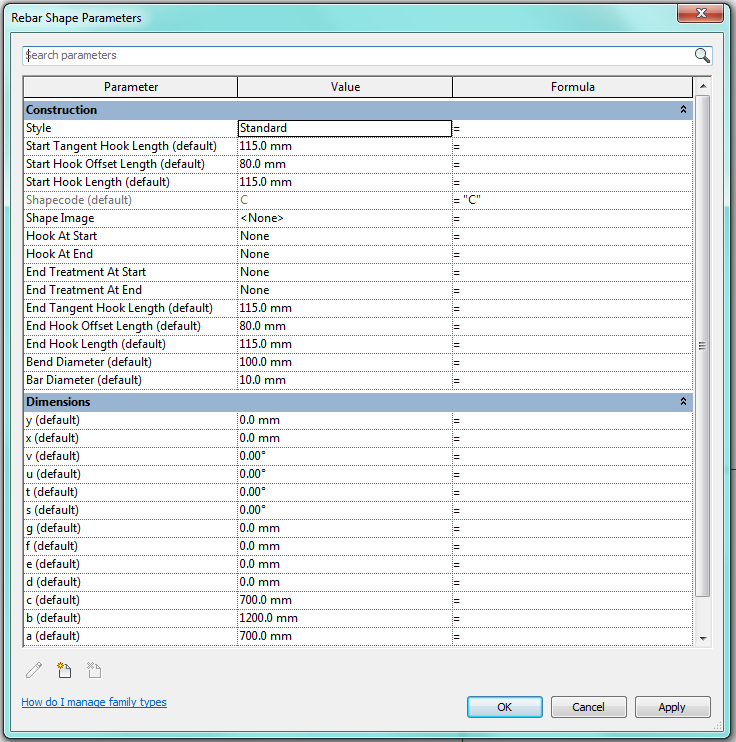
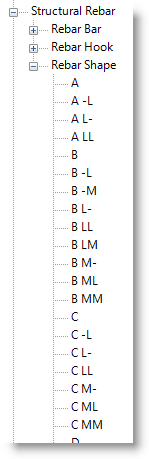
Rebar shape
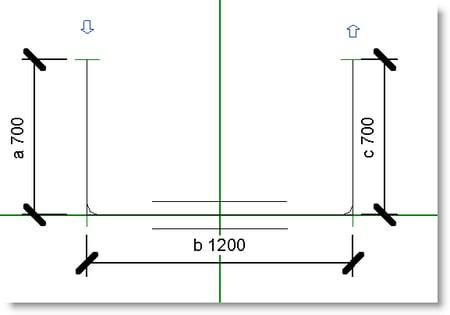
With rebar shape you define the shape of the different types of reinforcement. This is handled in the family editor. In Naviate most of the local standards are presented in specification sheet 2A. All shapes are defined as style: standard.
Structural fabric reinforcement
Structural fabric reinforcement is modelled using the functions:
- Structural fabric area
- Structural fabric sheet

Structural fabric reinforcement is defined in two system families:
- Fabric sheet (system)
- Fabric wire (system)
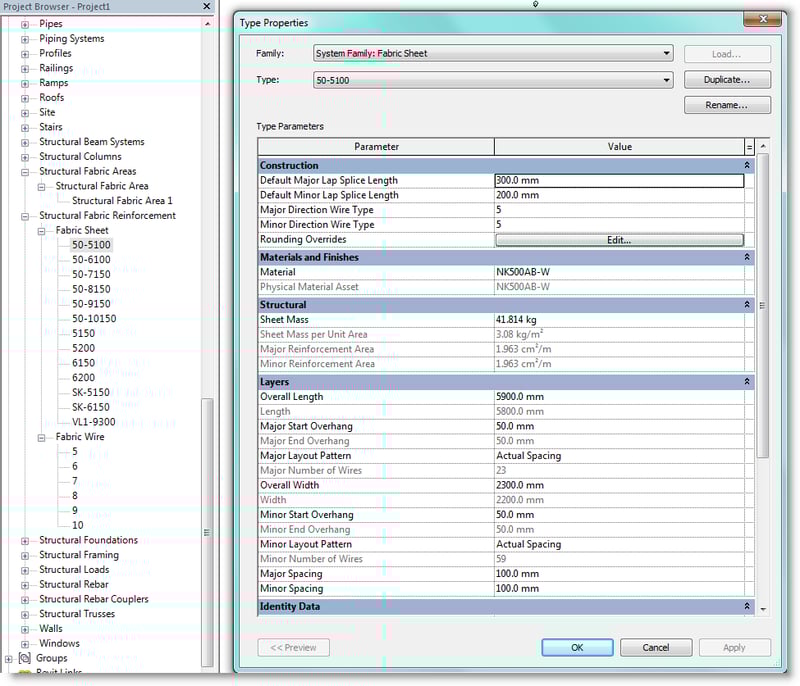
Structural fabric sheet
In this system family you define different type of fabric sheets. In Naviate we have already defined several types for you to use.
Structural fabric wire
In this system family you define diameter for fabric wire.
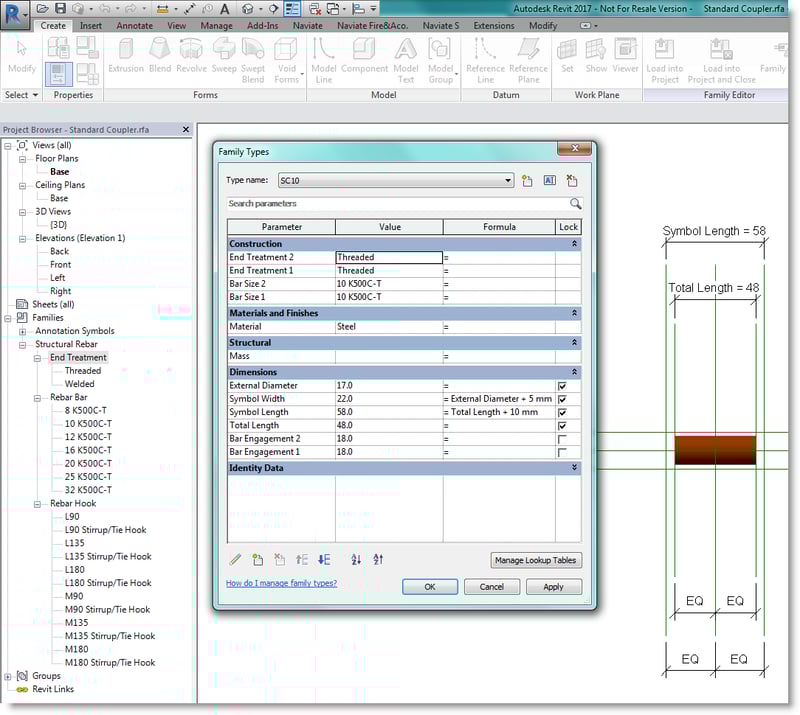
Structural rebar coupler
In Revit you can model mechanical coupler for structural rebars with the function structural rebar coupler.
In Naviate we have defined three different couplers:
- Headed anchor coupler
- Standard coupler
- Transition coupler
For now, rebar coupler cannot be exported by Naviate, instead they need to be handled manually in the schedule.
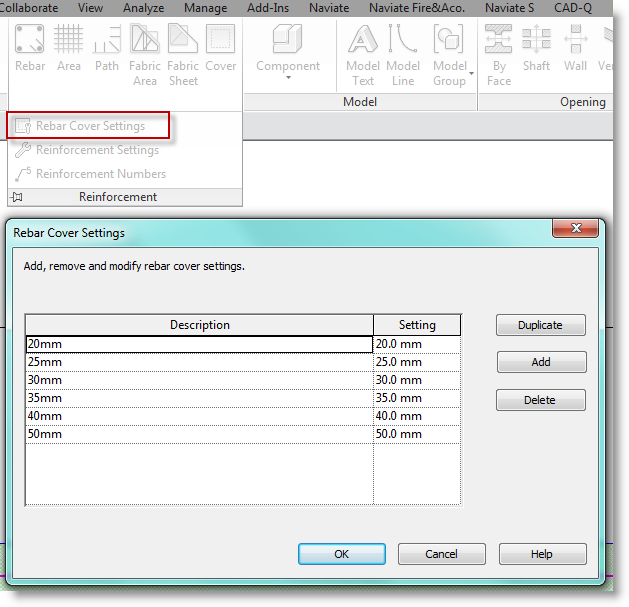
Rebar cover settings
All rebar host contains cover dimension data. Some host have different dimension data for top and bottom cover and others have the same dimension data around the object.
The available covers for the project are defined under tab structure for reinforcement and rebar cover settings.
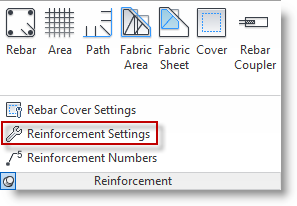
Reinforcement settings
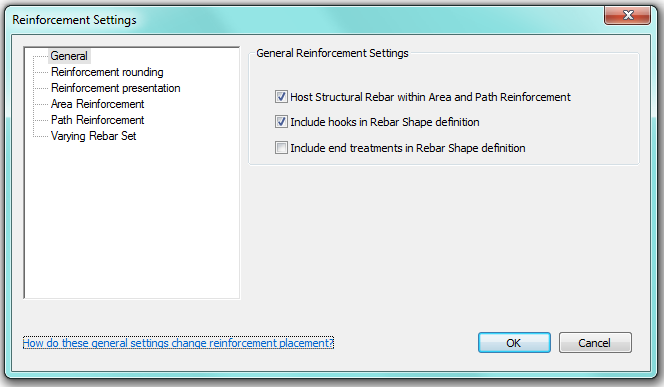
General settings for Reinforcement are listed on tab structure and reinforcement, reinforcement settings.
Note. It is important that the settings are as image below and that they are checked before reinforcement modelled out.
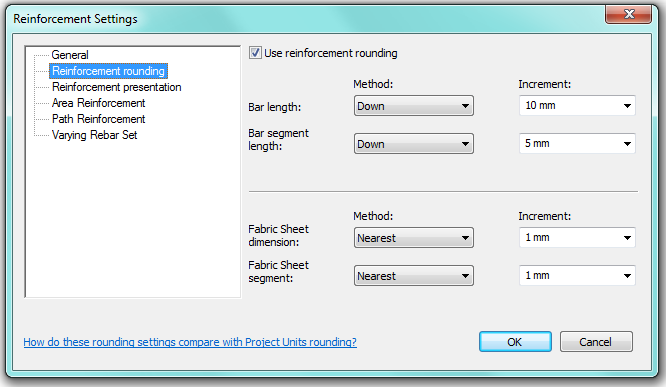
Reinforcement rounding
Settings for how Revit handles rounding on rebar are under the reinforcement rounding.
We have predefined values for rounding and we also recommend that you use reinforcement rounding in your project.
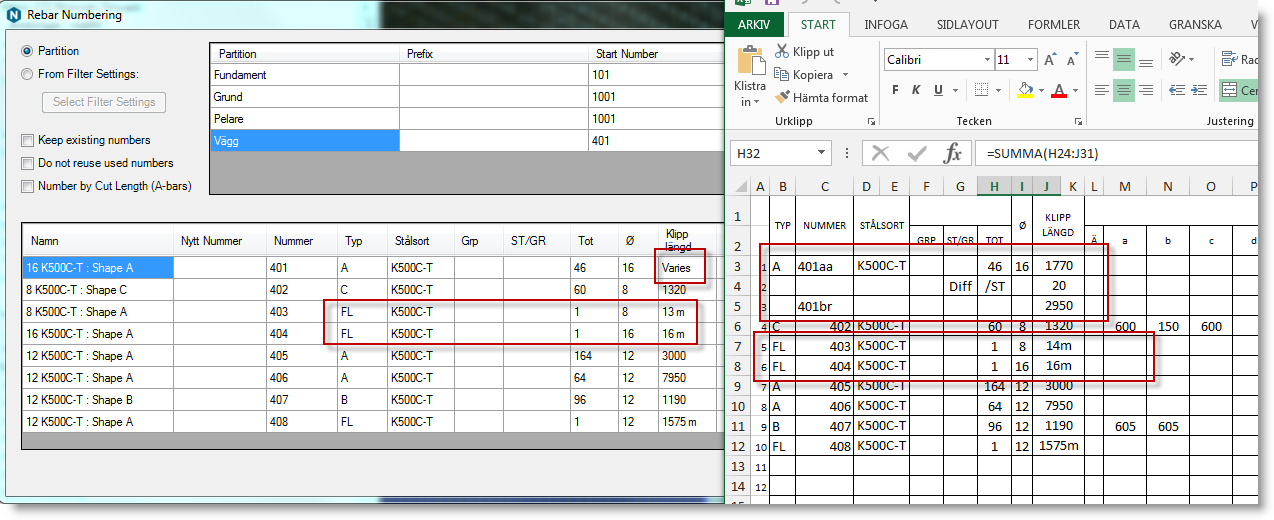
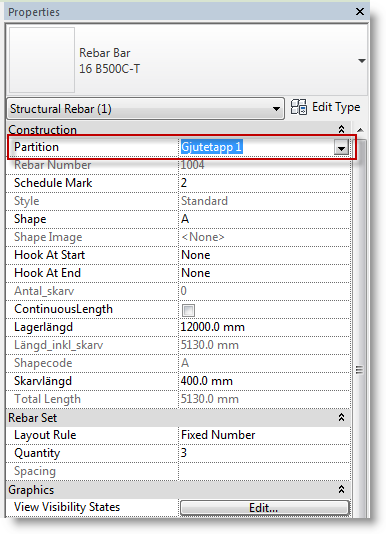
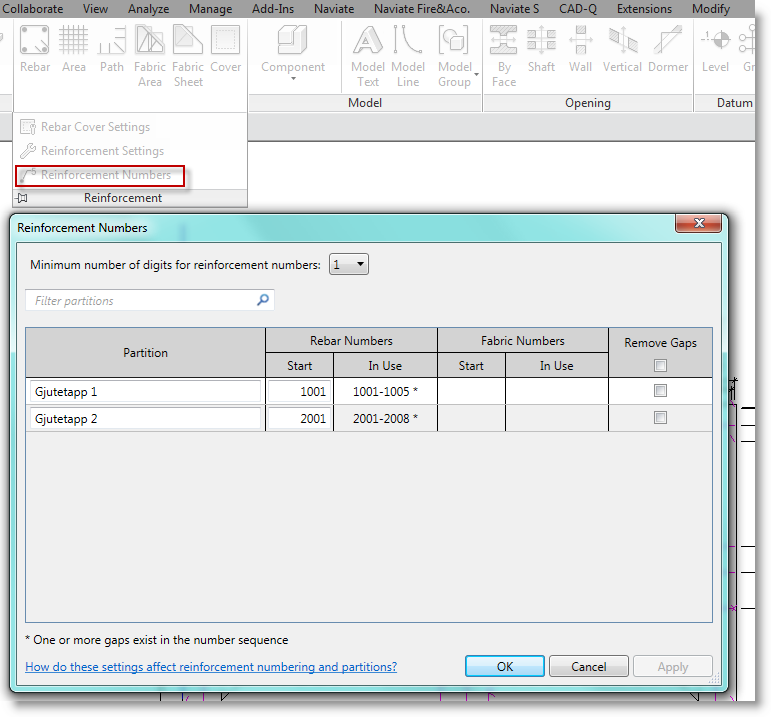
Reinforcement numbers
Settings for how Revit handles numbering (rebar numbers) and division (partition) are listed on tab structure for reinforcement numbers. A partition is created by first placing the rebar in the model and then write the desired value in the properties under partition.
Want to know more?
You can try out the Naviate reinforcement module in these products for free today:
- Naviate Rebar Extension
- Naviate Structure
- You can read more articles about similar topics in our knowledge base
- Join us at a webinar, see the complete list here