When working with Revit trying to manipulate a toposurface can be somewhat challenging.
Since we launched our Site & Landscaping application back in spring 2018, we have received a lot of feedback on what our customers want to achieve when using Revit as their platform for Landscape projects.
In this blogpost we will talk about our Cut & Fill functions that help you to optimize and save time in your project.This function is based on the feedback from our customers, that they needed a tool that could automate this in a more efficient way.
So please read how we solved this in Revit today.
Tool for Cut & Fill of site topography
Consists of three functions:
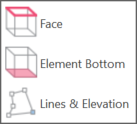
- Cut & Fill by Face
- Cut & Fill by Element Bottom
- Cut & Fill by Lines at an given Elevation
The tool also provides a setting panel:

In the setting panel you can define the vertical/horizontal offset of the excavation and specify the slope for the Cut&Fill (you can enable or disable the Fill functionality).
 Cut&Fill by Element Bottom
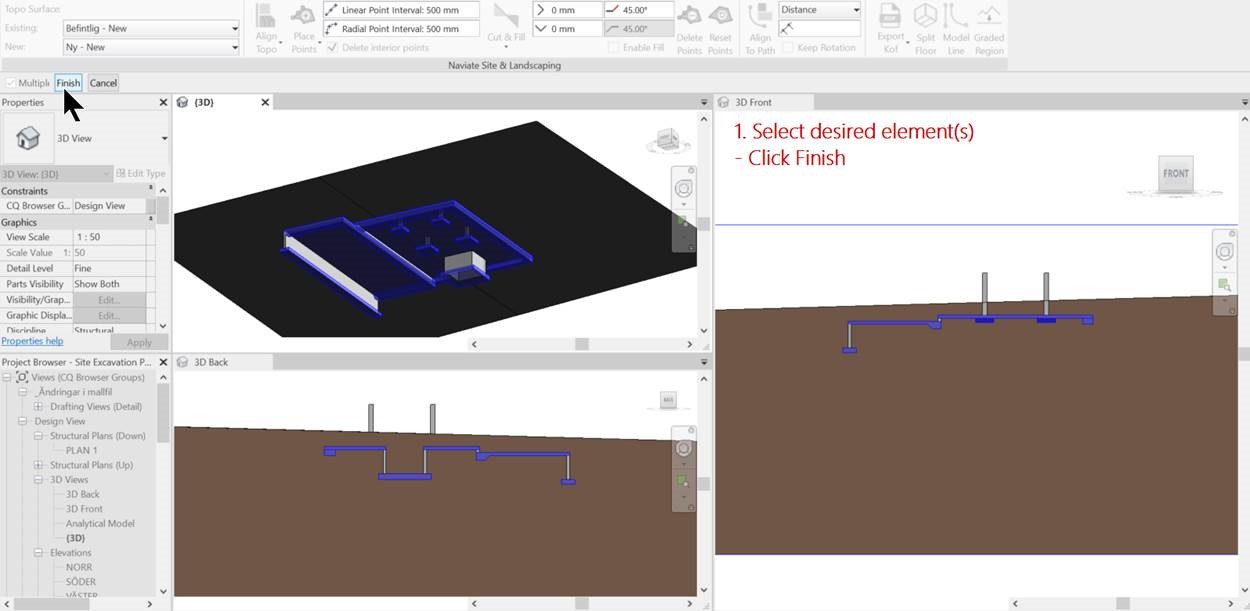
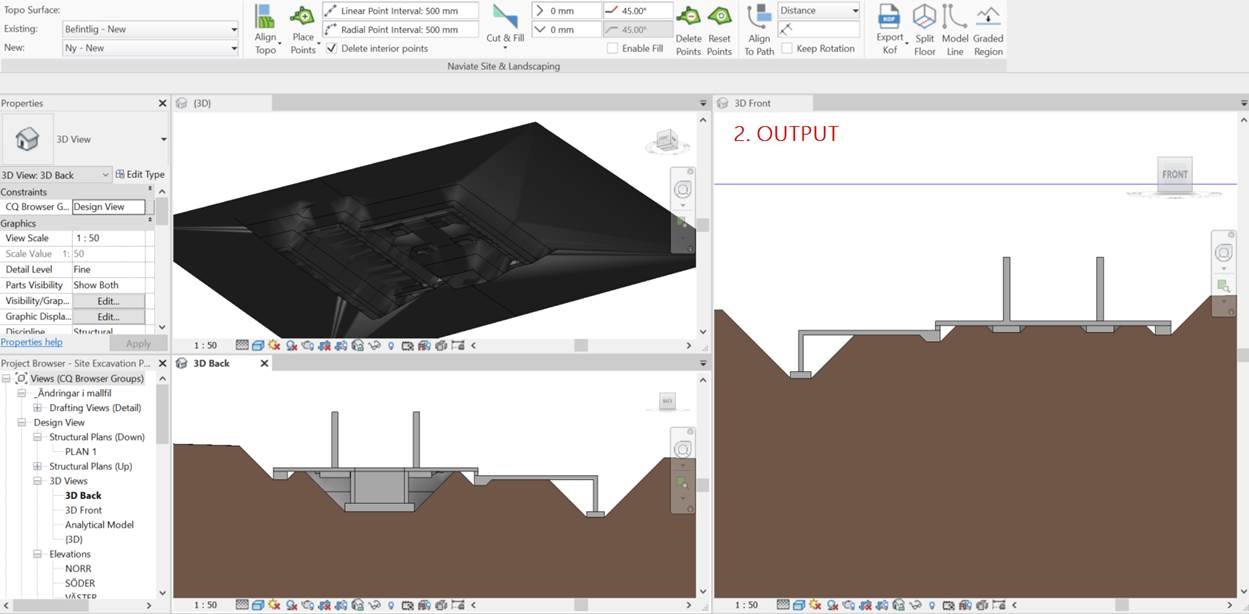
By using this tool you can select one or more elements and create the cut based on the bottom of these elements. When the tool starts it will figure out which part of this element(s) is the bottom side from where you should calculate the offset and make the excavation(cut). It will examine all the faces of the selected elements and determine for each element the face that is the bottom one and create excavations for each of those.
Workflow:
 Cut&Fill by Face
Works in a similar manner as the "Cut&Fill by Element" tool, except one thing - with this tool you choose to which face of the element(s) you want the excavation to align.
 Cut&Fill by Line and Elevation
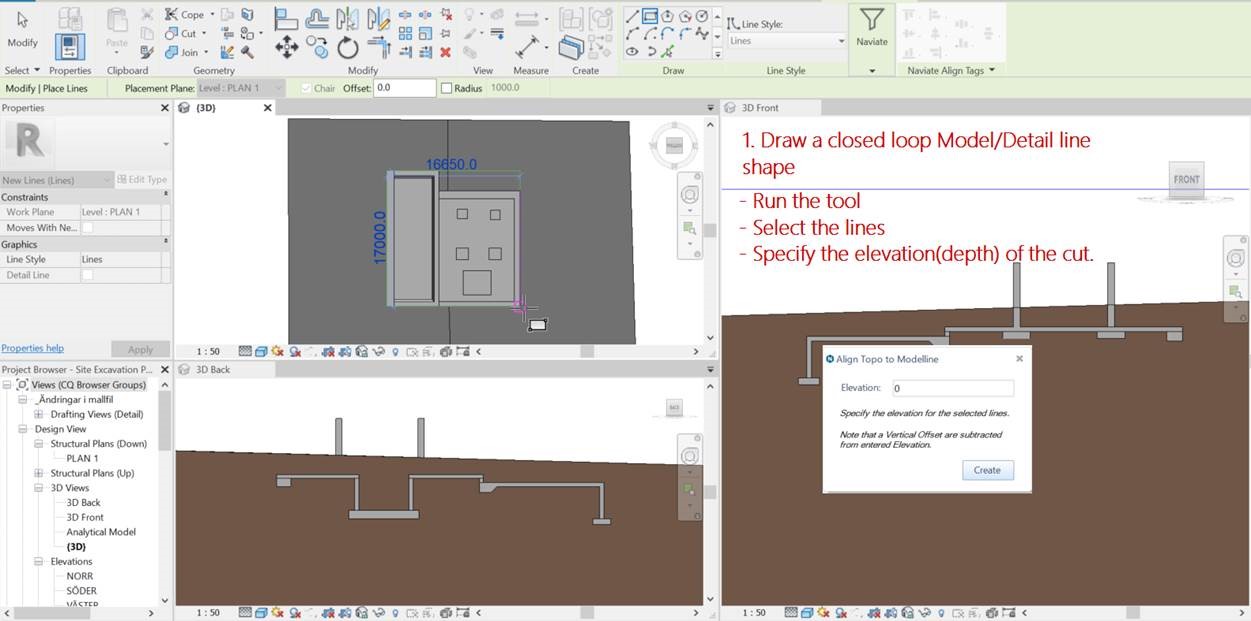
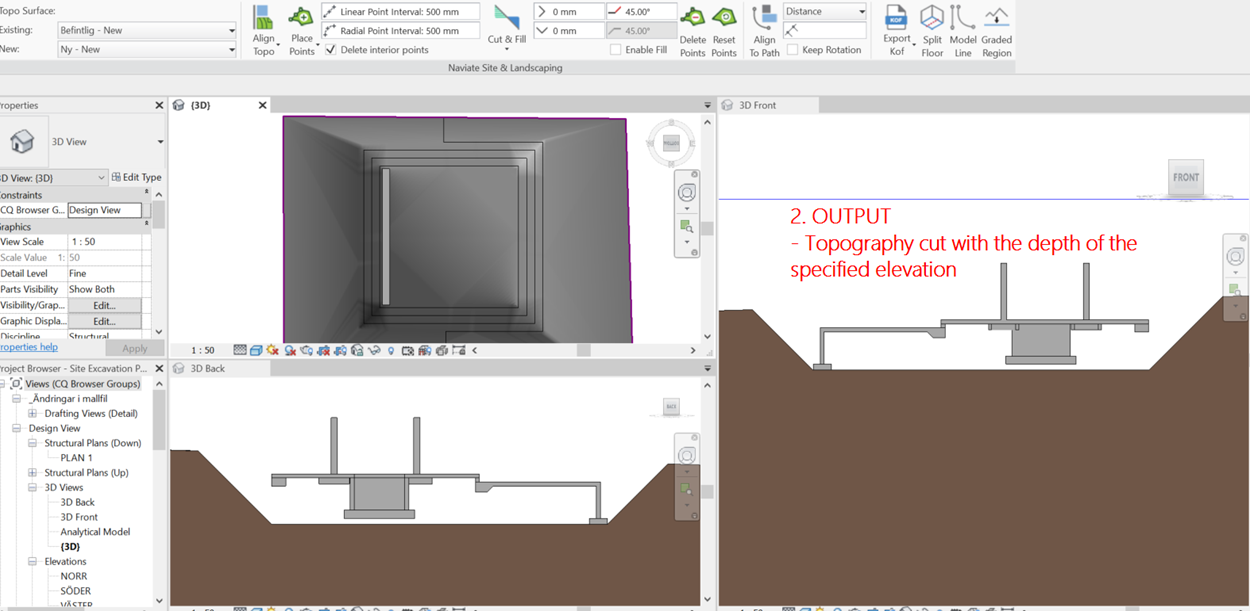
With this tool you can Model/Detail lines and make the excavation based on those lines. The tool examines the boundary of the lines and creates an excavation around that boundary. Works only with closed loop lines.
Workflow:
View Cut&Fill in action in this video:
Want to learn more?
Try the tool yourself by downloading a free trial today:
And join our webinar to learn more:


