Hopefully you’re already know and use the floor coverings in Naviate for Revit. It’s a timesaver when you create floor elements for pre-selected rooms. With the latest release, you can also do the same for walls and ceiling.
Let’s go through the solutions, one at a time.
What is Create Coverings
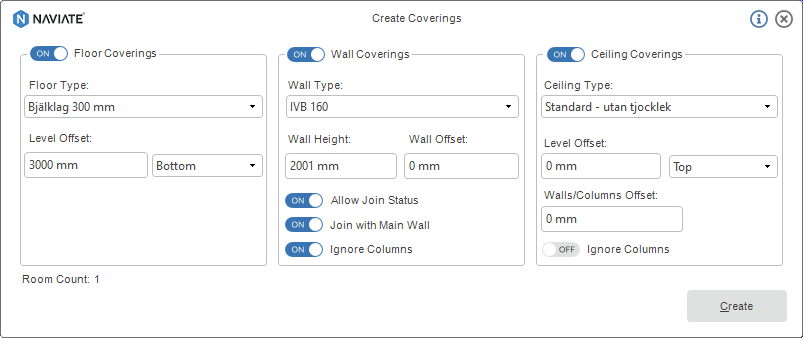
With Create Coverings you can create covering elements for selected rooms. The supported coverings are:
- Floor Coverings – Creates a floor element for pre-selected room(s)
- Wall Coverings – Creates cladding wall elements for pre-selected room(s)
- Ceiling Coverings – Creates Ceiling elements for pre-selected room(s)
What’s new in the latest release
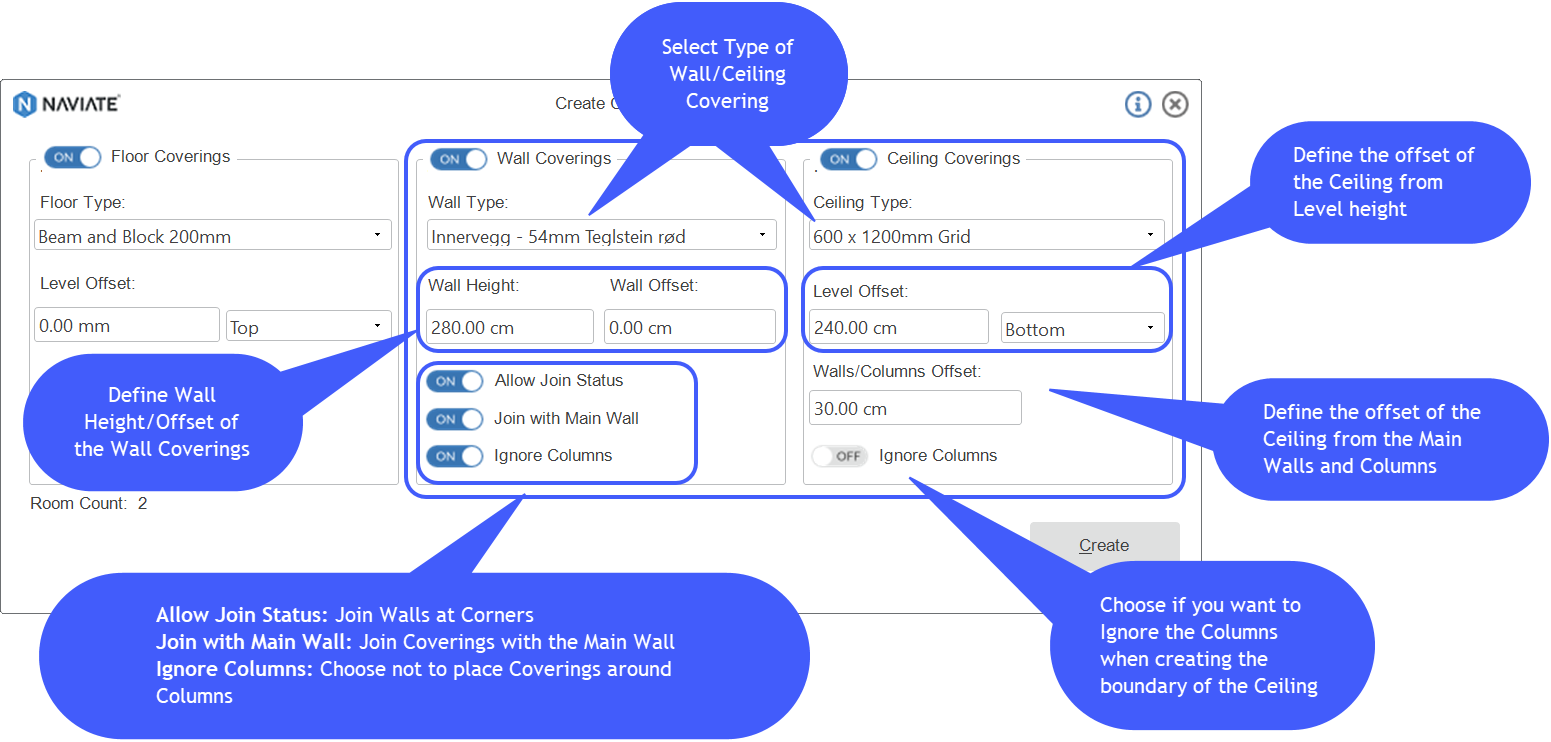
- Place selected type of wall and Ceiling Coverings based on the boundaries of the selected room(s)
- Define their height and offset within the selected room(s)
- Define if the Wall Coverings should be joined with the main walls and at corners
- Choose to create Coverings around columns within the room(s)
Floor Coverings
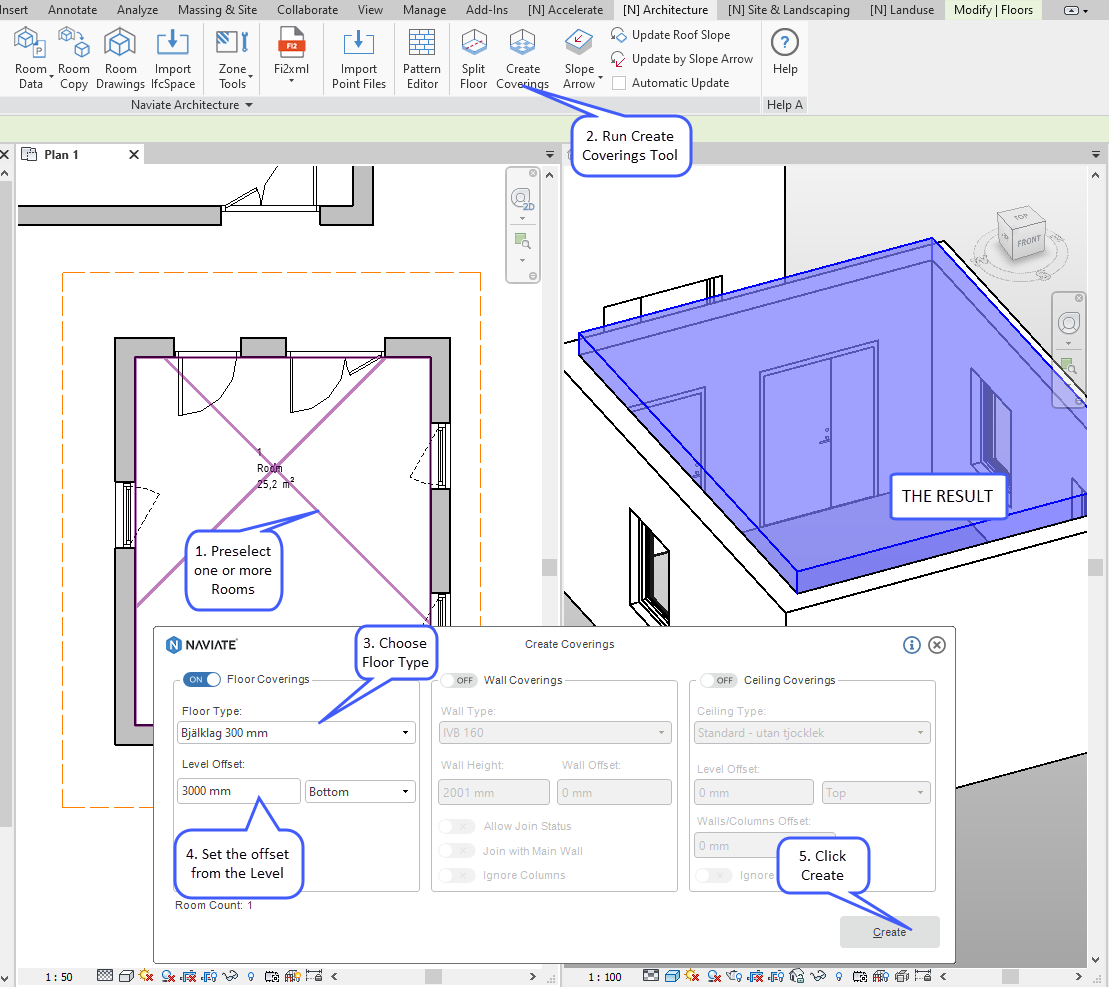
How to create Floor Coverings
- Pre-select a room, you can pre-select more rooms at once if wanted. You will get an overview of number of rooms when you start the process
- Choose Floor Coverings from the menu
- Set the desired floor type
- Set the offset from the floor. You can choose if this offset is in relation to the top or bottom of the floor. After you have configurated the settings, click create
After creation you will get a report dialog with the number of created elements in the project.
Wall Coverings
With create Wall Coverings you get additional settings. Apart from the possibility to choose wall type, you can choose height and offset from the main wall or a column. There are also three additional options with which user has possibility to enable or disable:
- Allow Join Status
- Join with a Main Wall
- Ignore Columns
How to create Wall Coverings
- Pre-select a room, you can pre-select more rooms at once if wanted. You will get an overview of number of rooms when you start the process
- Choose Wall Coverings from the menu
- Set the desired wall type, height and offset
- Enable or disable additional options
- When your settings are done, click create
After creation you will get a report dialog with the number of created elements in the project.
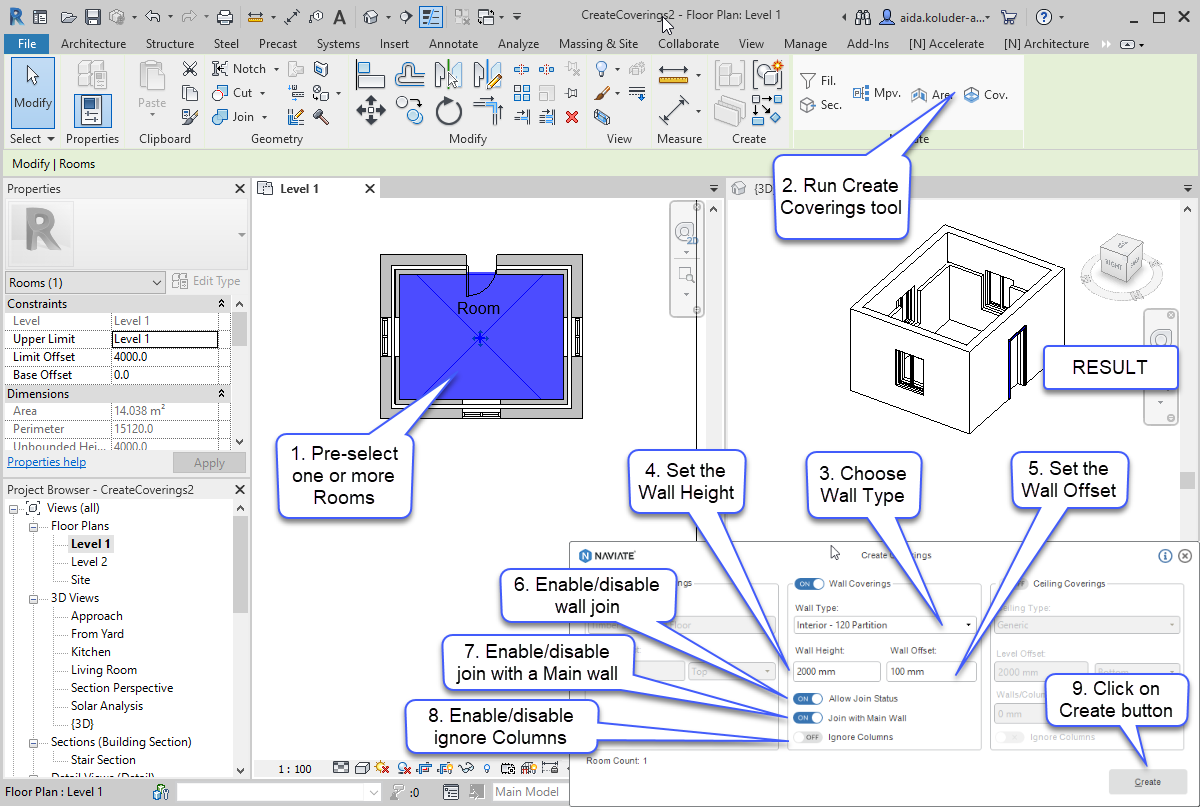
A few tips to take along
- Wall height cannot be lower than a 31mm, it will not be able to create the wall(s). If the user enters value from 0mm to 30mm warning message will appear in a main dialog window
- Wall offset cannot be greater than 120mm, it will not be able to join covering wall(s) with a main wall. If the user enters value greater than 120mm warning message will appear in a main dialog window
- Exterior side of created wall coverings are placed on the surface of the main wall
- Finish face exterior is set as default location line of created wall coverings
- Wall coverings will not be created on the curtain walls and room separation lines
Ceiling Coverings
How to create Ceiling Coverings
- Pre-select a Room, you can pre-select more rooms at once if wanted. You will get an overview of number of rooms when you start the process
- Choose Ceiling Coverings from the menu
- Set the desired ceiling type
- Set the offset from the level. You can choose if this offset is in relation to the top or bottom of the Ceiling
- Set the offset from walls
- After configuring settings, click Create
Note that you can also choose to ignore the columns. In this case the Ceiling elements will overlap with the columns found inside of the Room.
After creation you will get a report dialog with the number of created elements in the project.


