An overview of what you can do
- Add your own trim and mullion components to the library
- Have all the components available in a panel right in the family editor
- Place your components easily with a drag and drop function, or face picking, in the active view
- The components will follow the dimensions of the door or window family
- Update the component library directly within the panel
How to get started
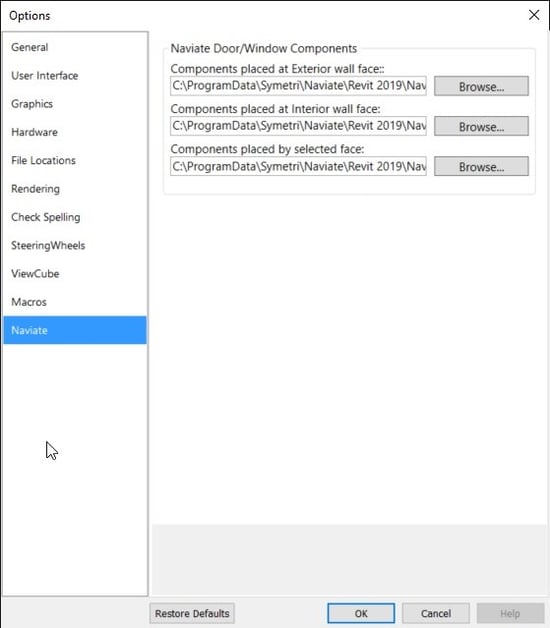
Before you start running the tool, you can select the destination folders of families to be used. You do this by clicking file in upper left corner in Revit and choose options. Here you will find the Naviate tab with default file destinations for the families. You can change the default path, or add your own families to the existing folder.
The component browser
To run the component browser, you need to be in a family editor. If you try to run the tool in the project, you will get a warning that family creator is only available in family documents. When you run the tool in family editor, a panel will appear. If no family is loaded, right click on the empty space in the panel and select “update content”. If this doesn’t work, make sure the right folder paths are selected in options.
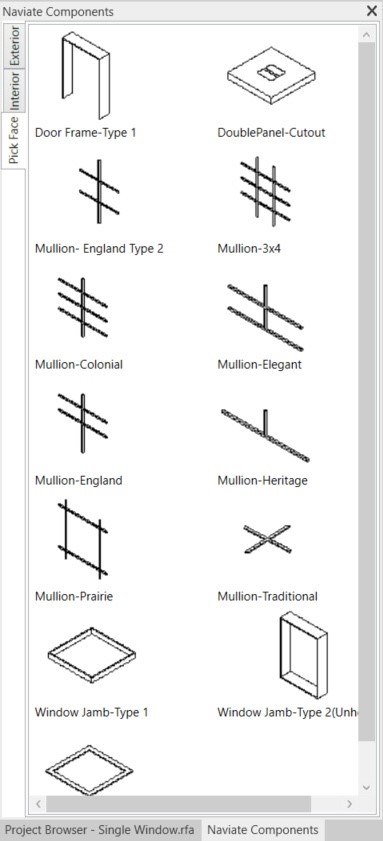
The panel menu
There are three tabs in the dock-able panel; exterior, interior and pick face.
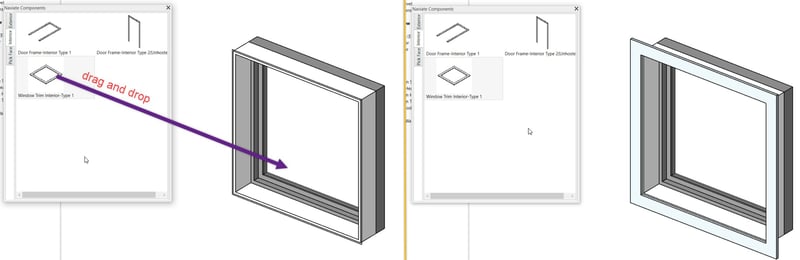
Adding interior and exterior families
The workflow for adding exterior and Interior families is very simple. You drag and drop a family from the Naviate components panel to the view. The solution recognises the interior or exterior reference plane and attaches the family to it. So, you need to make sure that your family has correct reference planes. You can add multiple families.
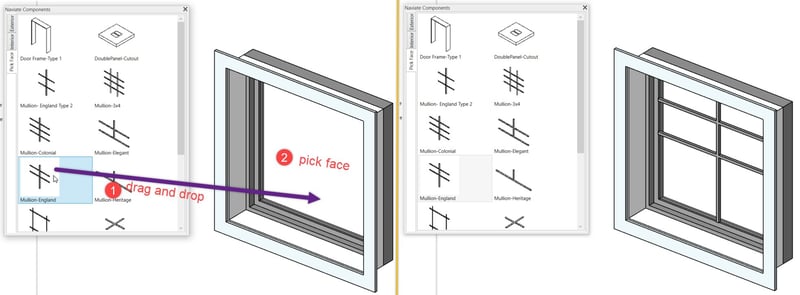
Adding pick face families
For adding pick face families, the workflow is very similar to interior and exterior families. You start by drag and drop the family from the Naviate components panel. Then you pick the face where you want the family to be placed. This is most commonly the glass surface of the window. The family is automatically scaled so it fits the selected face.
If you need to change some of the dimensions of the family, like for example the thickness of the mullion, you can do so by editing the type.
Rules for creating trim and mullion component families
To create the components and make them work together, there is a set of rules that needs to be followed:
- The component family’s needs to have the following reference planes: centre, top, bottom, left, right
- Parameters height, width and depth need to be constrained appropriately to the components and reference planes
- When using face-based families make sure to place them in the face-based folder through the options bar in the Naviate tab
Today’s demands of different shapes for door and windows in project have never been higher. With component browser you can get in position to create a variety of different doors and windows, without being dependent of your software vendor to produce all the families needed in your projects.
Want to know more?
Do you want to test it out yourself? Download a trial for free today.
Other topics that you want us to highlight? Please let us know in the comments.