During the years of developing smart and time saving functions in Naviate for Revit, we have also developed a set of tools to Manage your project. These are found in the Manage Project tab - smart and efficient functions to have control in your projects and make sure that your Revit models stays “healthy”. Manage Project includes the following tools:
- Warning Handler - correct warnings in Revit projects
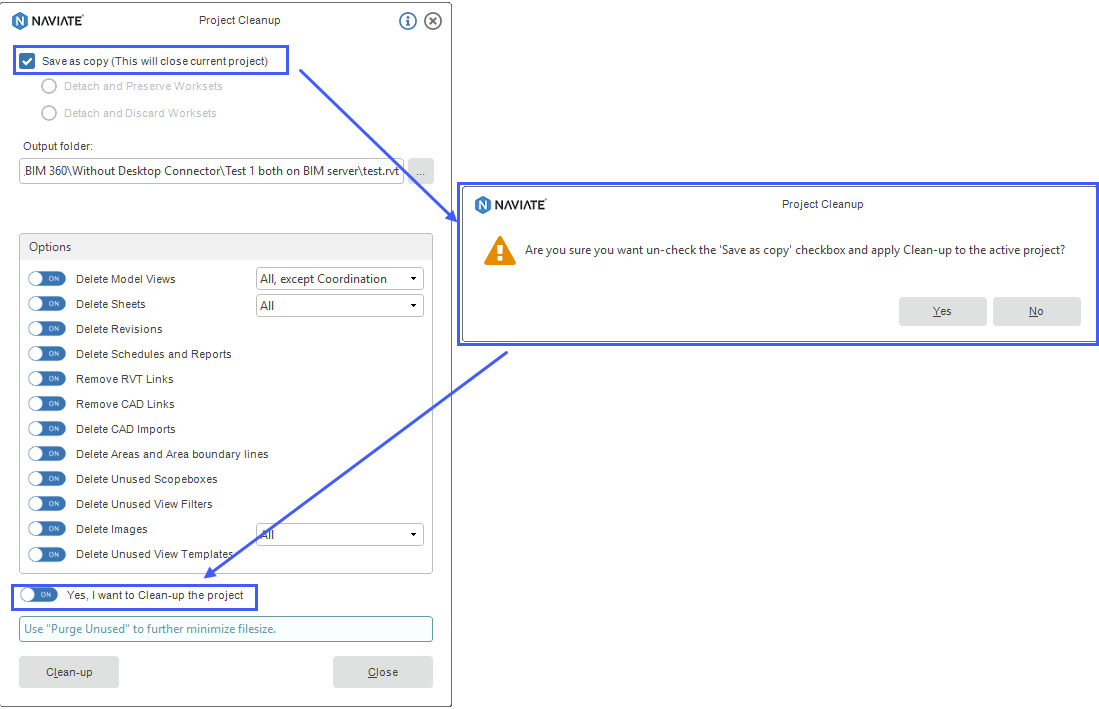
- Project Cleanup - clean-up your project from unnecessary views, sheets, and other categories in order to improve performance and reduce file size
- CAD Tracker - keep track of .cad files in your project. The function detects .dwg, .dxf and .dgn files
- View Filter Manager - lists all View Filters contained in the project with information about which Views and View Templates these filters are used in
- Basepoint Explorer - tool for importing and managing all shared coordinate systems in host and linked project
- Basepoint Export - tool for exporting of basepoint data to Excel Spreadsheet
We have seen that many users are struggling when working with shared coordinates in their projects, especially in linked projects.
So today I want to tell you about how our function Basepoint Explorer can help you with handling shared coordinates in your project.
Basepoint Explorer
Basepoint Explorer is a tool for importing and managing all shared coordinate systems in host and linked project. With this tool you can easily set the shared coordinates of the host document to match those of the linked .rvt or .ifc file.
The main features of the tool are:
- Showing all available coordinate systems from the linked file,
- Selecting the desired coordinates and transferring them to the host project
Before using this tool you need to have at least one Revit or IFC file linked to your project. To link a file to your project, go to Insert tab and use Link Revit or Link IFC tool.
The workflow is the following:
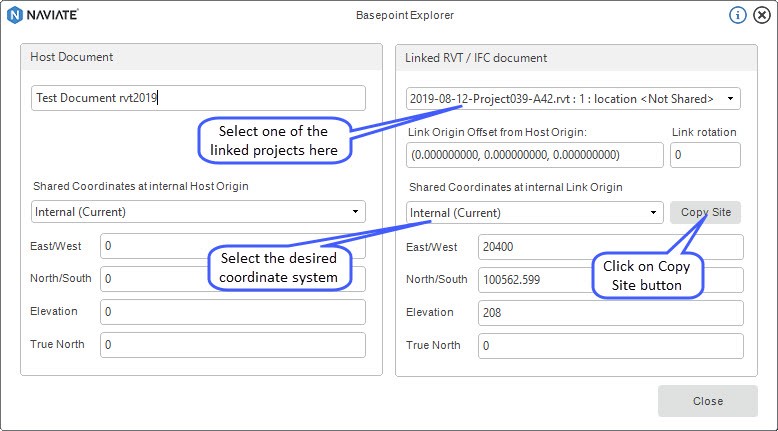
- Run Manage Project/Basepoint Explorer,
- The left box is showing the coordinates from the host, and the right is listing all the available coordinates in the linked project(s),
- Select one of the linked projects in Linked RVT/IFC document drop-down menu,
- Select the desired coordinate system from you wish to transfer to the host project in the Shared Coordinates at internal Link Origin drop-down menu,
- Click on Copy Site button,
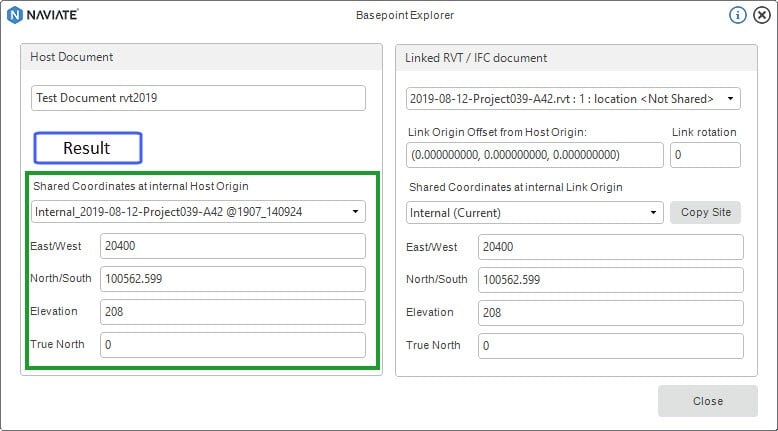
- A dialog box will appear confirming the transfer of the coordinates with their specific name which includes the name of the project, name of the coordinate system and the time of the transfer.
- The transferred coordinates will appear on the left configuration bar in the drop-down menu and below it all coordinate values will be listed. The copied values should be the same as in the linked coordinate system.
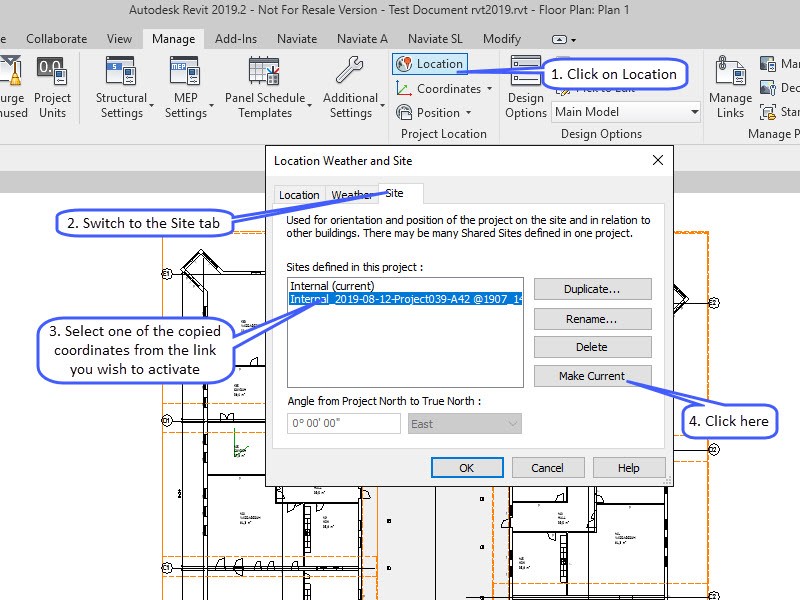
In order to apply the copied coordinates they have to be activated in the project. You can change and activate different shared coordinates of the host model. The coordinates returned are with respect to the shared coordinates between the models.
- Run Location from Project Location panel in Manage tab,
- Switch to the Site tab,
- Select one of the copied coordinates from the link you wish to activate,
- Click on Make Current
Notes and Tips:
After copying coordinate system from a linked file, all copied coordinate system can be viewed in the "Shared Coordinates at Internal Host Origin drop-down menu.
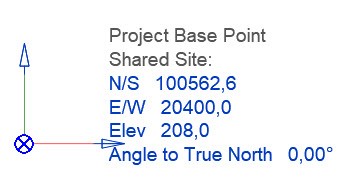
The changes made when activating new coordinate system will be documented and visible in the project base point properties. If needed they can be modified there also.
Want to learn more?
Why don’t you give it a try and download one of our trials and check it out. I promise you won’t be disappointed.

